Y-encoder replacement – Baby Lock ProStitcher Version 14.04.0051 (BLPS2) Instruction and Reference Guide User Manual
Page 12
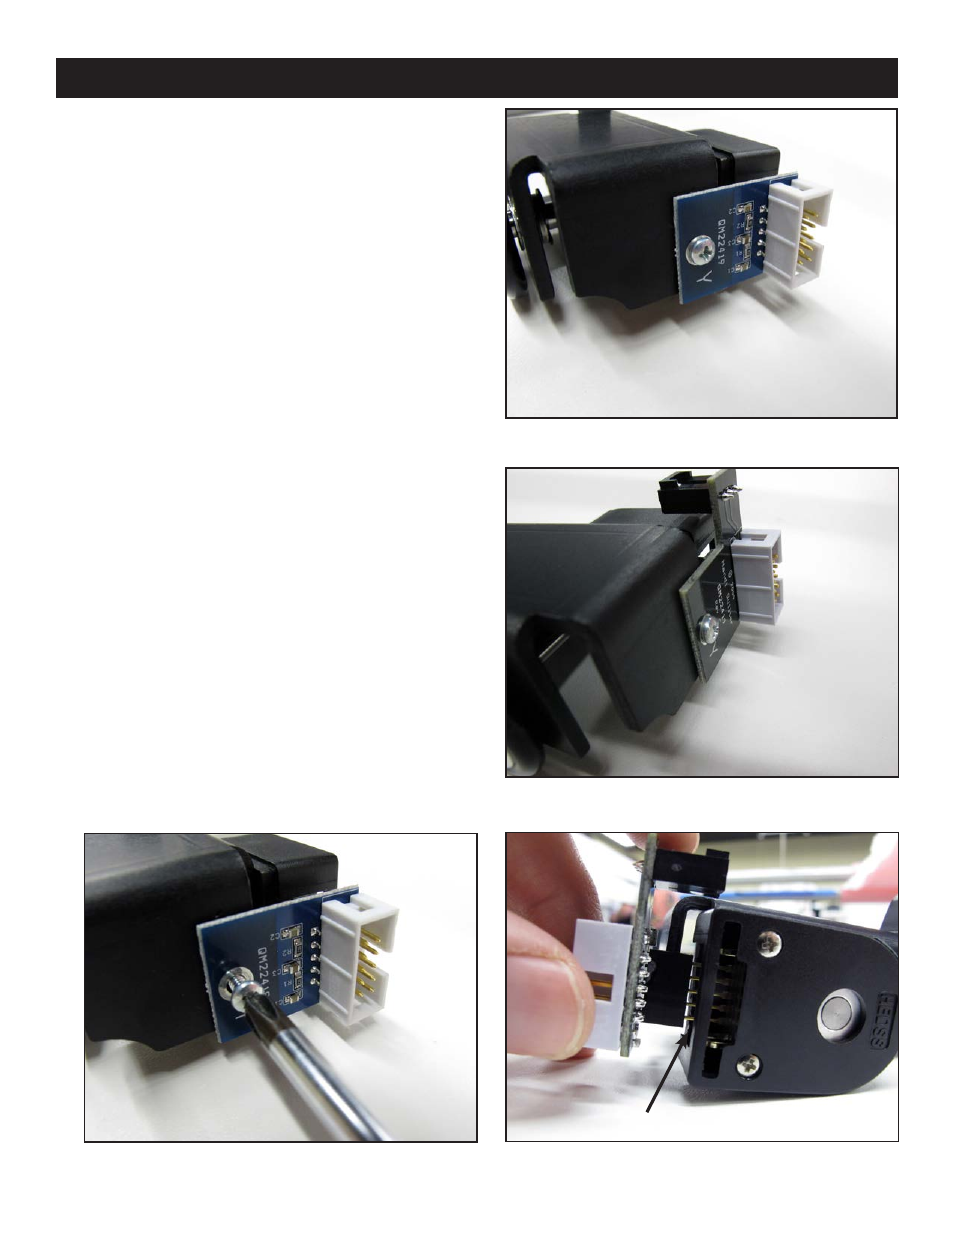
Installation Instructions 3.7
Figure 3.10
Y-Encoder Replacement
(may not be required)
The stitch-regulator encoder circuit board mounted
to the rear wheel of the machine will need to be
replaced if the circuit board is blue and does not
have a 3-pin connector attached and looks like
Figure 3.9. The circuit board is held in place with
one screw and five connecting pins. If the Y-encoder
has a black circuit board that looks like Figure 3.10,
skip ahead to the next section.
1. Unplug the stitch regulator cable from the
Y-encoder.
2. Remove the Phillips screw that holds the circuit
board in place with a small Phillips screwdriver
(Figure 3.11).
3. Gently pull the circuit board outward toward the
front of the quilting machine (the same direction
the screw came out).
4. Align the new Y-Encoder circuit board
(Page 3.3, C) so the five pins on the encoder fit
into the 5-pin connector on the circuit board
(Figure 3.12) and gently push into position. The
screw hole on the circuit board should match up
with the hole in the encoder housing.
5. Replace the Phillips screw.
6. Plug the stitch regulator cable back into the new
Y-encoder circuit board.
Figure 3.11
Figure 3.9
Figure 3.12
Align Connector with 5 Pins
Y-Encoder