New start/end, Start/stop auto, Scroll bar – Baby Lock ProStitcher Version 14.04.0051 (BLPS2) Instruction and Reference Guide User Manual
Page 57: Jump points
Pro-Stitcher User Manual
7.2 Quilt Menu
New Start/End
A quilter may choose to start quilting a design from
some point other than the designed start point. This
may occur because the thread breaks, the bobbin
runs out, or the quilter simply wants to stitch a
specific portion of a design. Similarly, the quilter
may change the ending point to a point other than
the design’s original end point. After a design has
been properly positioned and otherwise altered as
needed, there are several functions for choosing a
new start or end point.
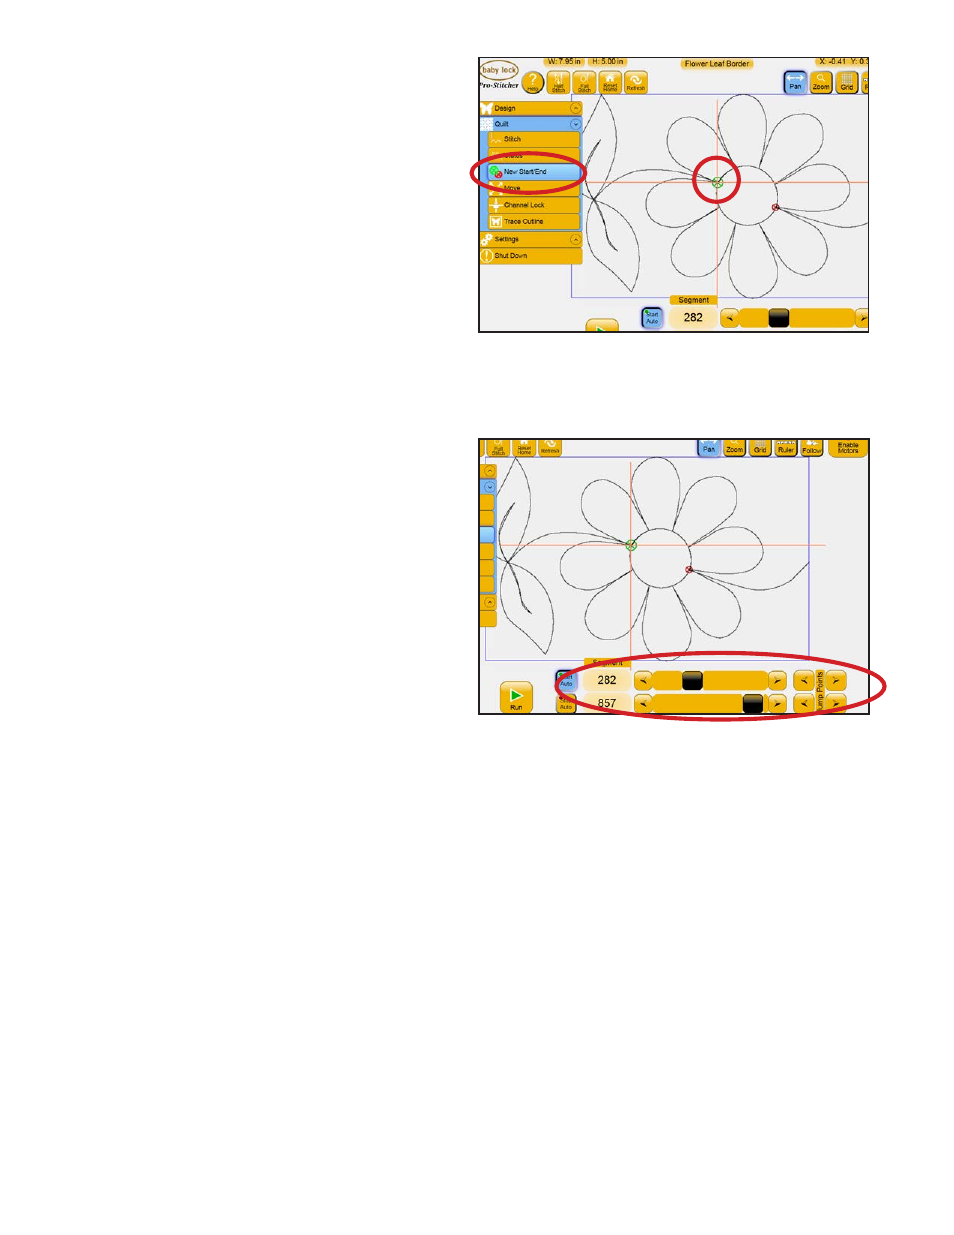
Start/Stop Auto
To select a start or end point based on where the
needle and crosshairs are currently positioned,
press either Start Auto or Stop Auto. The point
in the design that is closest to the crosshairs will
be the new start or end point respectively
(Figure 7.3). If a start point is selected further in
the design than the current stop point, the stop
point will be automatically adjusted so it comes after
the start point. Similarly, if a stop point is chosen
earlier in the design than the current start point, the
start point will be adjusted so it comes before the
stop point. As long as the Start Auto or Stop Auto
button is pressed, the start point or stop point will
continue adjusting as the machine and crosshairs are
moved.
Scroll Bar
As an alternative to the Auto method described
above, a quilter may drag the scroll bar to identify
either a new Start or Stop position (Figure 7.4).
The upper scroll bar controls the start point and
the lower scroll bar controls the stop point. Use the
left and right arrows at the ends of the scroll bars to
fine-tune the selection to precisely position the new
start or end point.
Jump Points
For designs that have multiple jump points, press the
Jump Point arrows to move either the start or end
point to the next jump point in the design.
Figure 7.3
Figure 7.4