Setting up the new carriage – Baby Lock ProStitcher Version 14.04.0051 (BLPS2) Instruction and Reference Guide User Manual
Page 13
Pro-Stitcher User Manual
3.8 Installation Instructions
Figure 3.13
Setting Up the New Carriage
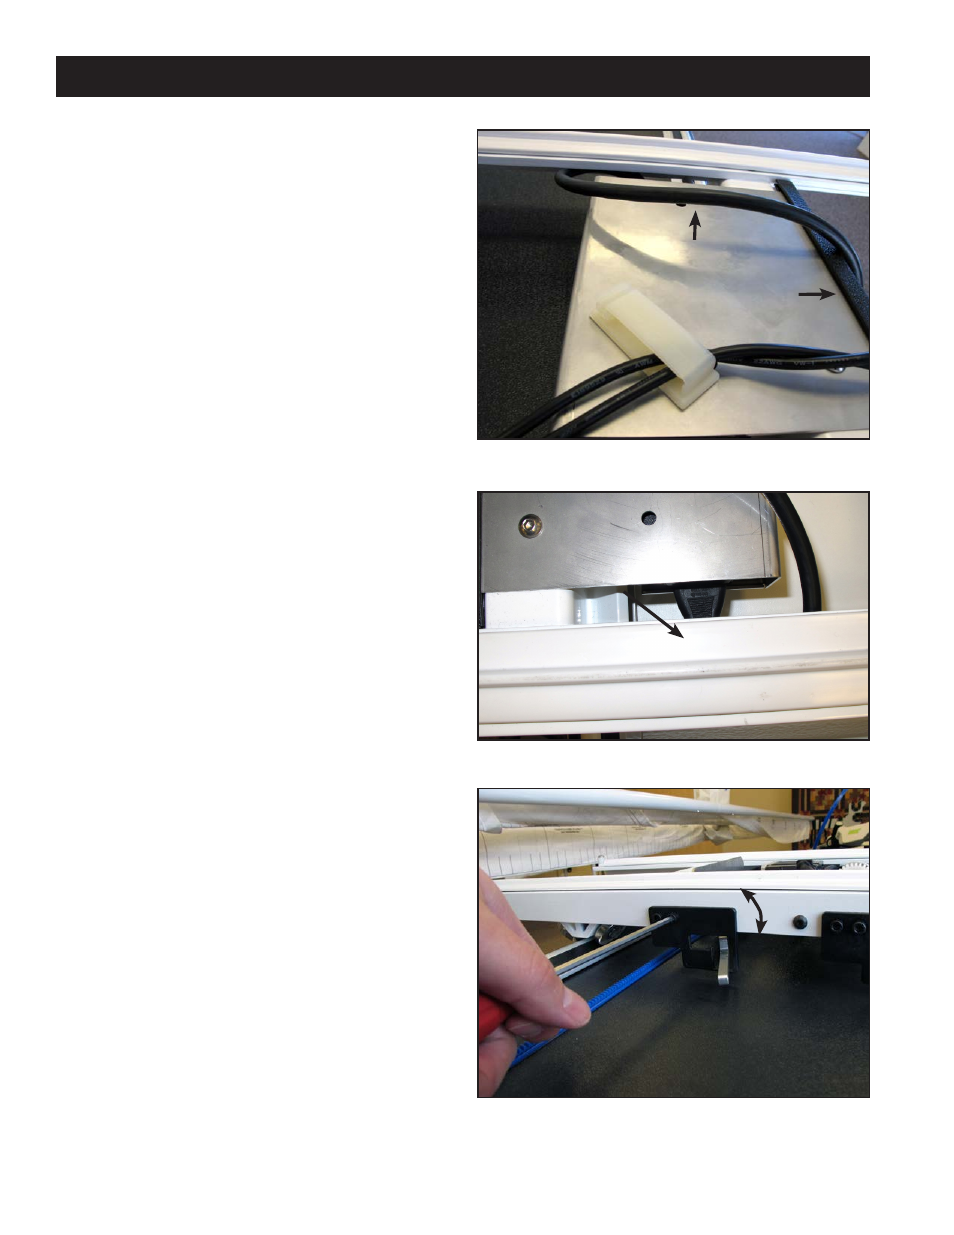
1. With the Pro-Stitcher carriage set properly on
the frame system, untie the black twist ties that
are binding the black cables in a loop. Drape
the black cables over the back of the carriage as
shown in Figure 3.13.
2. Plug one branch of the new “Y” power cord
(Page 3.3) into the power supply located toward
the rear of the carriage (Figure 3.14). Route the
power cord as shown in Figure 3.13.
3. With the X-axis engagement lever shifted into
the lowest position, verify that the white gear at
the front of the carriage fully engages with the
blue flexirack that was previously installed.
a. If the white gear fails to lower enough with the
front disengagement lever in its lowest position,
you will need to adjust the black X-axis lever
bracket to allow the X-axis engagement lever
to drop a little lower. To do this, loosen the
two 4mm Allen bolts and pivot the bracket
downward until the white gear is pressing
firmly on the blue flexirack, then re-tighten the
two bolts (Figure 3.15).
b. Move the carriage along the length of the
table to double-check the placement of the
blue flexirack. Make adjustments to the blue
flexirack as necessary.
Figure 3.14
Figure 3.15
Adjust only
if necessary
Plug
“Y” power cord
Back of carriage