Computer/touch screen monitor assembly – Baby Lock ProStitcher Version 14.04.0051 (BLPS2) Instruction and Reference Guide User Manual
Page 16
Installation Instructions 3.11
Figure 3.22
Figure 3.23
1. Remove the front handlebar from the front of the
quilting machine, making sure to first disconnect
the handlebar cable from the side of the head and
then remove the three hex-head bolts with a 5mm
Allen wrench.
If it is difficult to remove the cable on the quilting
machine, first remove two of the hex-head bolts
and then loosen the third. Next, rotate the
handlebar slightly to allow easier access to the
handlebar cable.
2. Make sure the three handlebar bolts are in the
front handlebar and protruding out the bottom of
the handlebar (Figure 3.22).
3. Position the handlebar over the computer bracket
such that the screws go through the three holes in
the bracket (Figure 3.23).
4. Secure the handlebar and bracket in place on the
machine head using the three handlebar bolts.
Computer/Touch Screen Monitor Assembly
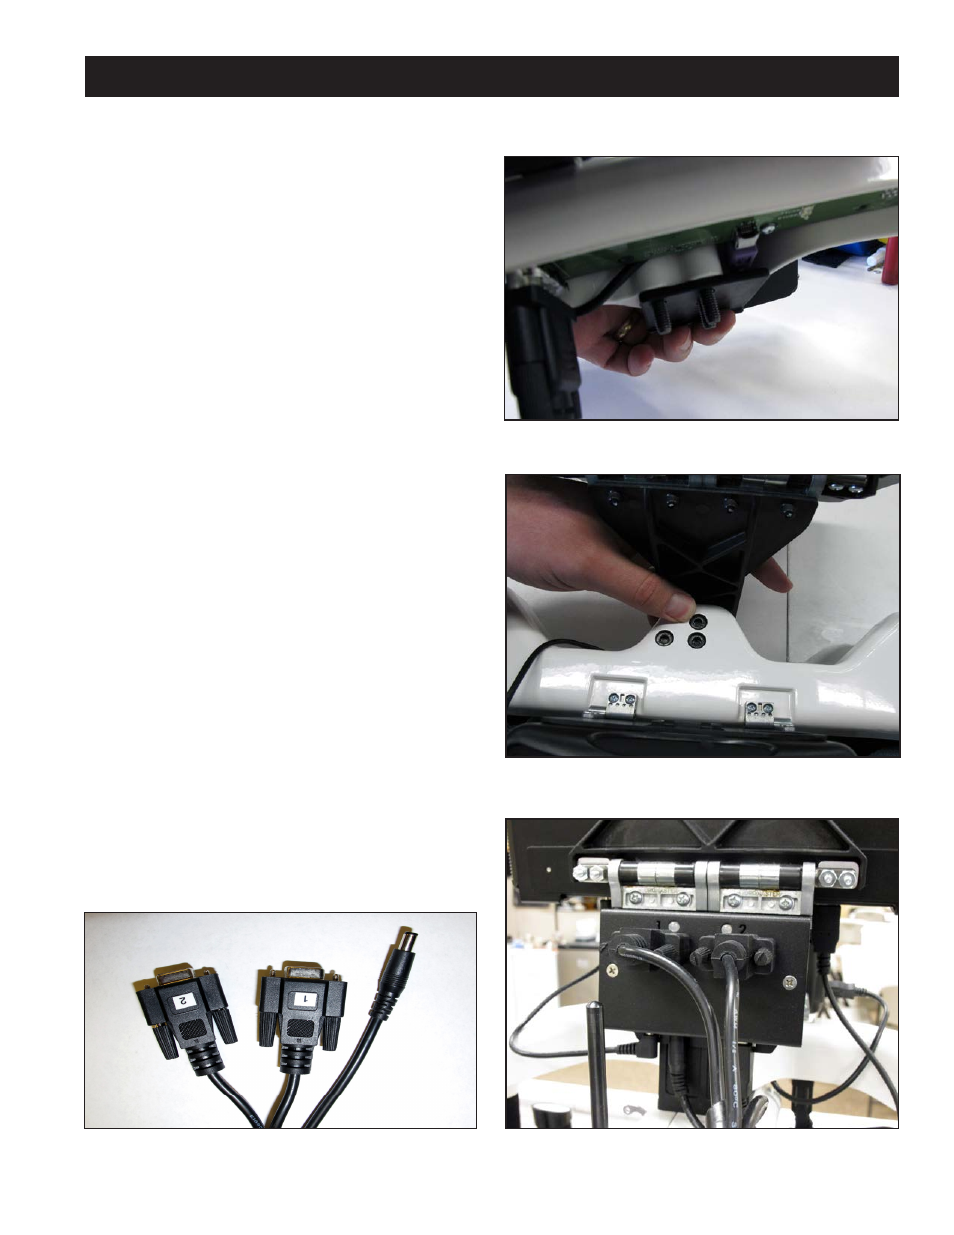
5. The black cable has three connections – two 9-pin
serial connectors and one barrel connector for
power (Figure 3.24). Insert the barrel connector
into the center jack (B) located on the bottom
edge of the black box that is mounted to the back
of the computer bracket (Figure 3.25). Attach the
two 9-pin serial cables to the appropriate ports
on the back of the same box, making sure cable
connectors are plugged into their corresponding
ports on the black box.
Figure 3.24
Figure 3.25