Baby lock crown jewel, Installation instructions, Tools required – Baby Lock ProStitcher Version 14.04.0051 (BLPS2) Instruction and Reference Guide User Manual
Page 9: X-rack installation
Pro-Stitcher User Manual
3.4 Installation Instructions
Baby Lock Crown Jewel
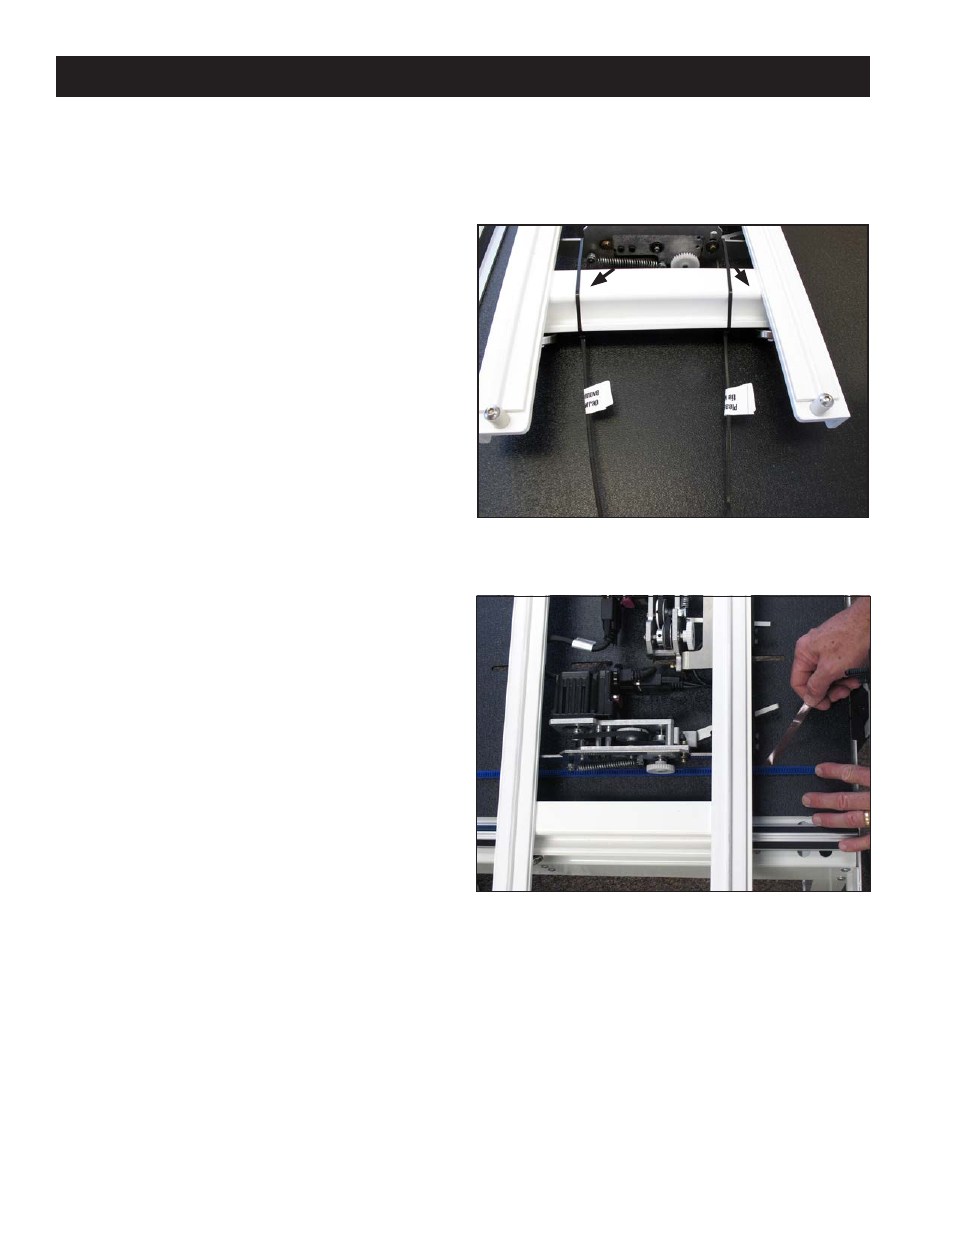
Figure 3.2
Tools Required
Power drill
4mm Allen wrench
5mm Allen wrench
Slotted screwdriver (one large and one small)
Phillips screwdriver (one large and one small)
Knife or Wire cutters to tool required
X-rack Installation
Note: Owners of the Majestic Frame should also
have purchased a Pro-Stitcher shim kit (item No.
BLPS-GMFKIT) for the Majestic Frame. Please fol-
low instructions included in that kit for shimming
the track prior to installing the X-rack.
1. Remove the blue flexirack (Page 3.3, A) and the
Pro-Stitcher carriage (E) from the box. Cut the
cable ties from the front of the carriage
(Figure 3.2).
2. Place the Pro-Stitcher carriage on the frame with
the white X-axis gear toward the front of the ta-
ble. The white X-axis gear drives the carriage left/
right across the table.
3. Starting at one end of the table, begin mounting
the blue flexirack to the table surface. Using the
X-axis engagement lever, drop the white X-axis
gear so it engages with the blue flexirack. With
the blue flexirack in position under the white
gear, begin peeling the pink protective layer from
the back side of the blue flexirack and pressing
down on the blue flexirack to stick it to the table
surface (Figure 3.3).
Figure 3.3
Installation Instructions