Baby Lock ProStitcher Version 14.04.0051 (BLPS2) Instruction and Reference Guide User Manual
Page 14
Installation Instructions 3.9
4. Carefully lift the quilting machine and place it
on the carriage so the wheels engage the white
carriage tracks, making sure not to set the wheels
on top of the stitch regulator cable (this is easier to
do with two people – one at each end of the quilting
machine).
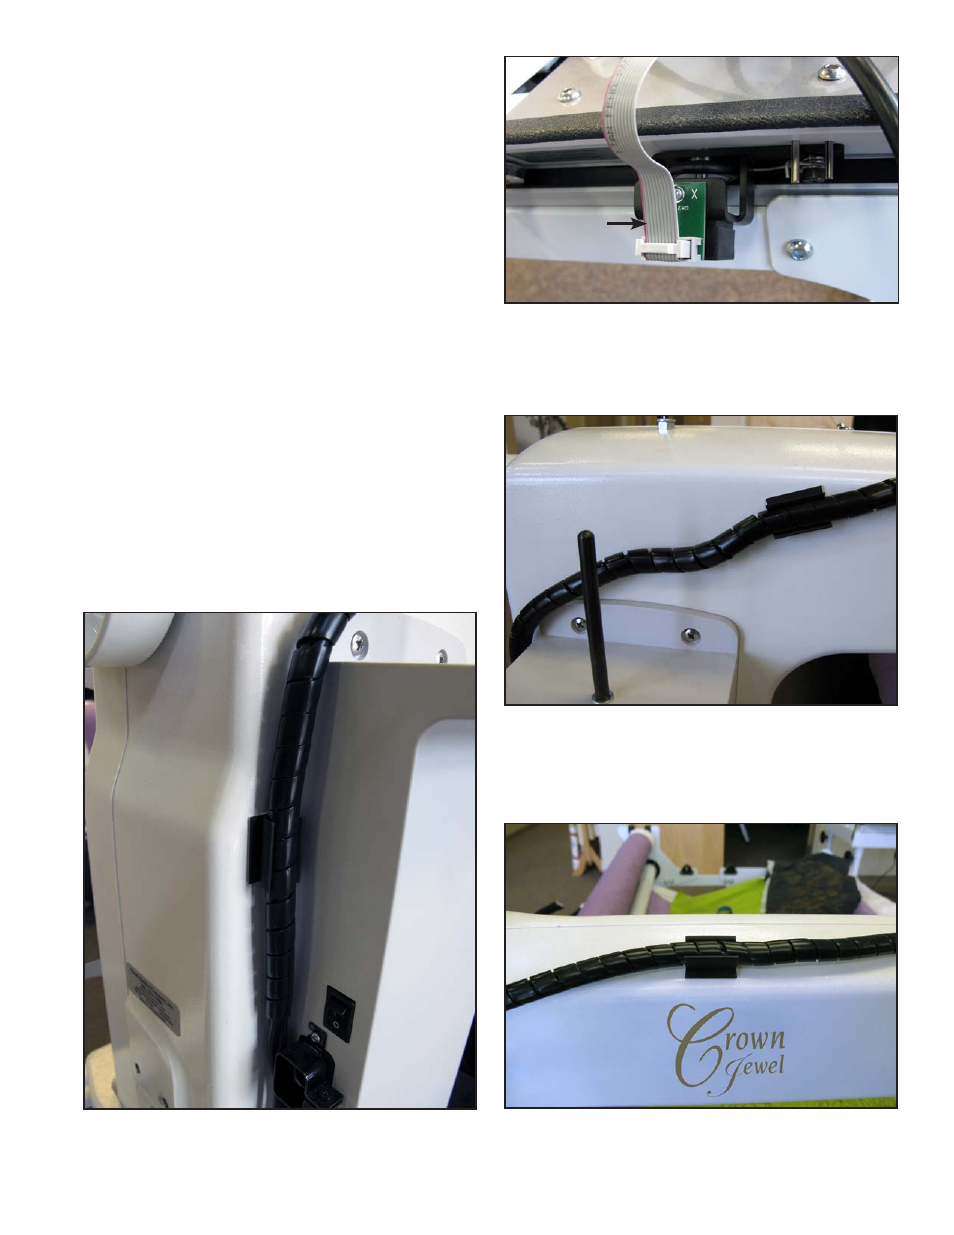
5. With one end of the stitch-regulator cable
plugged into the machine’s C-Pod and the middle
connector plugged into the quilting machine’s “Y”
encoder, plug the other end of the cable into the
carriage “X” encoder (Figure 3.16).
6. The black cables attached to the Pro-Stitcher
carriage should be routed up between the rear
handles and the quilting machine, toward the
right-hand side of the machine (looking at the
machine from the back). Place the black cable clips
(Page 3.3, J) as shown in Figures 3.17, 3.18, &
3.19 and route the cable accordingly.
Figure 3.16
Stitch
regulator
cable
Figure 3.17
Figure 3.18
Figure 3.19