Panel buttons, Work area – Baby Lock ProStitcher Version 14.04.0051 (BLPS2) Instruction and Reference Guide User Manual
Page 22
Overview 4.3
The Shut Down menu gives multiple options for
shutting down the Pro-Stitcher computer or
exiting the software to the Windows screen.
At times there may be more sub-menu options
than can be displayed on the screen. To scroll to the
options at the bottom that are not currently visible,
press anywhere on the function list and drag your
finger upward to slide the list up and reveal what is
at the bottom. Touch and drag downward to scroll
back up to the top of the list.
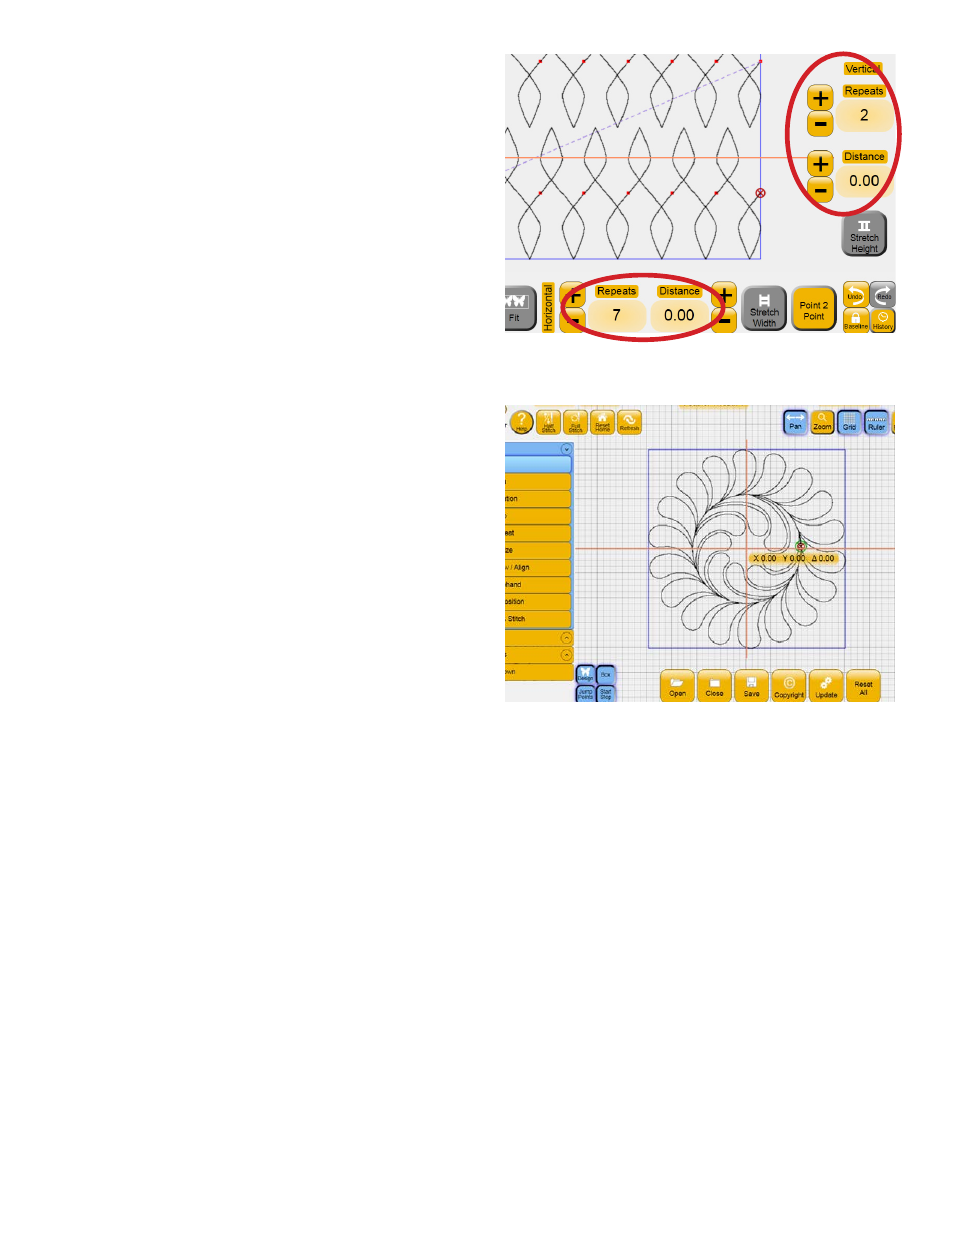
Panel Buttons
Buttons may appear at the bottom and right-hand
sides of the screen depending on which sub-menu
is selected (Figure 4.8). These buttons show the
options available for the selected function. For
example, selecting Design and then Repeat displays
the Repeat Panel buttons. The buttons for repeating
horizontally are across the bottom and the buttons
for repeating vertically are on the right.
Work Area
The central part of the screen is the Work Area
where the current design is shown (Figure 4.9).
The Crosshairs represent the position of the quilting
machine needle relative to the current design and
will move as the quilting machine is moved if the
quick release levers on the carriage are engaged.
The light-blue box around the current design is the
bounding box. The size of the bounding box is the
width and height of the widest and highest points
of the current design. The dimensions of the box
display at the top left-hand side of the screen.
A purple Area box may also be visible if an “Area”
has been defined on the quilt. Areas can be any
shape and define the size and shape of the quilting
area. A large green circle on the loaded design
indicates the start point, a large red circle indicates
the stop point, and small green and red circles
indicate the start and end points of jumps within the
design. Purple dashed lines connect the small green
and red circles to show the jumps, or “no-stitch”
lines.
Figure 4.8
Figure 4.9