Basler Electric BE1-700 Modbus Protocol User Manual
Page 18
1-8
BE1-700 Modbus™ Protocol
9376700991 Rev D
Start the Basler Modbus/TCP Device Discovery application that can be found on the CD provided with the
relay. See Figure 1-1. Using the Ethernet port on the relay, make sure the relay is connected to the
company network. Be aware that it takes about 90 seconds after powering up a relay before it can be
discovered.
Clicking the Refresh button displays all Web-enabled units connected to the network. Highlight the
connection (i.e., your IP address) that you wish to configure. The IP address of interest will be related to
the MAC address shown on the factory test report. After highlighting the appropriate
IP Address, click the
Configure button. This will launch a telnet application connected to the corresponding relay. See Figure
1-2.
The default parameters to login are:
Login:
root <Enter>
Password:
Netsilicon
The password is case sensitive, so only the first letter should be capitalized. Press the Enter key. Once
login is successful, a screen similar to the one shown in Figure 1-3 will come up.
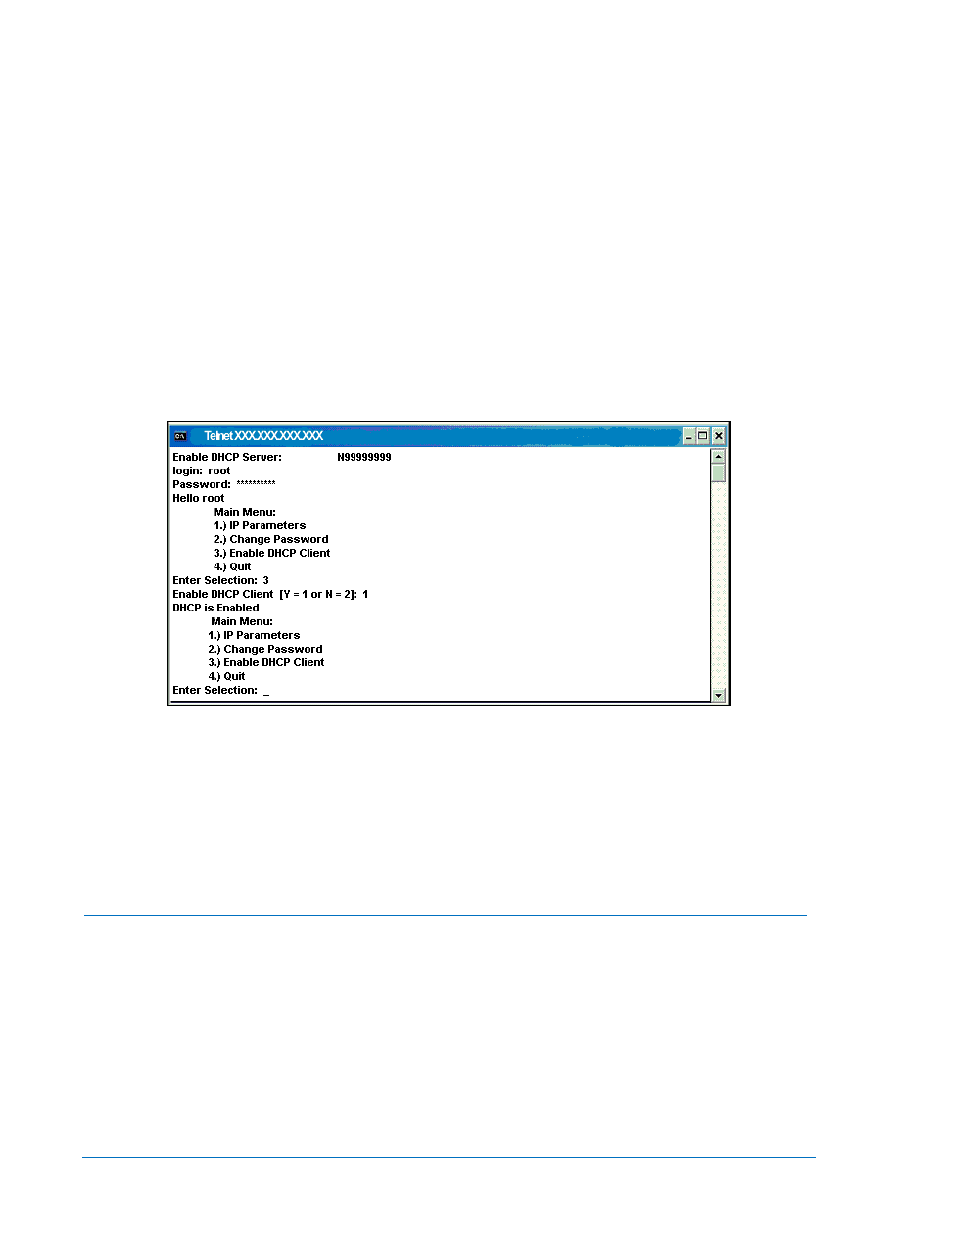
Type 3 (
Enable DHCP Client) and press the Enter key. Figure 1-4 will appear.
You will be prompted to enable the DHCP client with a YES (
1) or disable it with a NO (2). Type1 and
press the Enter key. The response will be “
DHCP is Enabled” as shown in Figure 1-10.
Figure 1-10. DOS Configuration Utility Screen – Enable DHCP Client
In addition, from the Main Menu, the user is encouraged to change the password from the default value.
Once the new password is changed, type 4 and press the Enter key to exit the program or click the X in
the upper right hand corner of the screen. The information that was changed is saved but it will take a few
seconds for the save operation to complete. In order to finish the setup procedure, it will be necessary to
cycle the relay power. This resets the parameters. Once this is completed, as a self-check, wait about 90
seconds and run the Discovery program again to verify that the DHCP client has been enabled. Then exit
the configuration utility program. The relay is now ready to communicate with the PC.
1) To discover the IP address of a single BE1-700 relay on an Ethernet network, the BE1-700 must be
connected to a hub or network switch that your PC’s NIC (Network Interface Card) is also connected
to. This is typically done by connecting a CAT 5 (Category 5) Ethernet cable from your PC’s NIC to a
network hub or switch and connecting the Ethernet port of the BE1-700 to the same network hub or
switch with a second CAT 5 Ethernet cable.
Change from DHCP to Static IP Address on a Single Wire Network (Between PC and BE1-700)
2) Your PC’s NIC can also be directly connected to the Ethernet port on the BE1-700 if you use a
Crossover CAT5 Ethernet cable between them.
3) In most Ethernet networks, a DHCP (Dynamic Host Configuration Protocol) server from a router or
another PC is connected to your Ethernet network through the hub or switch mentioned in step 1
above. If there is NO DHCP server, then a default
169.254.xxx.xxx IP address will be set by your PC
and by the BE1-700 after connecting the Ethernet cables. This may take a few minutes after the
cables are connected.