Lynx Studio E44 User Manual
Page 8
8
5 Installation Procedures
The procedure for installing the E22/E44 requires that you physically install the card inside
your computer before running the Driver Installer.
The Driver Installer will install the required driver files and the Lynx Mixer application, as
well as configure your system to recognize the E22/E44.
5.1 Hardware Installation
1.
Turn OFF the power to your computer system and disconnect the power cords.
2.
Touch a metal plate on your computer system to ground yourself and discharge any
static electricity.
3.
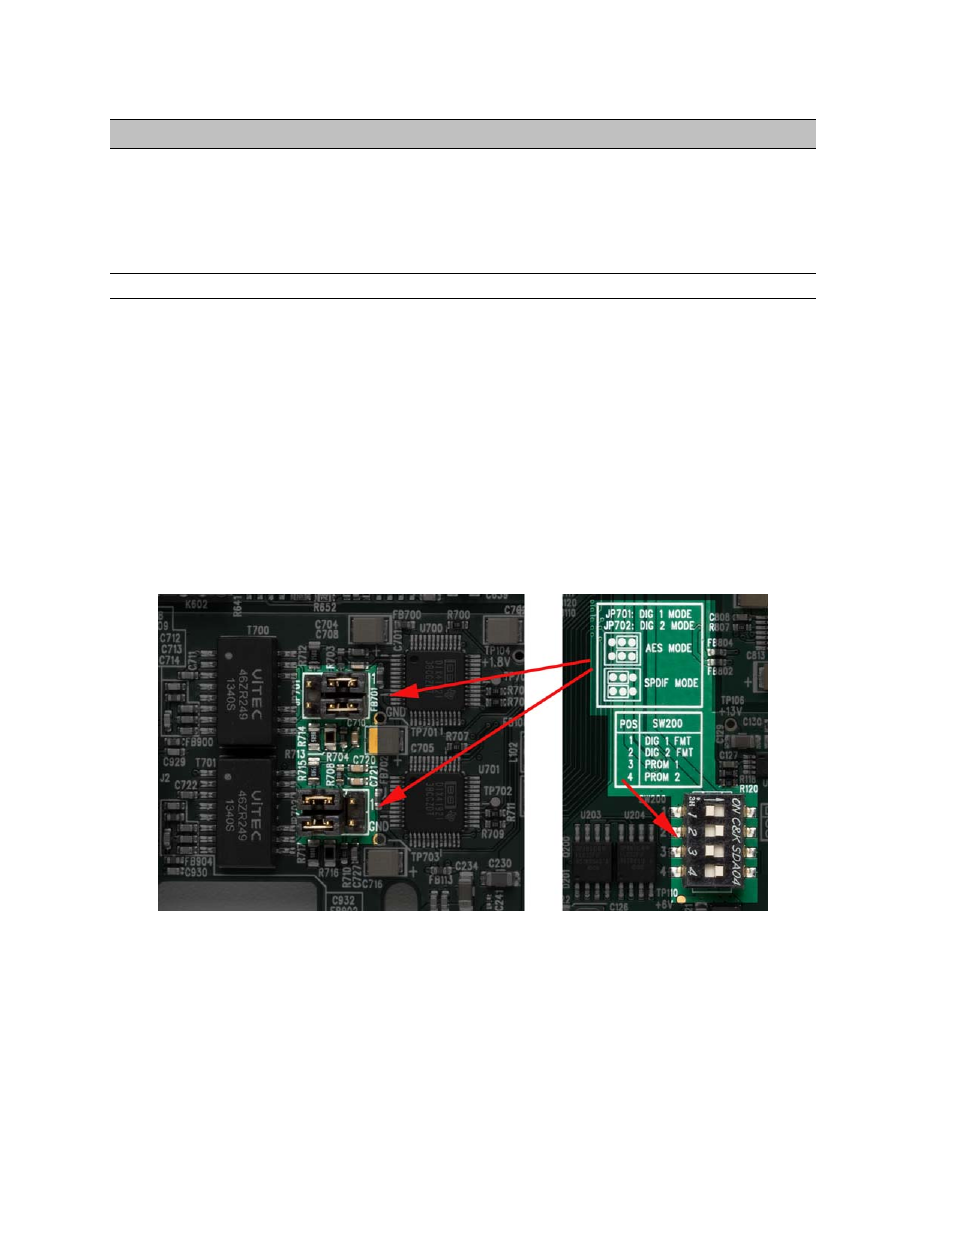
The E22/E44 Digital I/O is set to AES by default. If you would like to switch the
protocol to SPDIF, this is done with jumpers JP701 and JP702 to set the mode, and
switch SW200 to set the format. In the case of the E44 you can switch both Digital
I/Os to SPDIF or have one be SPDIF and the other AES. Remember that both the
jumpers and switches must be altered to go from the default of AES to SPDIF. To set
the mode, refer to the graphic below for jumpers JP701 and JP702. The format is set
using SW200: Switch 1 controls Digital In/Out 1while Switch 2 controls Digital
In/Out 2 (E44 only). The ON position selects SPDIF format and the ON position
selects SPDIF format.
4.
Remove the cover from your computer chassis and select an empty PCI Express slot
in your computer.
5.
You should refer to your computer system documentation for any special instructions
on installing expansion cards and peripheral equipment.
6.
Unscrew and remove the slot cover from your selected PCI Express slot.
7.
Insert the E22/E44 into the selected PCI Express slot and press it down so that the
contacts are securely seated.