Lynx Studio E44 User Manual
Page 9
9
8.
Secure the bracket of the card to the computer chassis using a chassis screw or
retaining bracket.
9.
Replace the computer chassis cover and reconnect the power cord.
10.
Connect the Audio and Sync cables to the E22/E44. Refer to
Section 5.3: Cable
Connections
for more information.
11.
Install software using the installation procedure for your computer type and operating
system from the following section.
5.2 Installing the Lynx Driver
Lynx Drivers and firmware updaters are updated regularly. The most current versions can be
easily downloaded from the Lynx Website:
http://www.lynxstudio.com/
> Support>
Downloads. Make sure that you choose Lynx E44 or Lynx E22 as the “Product”.
If you are updating an existing driver, the driver installation program will automatically
remove the old driver when the new one is installed. When installing drivers, make sure that
all software programs, especially audio applications, are closed.
The steps below will presume that the appropriate driver has been downloaded to your
computer.
5.2.1 Windows 7 (32-bit or 64-bit) or Windows 8
1.
Locate the E44/E22 driver from your downloaded files. The file name will be
V2Setup###.exe (where ### is the version number of the driver)
2.
Double-click the installation file to start the driver installation
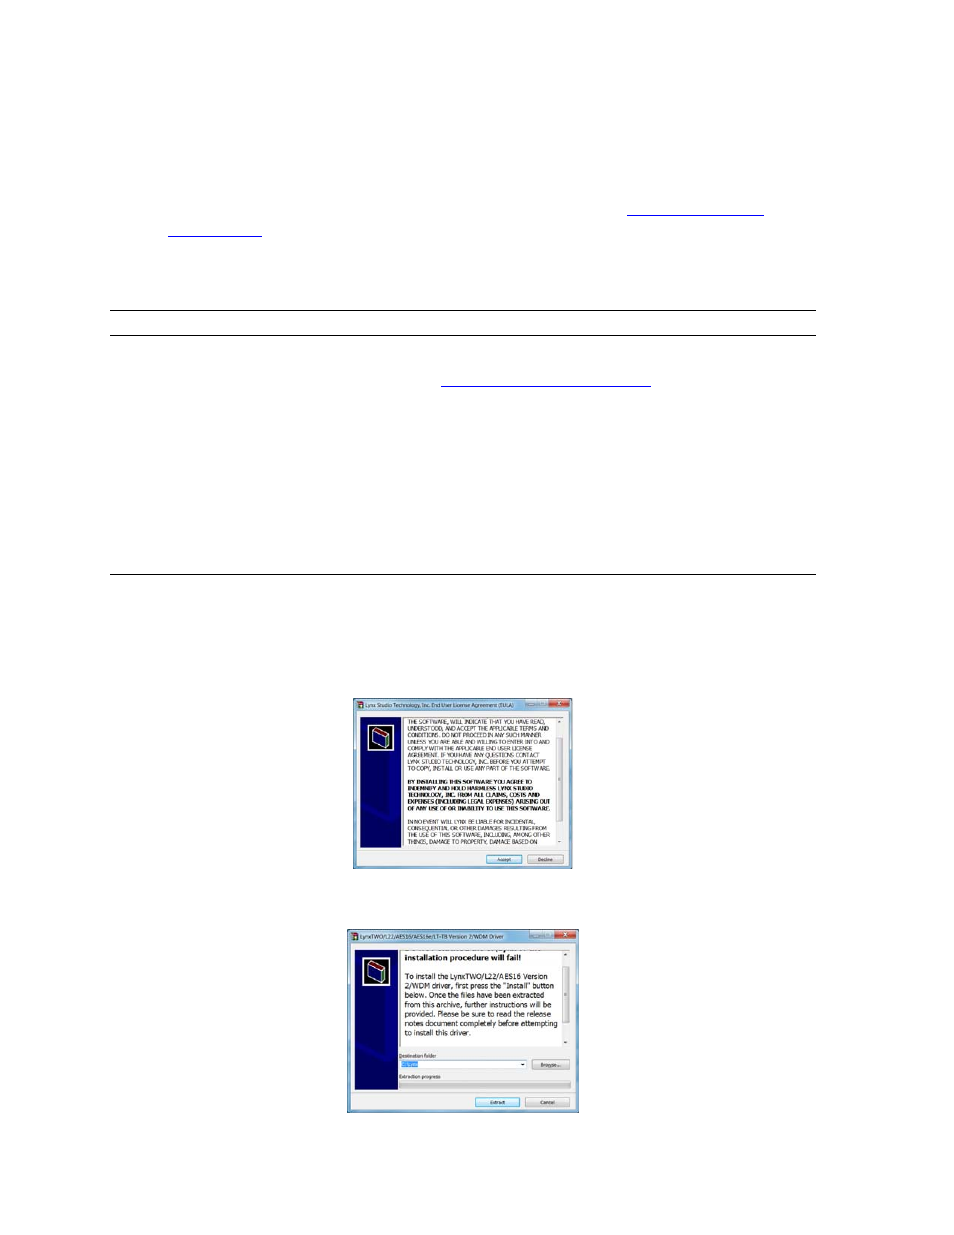
3.
Accept the License Agreement by clicking “Accept”
4.
The installer will extract the necessary files to the C:\Lynx directory. Click “Extract”
from this window