Assigning sources to monitors – Grass Valley Kaleido-X v.7.80 User Manual
Page 59
51
Kaleido-X
User’s Manual
Assigning Sources to Monitors
Any monitor in a layout can be assigned a logical source in XEdit. It is possible to change
the logical source assignment directly on the monitor wall.
Assigning a Logical Source to a Monitor by Using the Kaleido-RCP2
To assign a logical source to a monitor, by using the Kaleido-RCP2’s CHANNEL button
1 Move the pointer over the monitor that is to be assigned a logical source, and then
press CHANNEL on the Kaleido-RCP2.
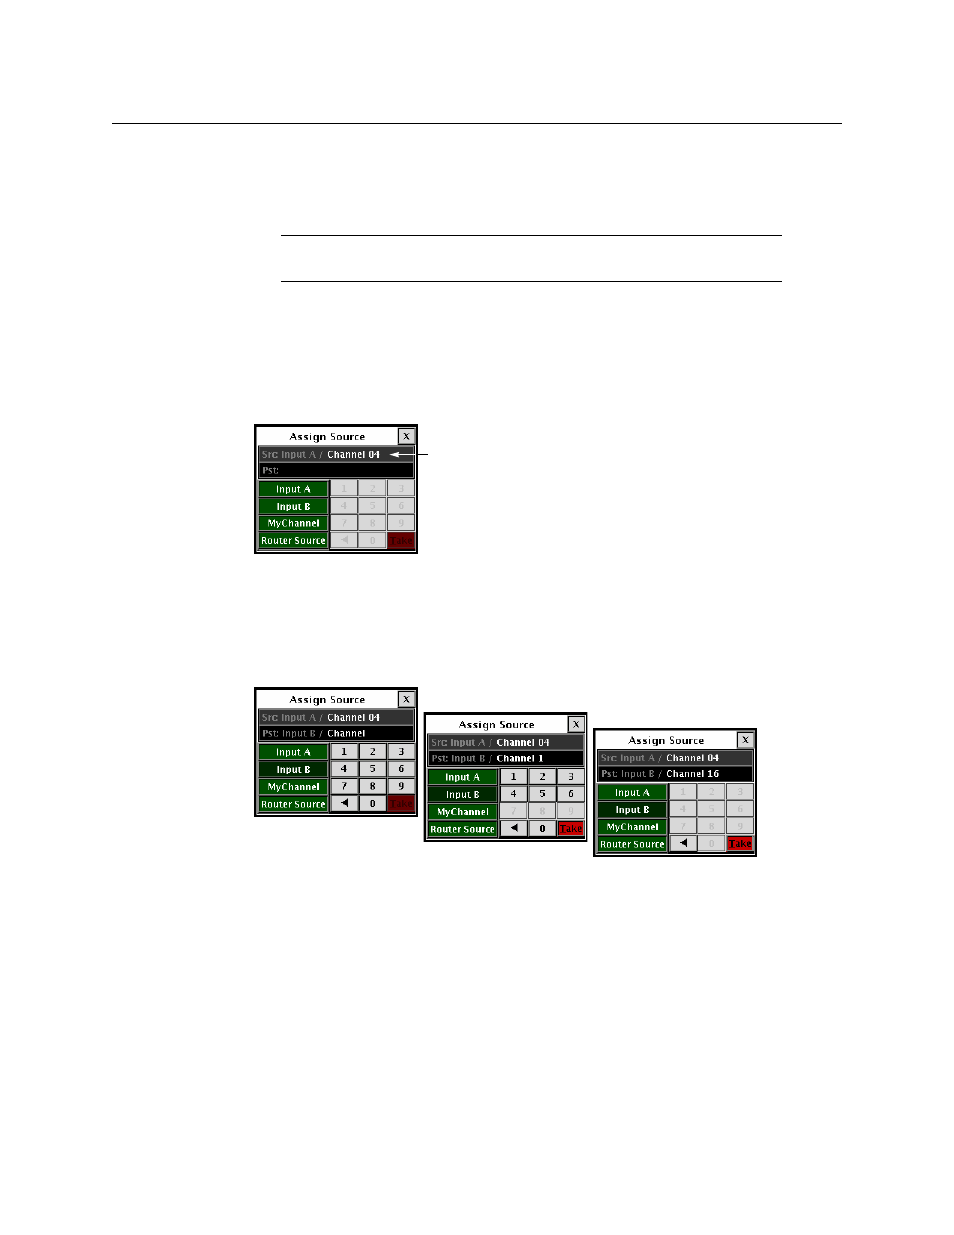
The Assign Source window appears.
The label of each category/index button in Assign Source is based on recurring strings
found in the logical source names available for your system. The Src box shows the
current assignment.
2 Click through the categories until the Pst box shows the logical source you wish to
assign to the selected monitor. For example, if you wish to assign the logical source
named “/Input B/Channel 16” to the monitor, click Input B, 1, and then 6.
3 Click Take.
The selected logical source is now assigned to the monitor.
4 Click the × button to close the Assign Source window.
Assigning a Logical Source to a Monitor by Using the RCP-200
Although logical source assignments can be accomplished via the CHANNEL monitor wall
function (see
), you may find the RCP-200’s category/index router view more
convenient. To use the RCP-200’s category/index panel, your multiviewer system must have
been configured to be controlled as a router. In a layout, the RCP-200 can only control
monitors that have been assigned a monitor wall destination.
Note:
Logical source assignments can also be changed by configuring
actions in XEdit. See
on page 321 for more information.
Current assignment