Installation and connection, 1. name and features of each part, 1-1. front part – Rugged Cams Workhorse DVR 4 Channel User Manual
Page 9
8
2. Installation and Connection
2-1. Name and Features of Each Part
Buttons are conveniently located on the front panel of the Workhorse 120-4, and various interfaces,
on its rear panel. Workhorse 120-4 can be easily installed in a standard rack using the rack mounting
handles (on the left and right sides).
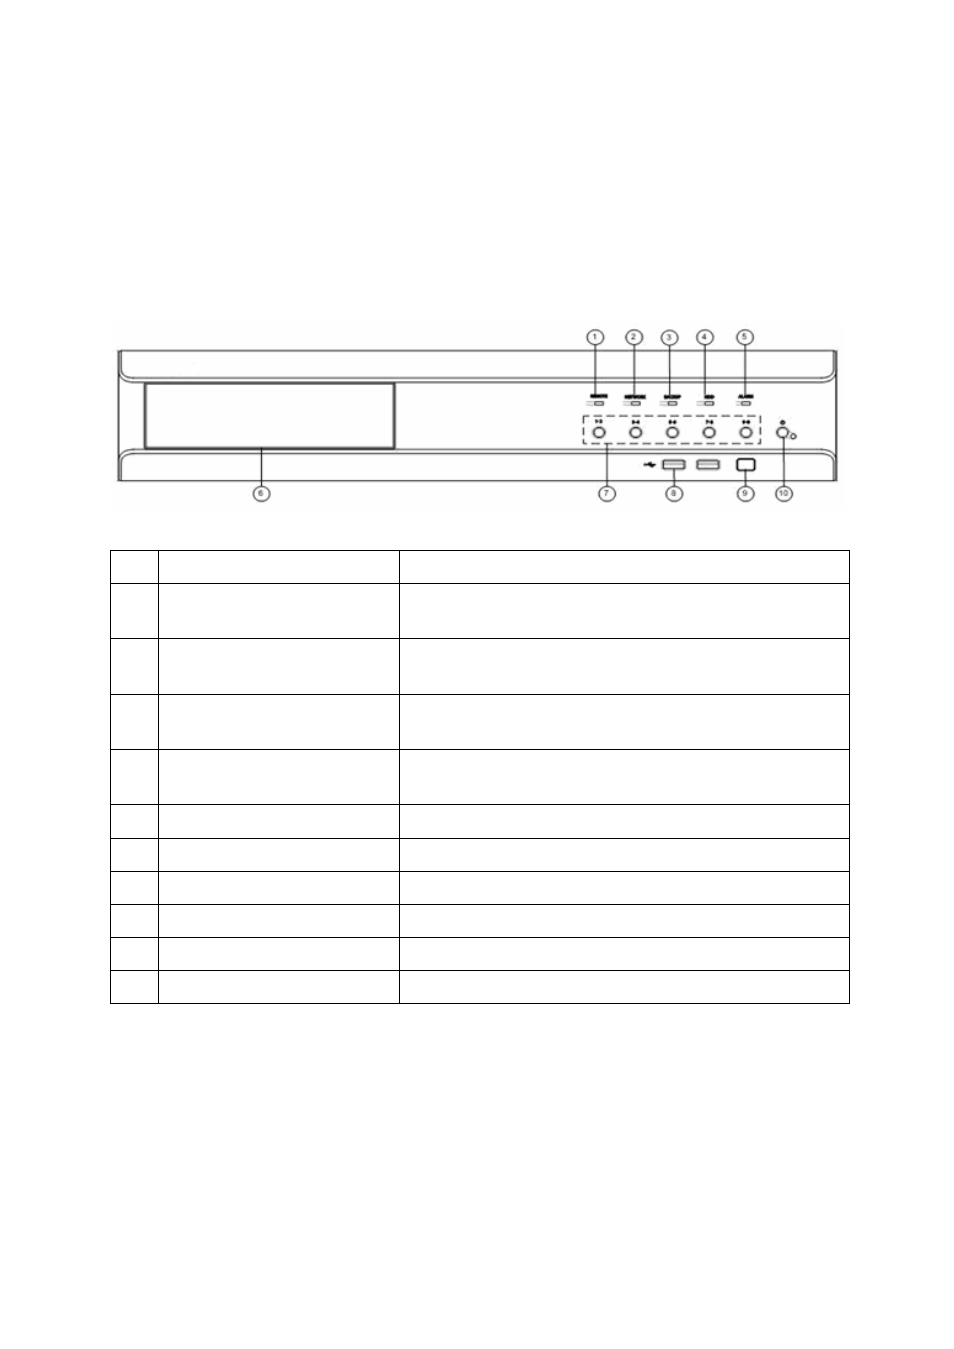
2-1-1. Front Part
No Name
Features
1 Remote
The green light is ON when the remote control is
accessing the DVR
2 Network
The green light is ON when the DVR is being accessed
through the network
3 Backup
The green light is ON when the DVR is making a
backup
4 HDD
The green light is turned ON when the hard drive is
operating.
5 Alarm
The red light is ON when an alarm is triggered.
6 CD-RW/DVD-RW
CD-RW/DVD-RW installation slot
7 Numeric
buttons
Numeric buttons
8 USB
External backup device or USB mouse connection
9
Remote control sensor
Remote control reception sensor
10 Power
System power ON/OFF or Selection button