E-mailing, Setting up the e-mail function, Configuring e-mail settings – Lexmark CX622ade Color Laser Printer User Manual
Page 50: Setting up the e, Mail function, Configuring e, Mail settings, Setting up the e ‑ mail function, Configuring e ‑ mail settings
E-mailing
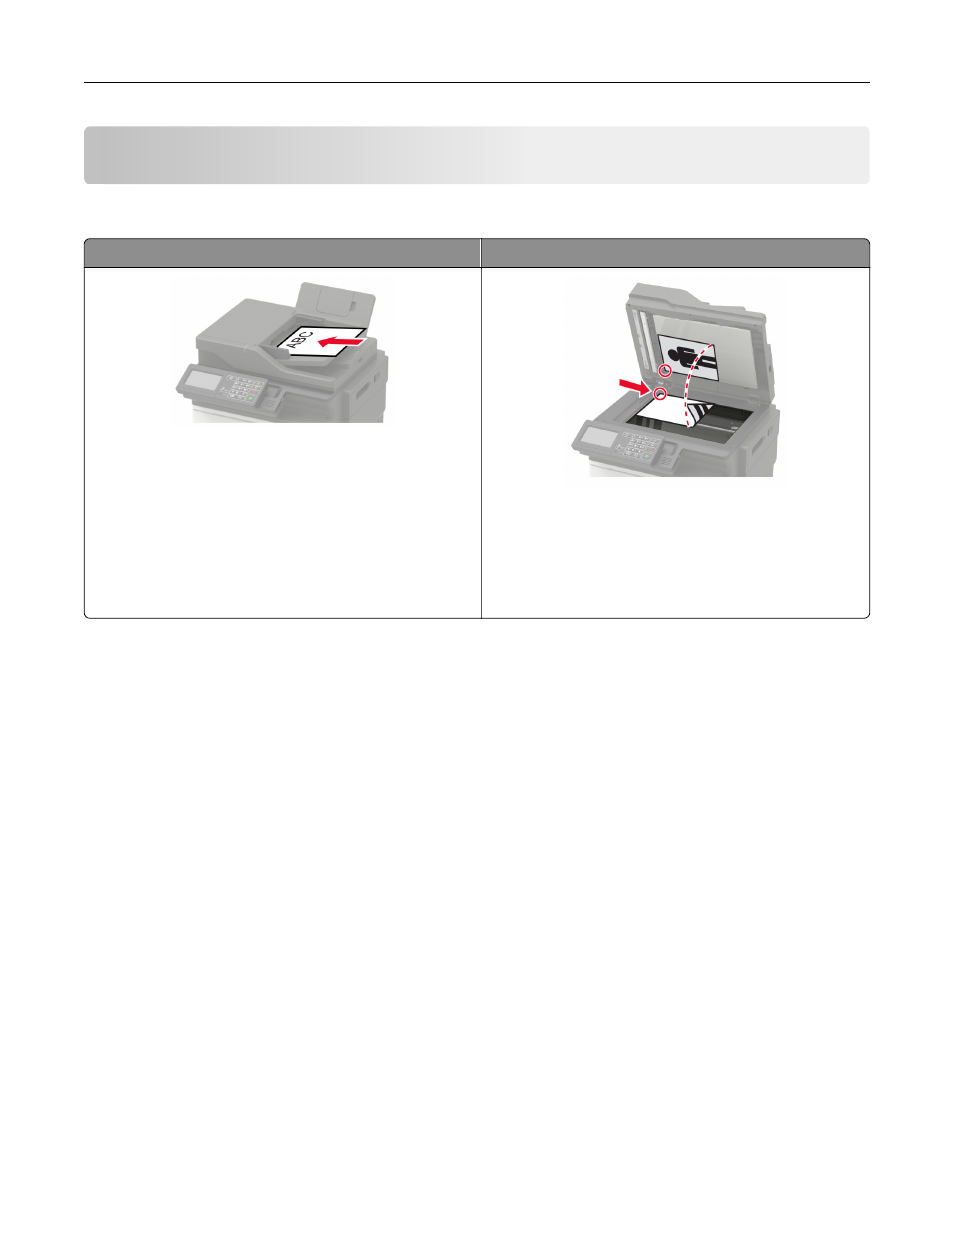
Using the automatic document feeder and scanner glass
Automatic document feeder (ADF)
Scanner glass
•
Use the ADF for multiple
‑
page or two-sided
documents.
•
Load an original document faceup. For multiple
‑
page
documents, make sure to align the leading edge
before loading.
•
Make sure to adjust the ADF guides to match the width
of the paper that you are loading.
•
Use the scanner glass for single
‑
page documents,
book pages, small items (such as postcards or
photos), transparencies, photo paper, or thin media
(such as magazine clippings).
•
Place the document facedown in the corner with the
arrow.
Setting up the e
‑
mail function
1
Open a web browser, and then type the printer IP address in the address field.
Notes:
•
View the printer IP address on the home screen. The IP address appears as four sets of numbers
separated by periods, such as 123.123.123.123.
•
If you are using a proxy server, then temporarily disable it to load the web page correctly.
2
Click
Settings
>
E
‑
>
E
‑
mail Setup
.
3
Configure the settings.
4
Apply the changes.
Configuring e
‑
mail settings
1
Open a Web browser, and then type the printer IP address in the address field.
Notes:
•
View the printer IP address on the printer home screen. The IP address appears as four sets of
numbers separated by periods, such as 123.123.123.123.
•
If you are using a proxy server, then temporarily disable it to load the Web page correctly.
2
Click
Settings
>
.
E-mailing
50