Setting up fax using a standard telephone line – Lexmark CX622ade Color Laser Printer User Manual
Page 53
Setting up fax using a standard telephone line
CAUTION—SHOCK HAZARD:
To avoid the risk of electrical shock, do not set up this product or make
any electrical or cabling connections, such as the power cord, fax feature, or telephone, during a
lightning storm.
CAUTION—SHOCK HAZARD:
To avoid the risk of electrical shock, do not use the fax feature during a
lightning storm.
CAUTION—POTENTIAL INJURY:
To reduce the risk of fire, use only a 26 AWG or larger
telecommunications (RJ-11) cord when connecting this product to the public switched telephone
network. For users in Australia, the cord must be approved by the Australian Communications and Media
Authority.
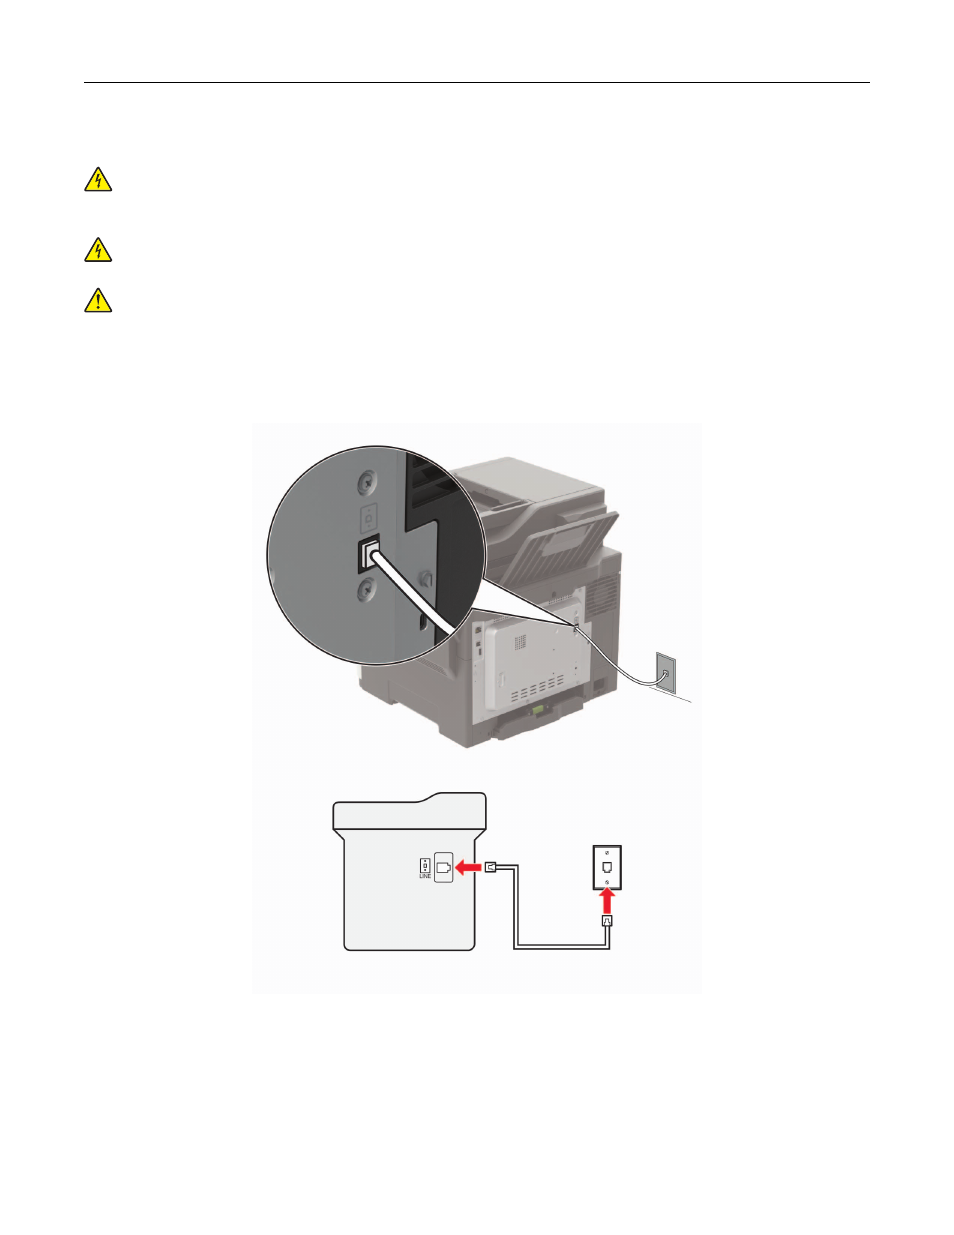
Setup 1: Printer is connected to a dedicated fax line
1
Connect one end of the telephone cable to the line port of the printer.
2
Connect the other end of the cable to an active analog wall jack.
Notes:
•
You can set the printer to receive faxes automatically (Auto Answer On) or manually (Auto Answer Off).
•
If you want to receive faxes automatically, then set the printer to pick up on a specified number of rings.
Faxing
53