Printing borderless (full-bleed) labels – Formax ColorMaxLP Operator Manual User Manual
Page 32
32
Using the Printer
Formax
Printing Borderless (Full-Bleed) Labels
The usual approach to borderless printing is to prepare an image slightly larger than
the label size, then center the larger image over the label so that it prints over the
edges. The following procedure describes where to make the adjustments on the
L801 printer.
Note the following:
• This method requires fine-tuning of the printing position, which will be difficult
if the label gap is very small e.g. 0.1” (3 mm).
• As the maximum label width is 8.5” (215.9 mm), it is also difficult to print
borderless labels of this size. This method works best when the label width plus
bleed allowance does not exceed 8.5” (215.9 mm).
• Print at 6 IPS only.
• You may need to fine-tune the Top of Form/Bottom of Form/Left Edge offset on
the control panel for each label size. For example, the offsets for a 6” x 4” label
may be different from a 2” x 2.5” label. Hence, you need to record the offsets used
for each label size.
Adjustments for Borderless Printing
1. On the General tab of the printer driver (
Figure 4
), click Custom Sizes to set the
page size slightly smaller than the label (about 0.01” or 0.2 mm in both
direction).
Select Print Speed of 6 IPS and enable Borderless.
2. On the Media tab, adjust the Left Edge to center the image on the label.
3. Print a few labels to check the print position.
Fine-tune using the printer control panel:
(
Config)
ADJUST OFFSET
Top of Form/Bottom of Form/Left Edge
+
–
+
–
–
+
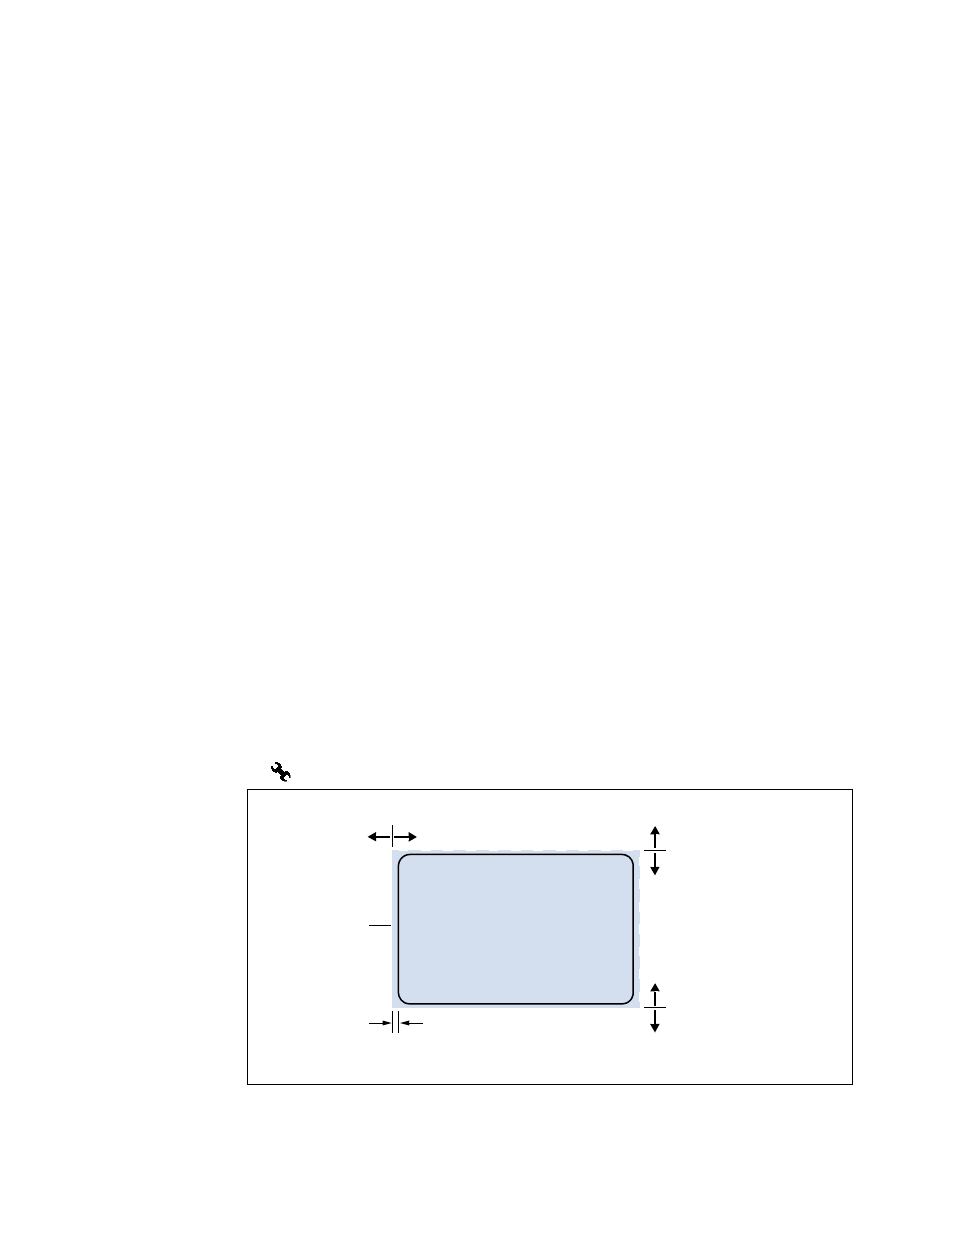
bleed (Borderless Enabled)
Image/page size
6.08” x 4.08”
Left Edge: Horizontal adjustment
Top of Form:
Bottom of Form:
Label 6” x 4”
Adjust starting line
Adjust ending line
EXAMPLE:
Note: The printer automatically determines the bleed/over spray.