LSC Lighting maXim MP User Manual
Page 45
maXim
MP L(P) XL(P) XXL(P)
Basic Fixture Programming
Operator Manual V3
LSC Lighting Systems (Aust) Pty. Ltd.
Page 39
14.4 SELECTING
A
FIXTURE
To select any of the loaded fixtures, tap either end
of the Fixture Displayer. Tap the left to select the
next lower Fixture Number. Tap the right to select
the next higher Fixture Number.
To change directly to a specific Fixture Number,
HOLD
the centre of the Fixture Displayer, then
tap
[f/a] (Fixture Number).
The Fixture Number of the currently selected
Fixture is shown on the Fixture Displayer and also
indicated on the video screen by a row of colons. :
: : : : : : : : : : : : : : : : : : : :
The PaTPad can now control the parameters of
this Fixture.
14.5 CONTROLLING THE SELECTED
FIXTURE
When a fixture is selected on the PaTPad, its
Fixture Number is shown on the Fixture Displayer
and all of its available “PM” (Parameters Matrix)
buttons are active. Each of the 6 parameter
displayers can be used to control up to 4
parameters as selected by the 4 [PM] buttons
beside it. This allows a maximum of 24
parameters to be controlled. The number of “PM”
buttons that are available and the actual
parameters that each of these PM buttons selects
are defined each Fixture’s Template.
The colour of the PM buttons indicates their status
or function;
• Red + White + Blue. This parameter is
active
on the parameter displayer to its
left.
• Red. This is a colour parameter and it is
not currently active
. Pressing this PM
button will select it on the parameter
displayer to its left.
• Blue. This is a beam parameter and it is
not currently active
. Pressing this PM
button will select it on the parameter
displayer to its left.
• Green. This is a focus parameter and it
is not currently active. Pressing this PM
button will select it on the parameter
displayer to its left.
• Red + Blue. This is a parameter that
cannot be stored in a scene (No Store)
and it is not currently active. Pressing this
PM button will select it on the parameter
displayer to its left.
When a parameter is selected (by pressing its PM
button) its displayer will show the Name of the
parameter and the PM button will light red + white
+ blue to show that it is active.
There are three display levels of information
available on the displayers for each parameter,
N
ame, Value and Time.
Tapping an active [PM] button will toggle its
parameter displayer between Name and Value.
Tapping a parameter displayer that is showing a
N
ame will also change it to Value.
• Name – Displays the name of the current
parameter. e.g. “PAN“ or “Colour”.
• Value – Displays the current value of the
parameter. e.g. “Pan= 35D” or “Green”
and allows you to alter the value by
touching and scrolling the displayer.
Pressing and HOLDING a [PM] button will change
its displayer to:
• Time – Displays the timing information
that will be recorded/stored for that
parameter and allows you to alter the
timing information (see the “Advanced
Programming” section for details).
Tapping a [PM] button returns its displayer to
N
ame.
There are three yellow LEDs located at the right
end of each parameter displayer and they indicate
which level of information is being displayed.
• Top yellow LED = Name
• Mid yellow LED = Value
• Low yellow LED = Time.
To quickly restore all parameter displayers to the
N
ames of the parameters that they control press;
[clear], [clear].
14.6 ADJUSTING
PARAMETER
VALUES
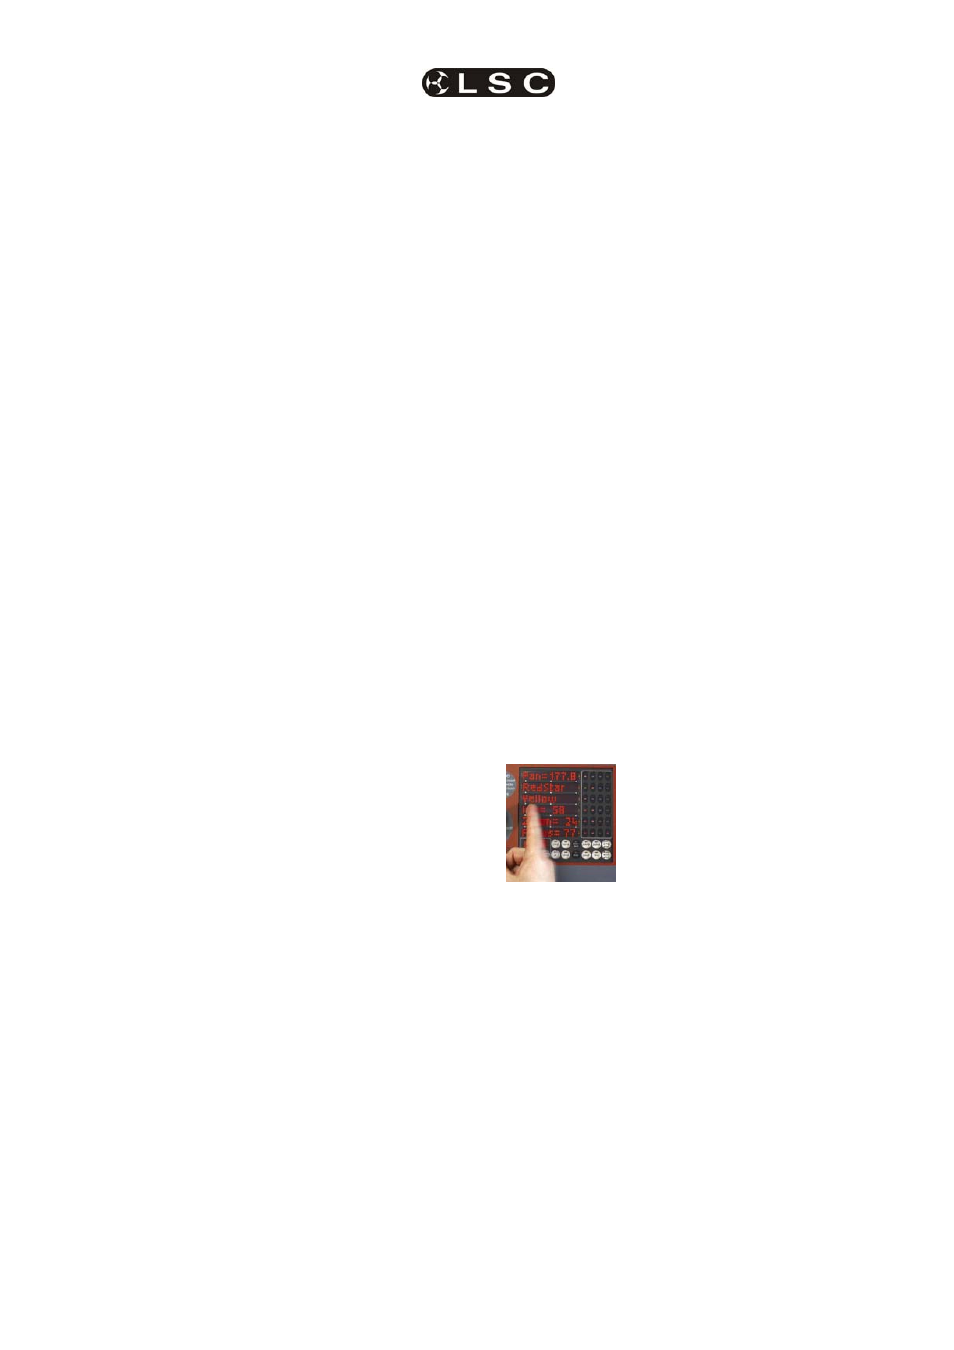
In Value and Time modes, each touch sensitive
displayer can be used to adjust its parameter
value by “mousing” the display. Use the edge of
your finger to get the best response from the
displayer.
For fine adjustment “roll” the edge of your finger.
When you have touched a displayer, the Mid
(Name) or Low (Time) yellow
LEDs
will flash. Whilst they are
flashing, the EDIT wheel can
also be used to vary the value.
Use the edit wheel for very fine
adjustments. If the edit wheel is
not moved for 30 seconds, the
yellow LED will stop flashing and the edit wheel
will revert to scrolling the V1 or V2 video page. To
manually revert to scrolling the V1 or V2 video
page press [ok].
To re-connect the edit wheel to a parameter
displayer or connect it to a different displayer,
touch the required displayer.
To connect the edit wheel to the next parameter,
press [>]. To connect the edit wheel to the
previous parameter, press [<].
For example, whilst adjusting pan with the EDIT
wheel, if you press [>], the wheel will now adjust
tilt. If you press [>] again, the edit wheel will
connect to the next parameter such as colour.
Pressing [<] connects it back to tilt.
The parameters that can be selected for the EDIT
wheel with the < and > buttons can be restricted
by the use of filters.
For example, if no filters are selected, the < and >
buttons can be used to step through all