Creating a marquee, Adjusting a marquee – Epson WP-M4595DNF User Manual
Page 78
❏ Thumbnail preview displays your previewed image(s) as thumbnail(s). Epson Scan automatically locates the
edges of your scan area, applies automatic exposure settings to the image(s), and rotates the image(s) if necessary.
Note:
❏ Some of the settings that you change after previewing an image are reset if you change the preview mode.
❏ Depending on your document type and the Epson Scan mode you are using, you may not be able to change the preview type.
❏ If you preview image(s) without the Preview dialog displayed, image(s) are displayed in the default preview mode. If you
preview with the Preview dialog displayed, image(s) are displayed in the preview mode that was displayed just before
previewing.
❏ To resize the Preview window, click and drag the corner of the Preview window.
❏ See the Help for more details on Epson Scan.
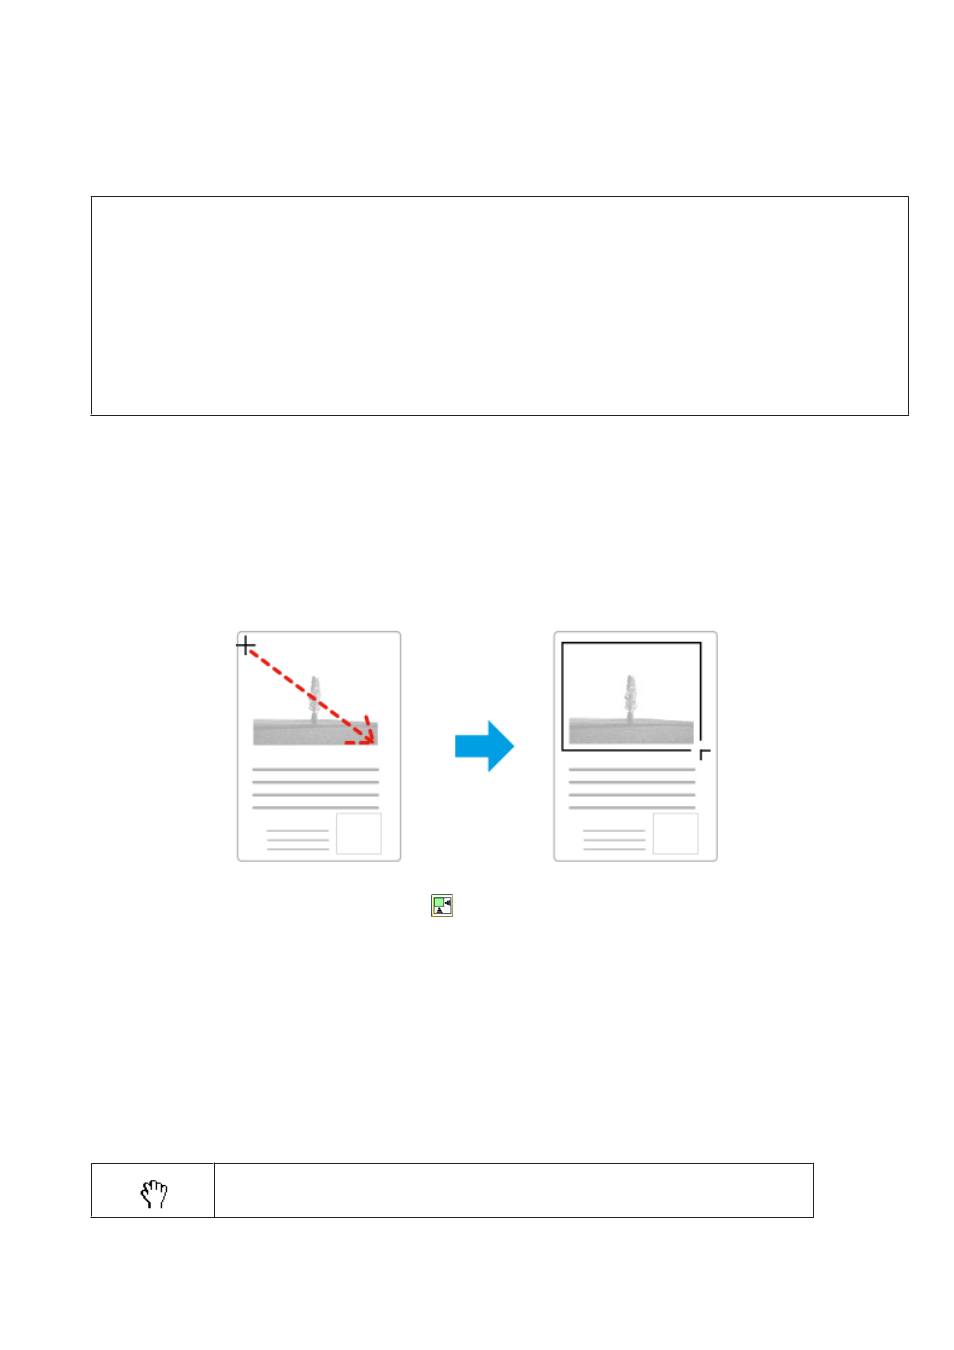
Creating a marquee
A marquee is a moving dotted line that appears on the edges of your preview image to indicate the scan area.
Do one of the following to draw a marquee.
❏ To draw the marquee manually, position the pointer in the area where you want to place the corner of your
marquee and click. Drag the cross-hairs over the image to the opposite corner of the desired scan area.
❏ To draw the marquee automatically, click the
auto locate icon. You can only use this icon when you are
viewing a normal preview and you only have one document on the document glass.
❏ To draw the marquee at a specified size, type in a new width and height in the Document Size setting.
❏ For best results and image exposure, make sure all sides of the marquee are located inside the preview image. Do
not include any areas around the preview image in the marquee.
Adjusting a marquee
You can move the marquee and adjust its size. If you are viewing a normal preview, you can create multiple marquees
(up to 50) on each image to scan different image areas as separate scan files.
To move the marquee, position your cursor inside the marquee. The pointer becomes a hand. Click
and drag the marquee to the desired location.
User’s Guide
Scanning
78