Scanner instruction manual, Diagnostics menu ( diag ), Determining software version – Precision Digital PD6080 User Manual
Page 98: Reset scanner to factory defaults, Testing the display leds
PD6080/PD6081 Super Snooper Modbus
Scanner Instruction Manual
98
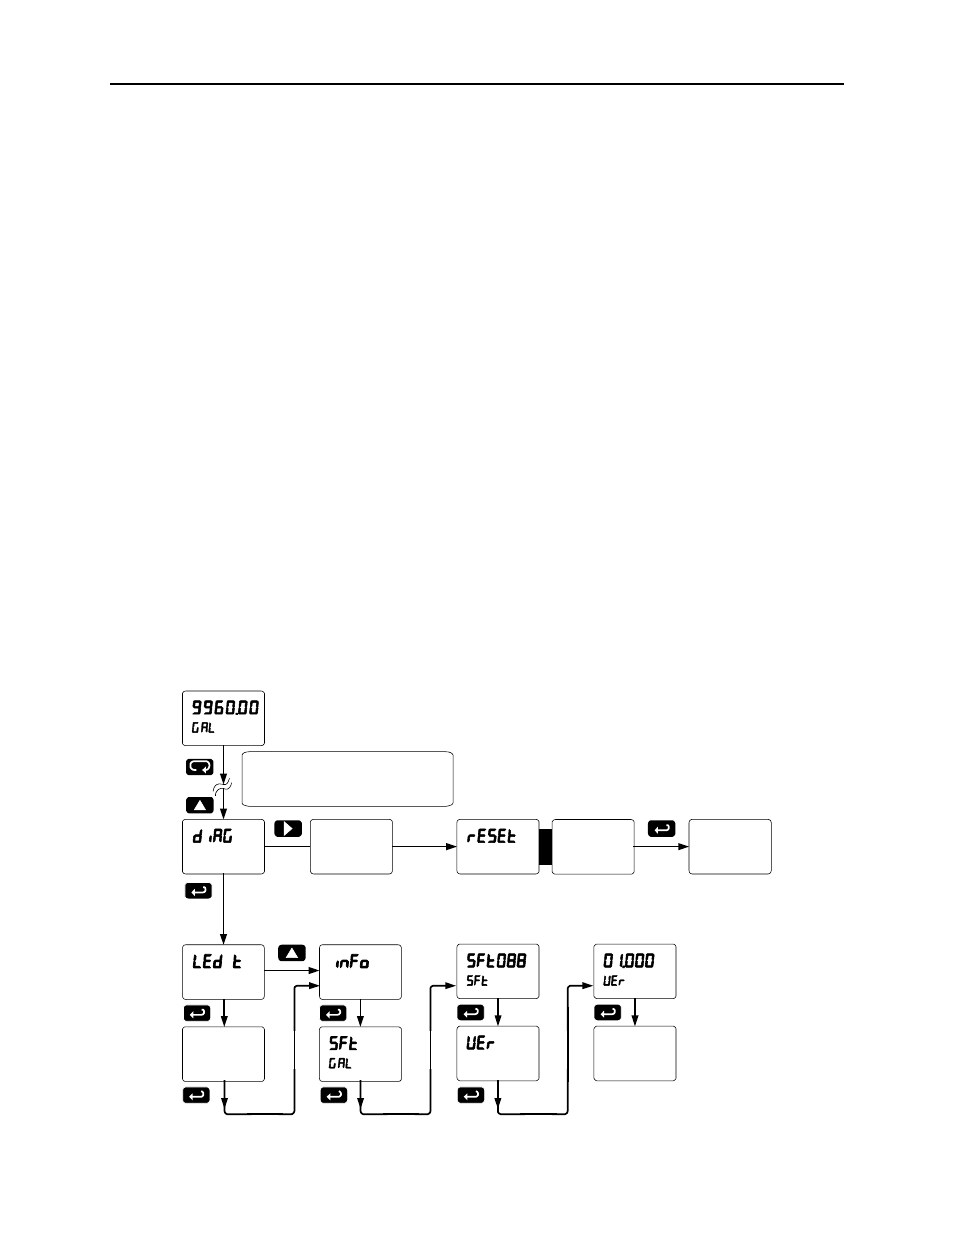
Diagnostics Menu (diag)
The Diagnostics menu is located in the Advanced Features menu, to access Diagnostics menu see page
69. The diagnostics meu provides the user with the ability to reset the scanner to factory defaults, test the
display segments and view information about the software version number for troubleshooting purposes.
Press the Enter button to view the information or the Menu button to exit at any time.
Determining Software Version
To determine the software version of a scanner:
1. Go to the Diagnostics menu (diAG) and press Enter button.
2. Press Up arrow button and scroll to Information menu (Info).
3. Press Enter to access the software number (SFT) and version (UER) information. Write down the
information as it is displayed. Continue pressing Enter until all the information is displayed.
4. The scanner returns to Run Mode after displaying all the settings.
Reset Scanner to Factory Defaults
When the parameters have been changed in a way that is difficult to determine what’s happening, it might
be better to start the setup process from the factory defaults.
Instructions to load factory defaults:
1. Enter
the
Advanced Features menu, see page 69.
2. Press Up arrow to go to Diagnostics menu
3. Press and hold Right arrow for three seconds, press Enter when display flashes reset.
Note: If Enter is not pressed within three seconds, the display returns to Run Mode.
4. The scanner goes through an initialization sequence (similar as on power-up), and loads the factory
default settings.
Testing the Display LEDs
Enter the Diagnostic menu and press the ENTER button to get to the LED Test menu (led t). Press the
ENTER button to activate the LED Test. The PD6080/6081 will cycle through all digits, decimal points,
and relay indicators to enable the operator to see that all are functioning properly. Press the ENTER
button again to access the Information menu (info). Press the MENU button to return to Run Mode.
Run Mode
Meter resets
and restarts
with factory
default settings
LED Test:
Cycles through all
digits, decimal pts,
& warning lights.
Press & hold right
arrow for 3 seconds
to reset meter.
Press ENTER while
RESET flashes
to reset meter.
To
RUN Mode
Press & hold MENU Button for 3 seconds
to access the Advanced Features Menu,
then press Up Arrow to scroll through menu
choices until you reach the Diagnostics Menu.