Connected to a computer (= 153), or display, Saving images to a computer, Installing the software – Canon EOS M10 User Manual
Page 153
153
Before Use
Basic Guide
Advanced Guide
Camera Basics
Auto Mode /
Hybrid Auto Mode
Other Shooting Modes
Tv, Av, and M Mode
Playback Mode
Wi-Fi Functions
Setting Menu
Accessories
Appendix
Index
P Mode
Saving Images to a Computer
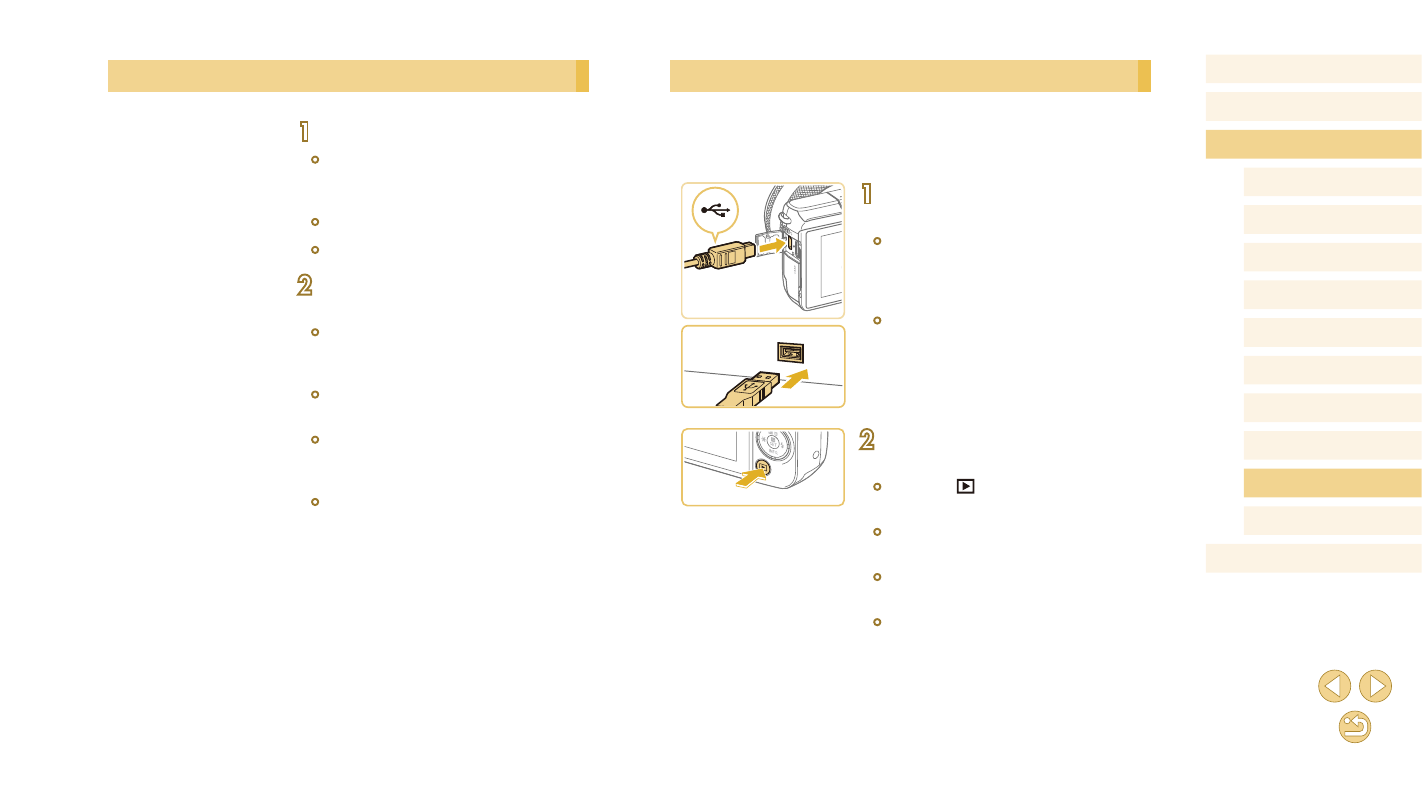
Use an interface cable (= 2) to connect the camera and save images
to the computer.
Windows 7 and Mac OS X 10.10 are used here for the sake of illustration.
1
Connect the camera to the
computer.
●
With the camera turned off, open the
cover (1). With the smaller plug of the
cable in the orientation shown, insert the
plug fully into the camera terminal (2).
●
Insert the larger plug of the cable in the
computer’s USB port. For details about
USB connections on the computer, refer
to the computer user manual.
2
Turn on the camera and display EOS
Utility.
●
Press the [
] button to turn the camera
on.
●
Windows: Double-click the EOS Utility
icon on the desktop.
●
Mac OS: Click the EOS Utility icon in the
Dock.
●
From now on, EOS Utility will start up
automatically when you connect the
camera to the computer and turn on the
camera.
Installing the Software
1
Download the software.
●
With a computer connected to the
Internet, access http://www.canon.com/
icpd/.
●
Access the site for your country or region.
●
Download the software.
2
Click [Easy Installation] and follow
the on-screen instructions.
●
Double-click the downloaded file, and
when the installation screen is displayed,
click [Easy Installation].
●
Follow the instructions displayed to
complete installation.
●
Installation may take some time,
depending on computer performance and
the Internet connection.
●
Click [Finish] or [Restart] on the screen
after installation.