Trying the camera out, Shooting (scene intelligent auto) – Canon EOS M10 User Manual
Page 25
25
Before Use
Basic Guide
Advanced Guide
Camera Basics
Auto Mode /
Hybrid Auto Mode
Other Shooting Modes
Tv, Av, and M Mode
Playback Mode
Wi-Fi Functions
Setting Menu
Accessories
Appendix
Index
P Mode
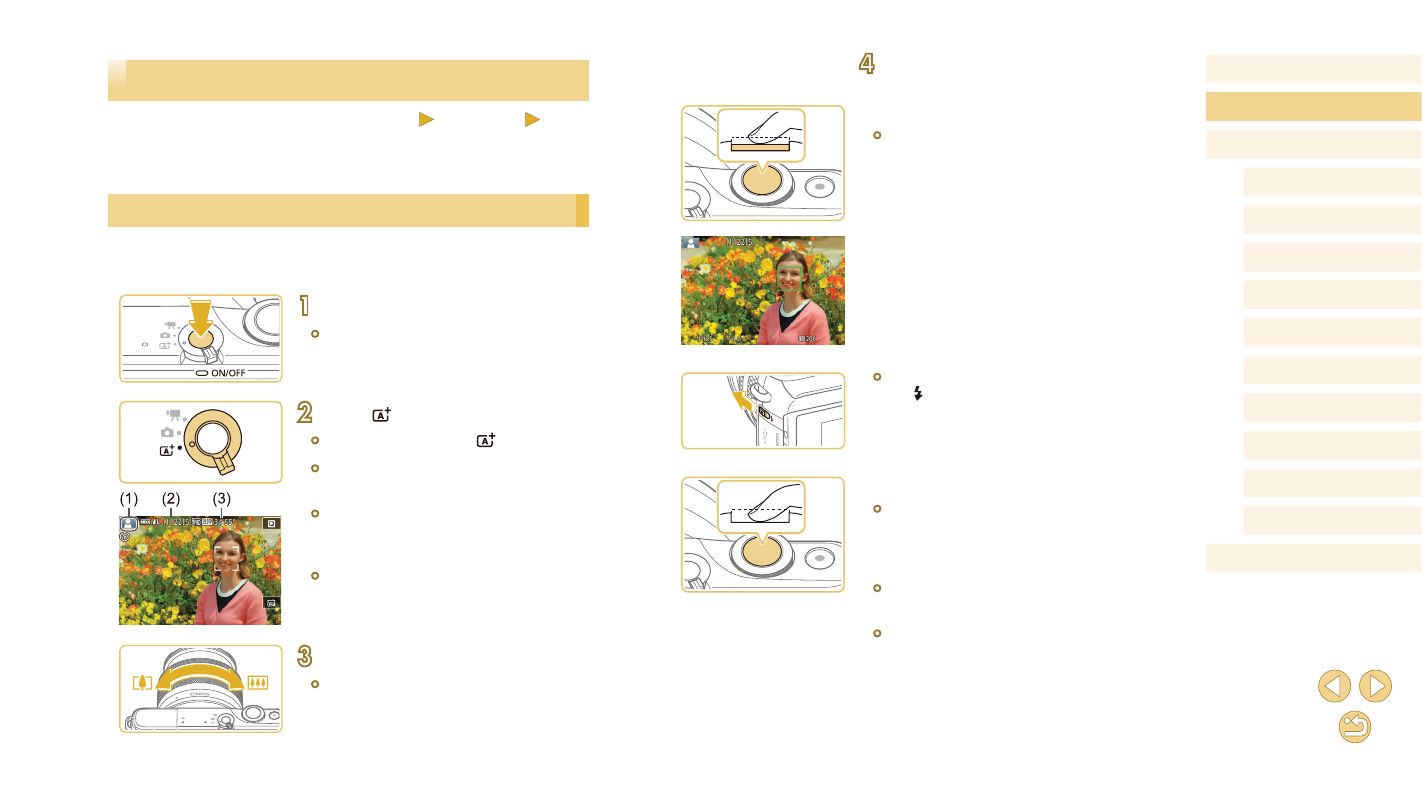
4
Shoot.
Shooting Still Images
1) Focus.
●
Press the shutter button lightly, halfway
down. The camera beeps twice after
focusing, and AF frames are displayed to
indicate image areas in focus.
●
If [Raise the flash] is displayed, move
the [ ] switch to raise the flash. It will fire
when shooting. If you prefer not to use
the flash, push it down with your finger,
into the camera.
2) Shoot.
●
Press the shutter button all the way down
to shoot. (In low-light conditions, the flash
fires automatically when you have raised
it.)
●
Your shot remains displayed on the
screen for about two seconds.
●
Even while the shot is displayed, you can
take another shot by pressing the shutter
button again.
Trying the Camera Out
Still Images
Movies
Follow these instructions to turn the camera on, shoot still images or
movies, and then view them.
Shooting (Scene Intelligent Auto)
For fully automatic selection of the optimal settings for specific scenes,
simply let the camera determine the subject and shooting conditions.
1
Turn the camera on.
●
Press the ON/OFF button.
2
Enter [ ] mode.
●
Set the mode switch to [ ].
●
A scene icon (1) is displayed in the upper
left of the screen.
●
Also shown on the top of the screen are
the number of shots (2) and length of
movies (3) that the card can hold.
●
Frames are displayed around faces
and subjects that have been detected,
indicating that they are in focus.
3
Compose the shot.
●
When using a zoom lens, zoom by
turning the zoom ring on the lens with
your fingers.