Altera SoC Embedded Design Suite User Manual
Page 121
9. SignalTap II will run the analysis and wait for the trigger from the DIP switch:
Figure 4-82: Acquisition in Progress
10.Change the state of the FPGA DIP switch 0 (SW1.5 on the board). This will trigger a Signal Tap II
acquisition and stop Signal Tap II. This will be indicated by the status changing back to Ready to
acquire.
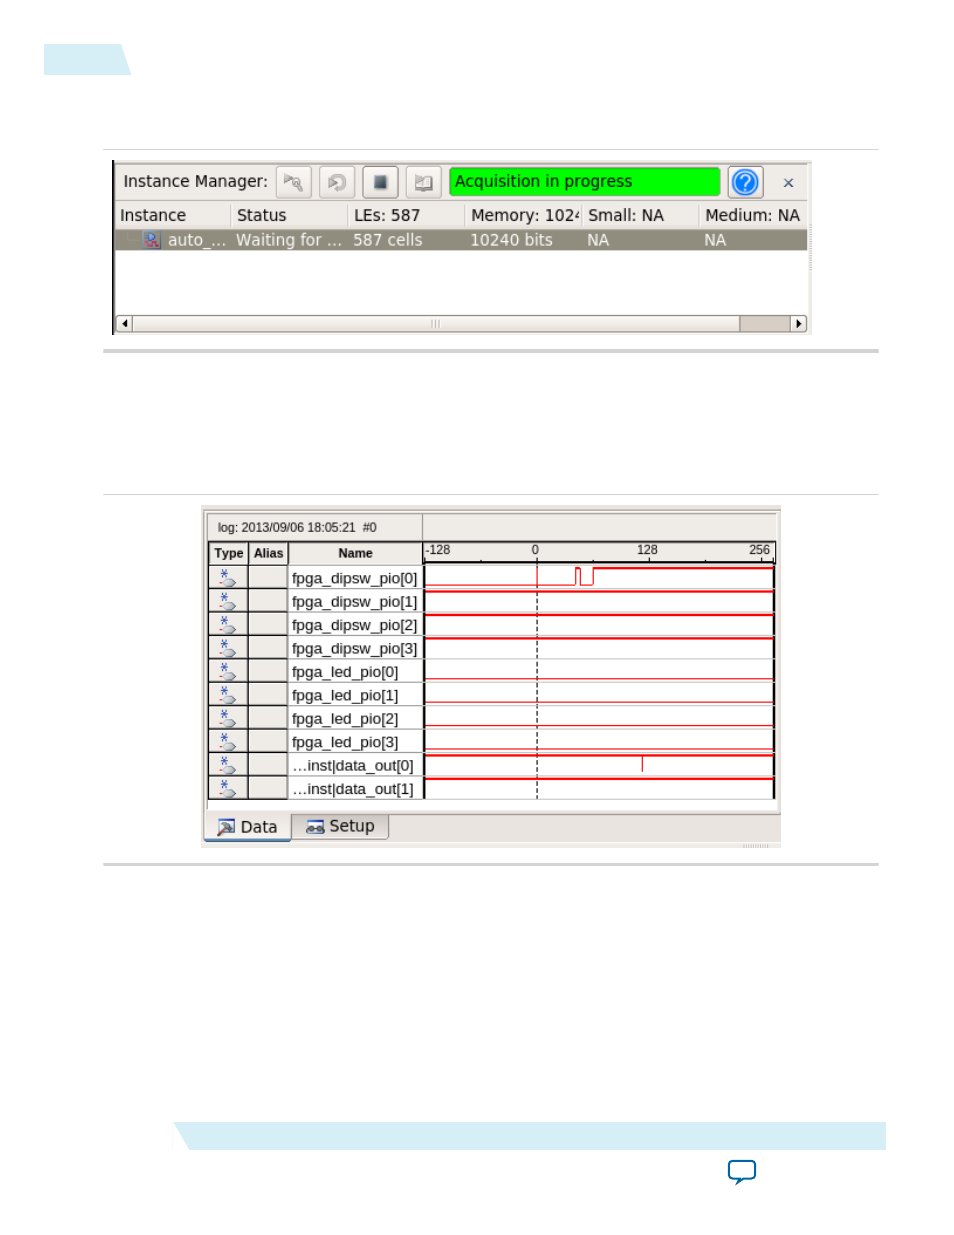
Note: On the Data tab, you will be able to see the change on the DIP switch signal.
Figure 4-83: DIP switch Toggled
11.Go back to the Eclipse debugger; you will notice the execution has stopped. When SignalTap II is
triggered, caused by a state change of the DIP switch, it sends the trigger to HPS, which in turn stops
the cores, as instructed.
Related Information
•
Cross-triggering Prerequisites
on page 4-96
For more information, refer to the Cross-triggering Prerequisites section in this document.
•
Enabling Cross-triggering on HPS
on page 4-98
For more information, refer to the Enabling Cross-triggering on HPS section in this document.
4-102
FPGA Triggering HPS Example
ug-1137
2014.12.15
Altera Corporation
Getting Started Guides