TabletKiosk Sahara Slate PC i575/i535 User Manual
Page 133
Chapter 06: Upgrading Your Sahara Slate PC
107
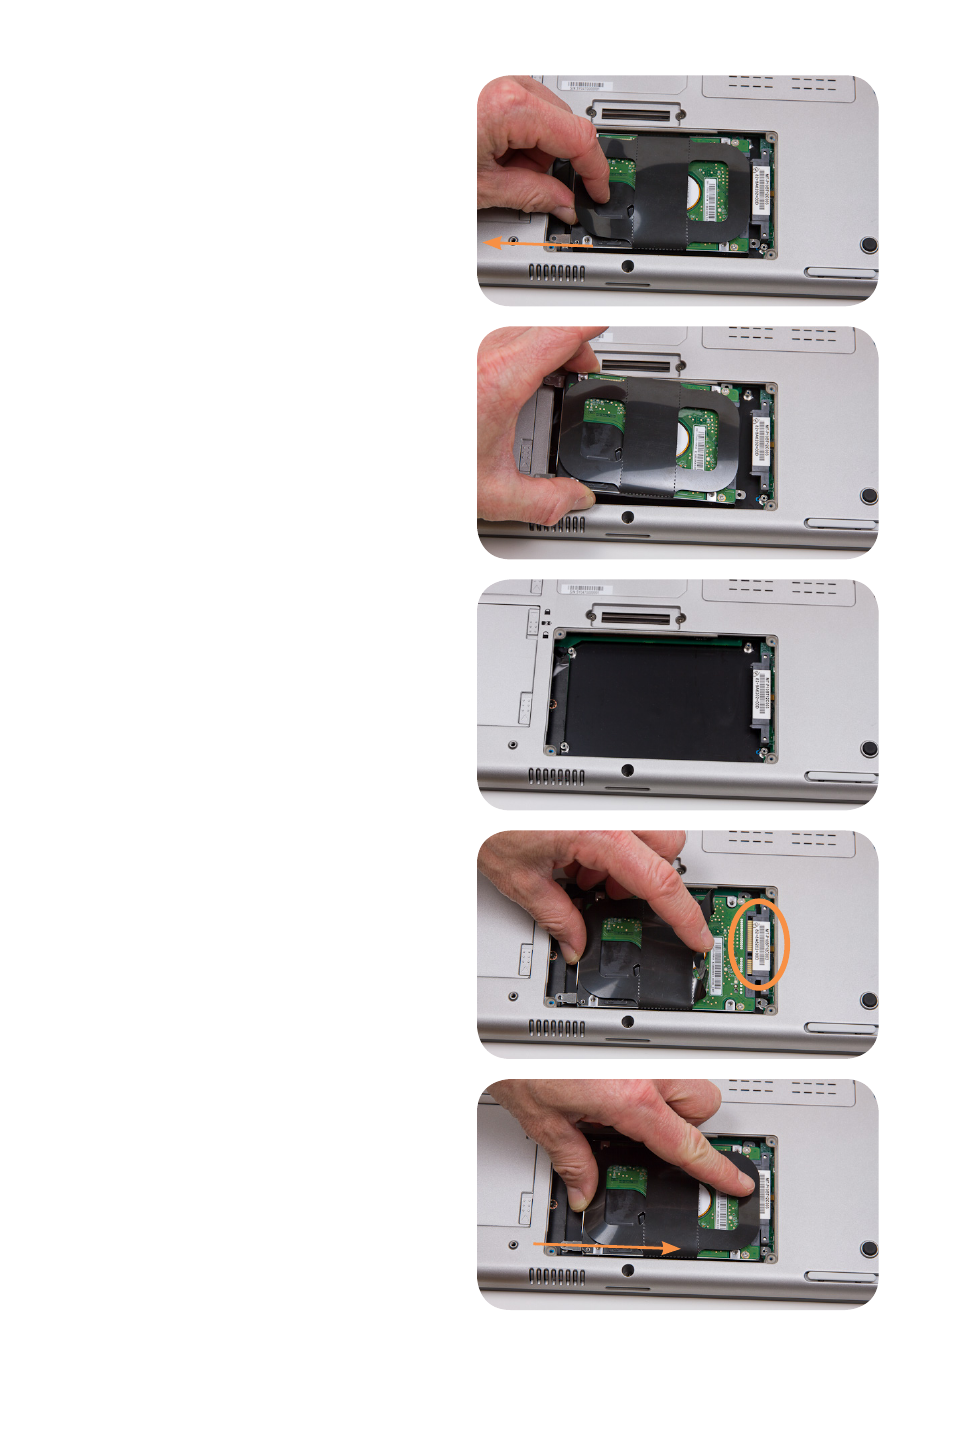
4. Take hold of the plastic
drive release strip and
gently pull the drive out
of its compartment as
shown in the illustration.
You might have to gently
move the drive slightly
side-to-side at first to
work it out of the SATA
and power ports.
5. Unscrew the existing
drive from its cage and
replace it with the new
drive. Once you have se-
cured the new drive into
the cage with the screws,
place it back into the
HDD/SSD compartment.
Be careful when aligning
the drive so the connec-
tors match up with the
SATA and power ports. If
you are properly aligned
with the compartment, it
should slide back in very
smoothly.
6. Slide the drive carefully
back into place.
7. Replace the four (4)screws
that secure the drive.
8. After the drive is securely
inserted, you can replace
the cover and secure it
with the four (4) Philips
head screws.