Creating a basic crawl, Creating a basic crawl -21 – Grass Valley Xstudio Vertigo Suite v.4.10 User Manual
Page 134
Xstudio User Manual
6-21
Working with scene objects
Creating a basic crawl
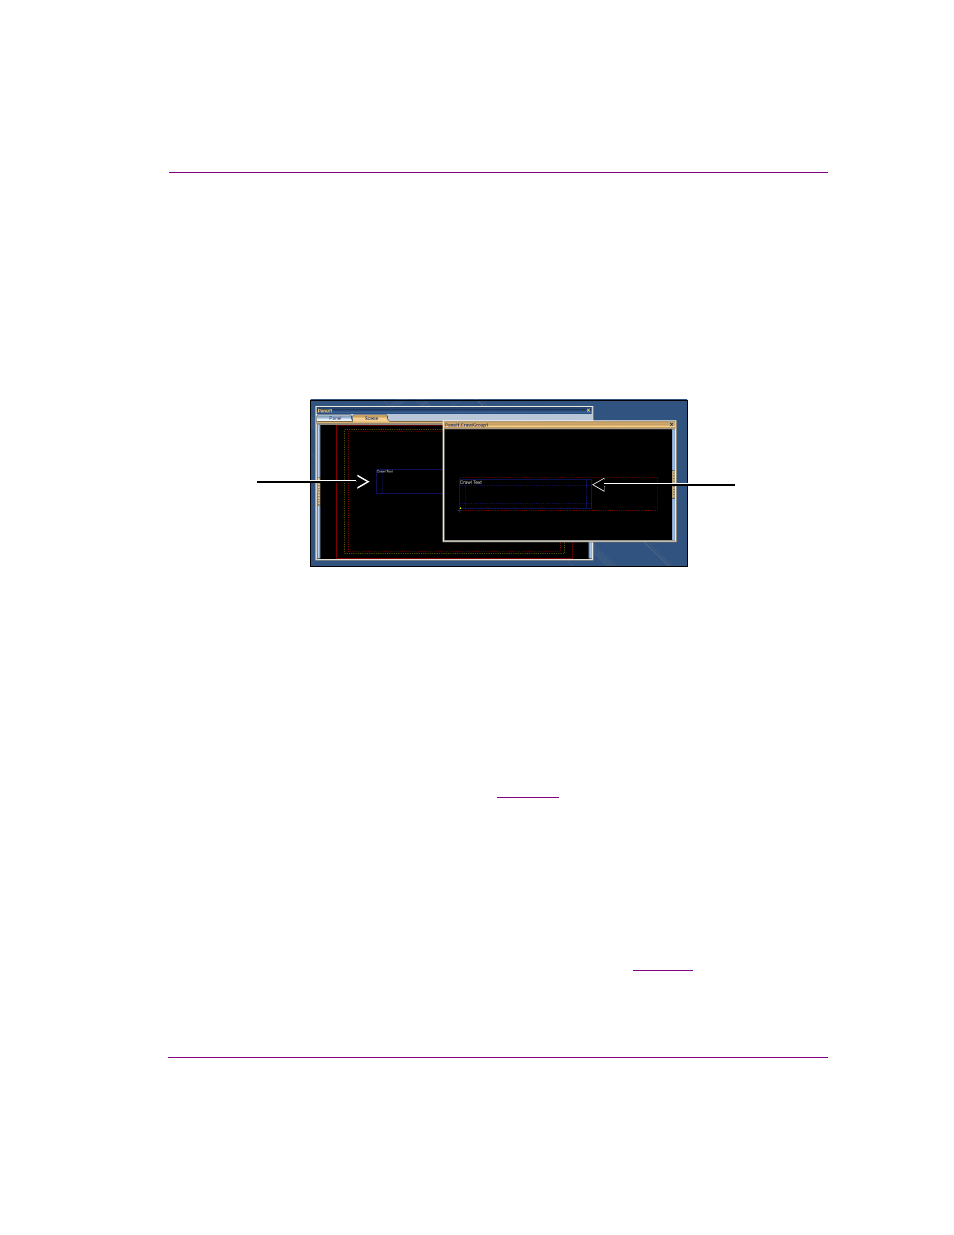
When a crawl primitive is added to the scene’s canvas, it can be positioned and resized just
like any other primitive. However, crawl (and rolls) primitives are unique in that they really
represent a group of objects (1 or more) that move together within the boundaries of the crawl.
By default, a crawl object contains a single Text2D object that contains the text “Crawl Text”.
Double-clicking the crawl object opens the crawl group, which is the work area in which you
can add other Text2D objects, images, cel animations, etc. Each object within the crawl
group can be configured individually using the object’s properties, as well as be linked to
control objects that can determine the object’s content and behavior.
Figure 6-3. The crawl group contains objects that will be displayed and move within the crawl object
To familiarize yourself with the components and behavior of a basic crawl, we suggest that
you perform the following task to create a simple crawl that repeats a static text.
To create and playout a basic crawl:
1.
With Xstudio actively connected to a playout device (i.e. Software CG), open a new
project (i.e. Panel + Scene) in Xstudio.
2.
On the scene side of a project, add a crawl primitive to the canvas and adjust it to the
desired size and position on the scene.
3.
Open Xstudio’s Properties Browser and view the crawl’s properties.
These properties determine the appearance and behavior of the crawl. Instructions for
setting these properties are provided on
. For the purposes of this example,
leave the crawl’s properties in there default state and ensure that the
C
RAWL
>A
UTO
S
TART
and C
RAWL
>R
EPEAT
properties are set to True.
4.
Switch to the control side of the project (i.e. Panel) and add a Text Box primitive to the canvas.
5.
Link the crawl’s Text2D object to the Text Box on the control side, so that text typed into
the text box appears in the crawl during playout.
a.
Open the Scene tree panel.
b.
Expand the C
RAWL
G
ROUP
object listed in the Scene category.
c.
Drag and drop the Text2D in the CrawlGroup object onto the Text box.
6.
Save and publish the project to the active playout device (see
).
7.
Switch to P
RODUCTION
mode and type some text in the text box.
The text displays on the output and repeatedly moves across the screen within the
boundaries defined by the crawl object.
Text2D object
within the
Crawl Group
Crawl object
on the scene