RISCO Group RISCO Application Server User Manual
Page 37
9 E-mail Template Editor
RISCO Cloud Web Administration Manual
33
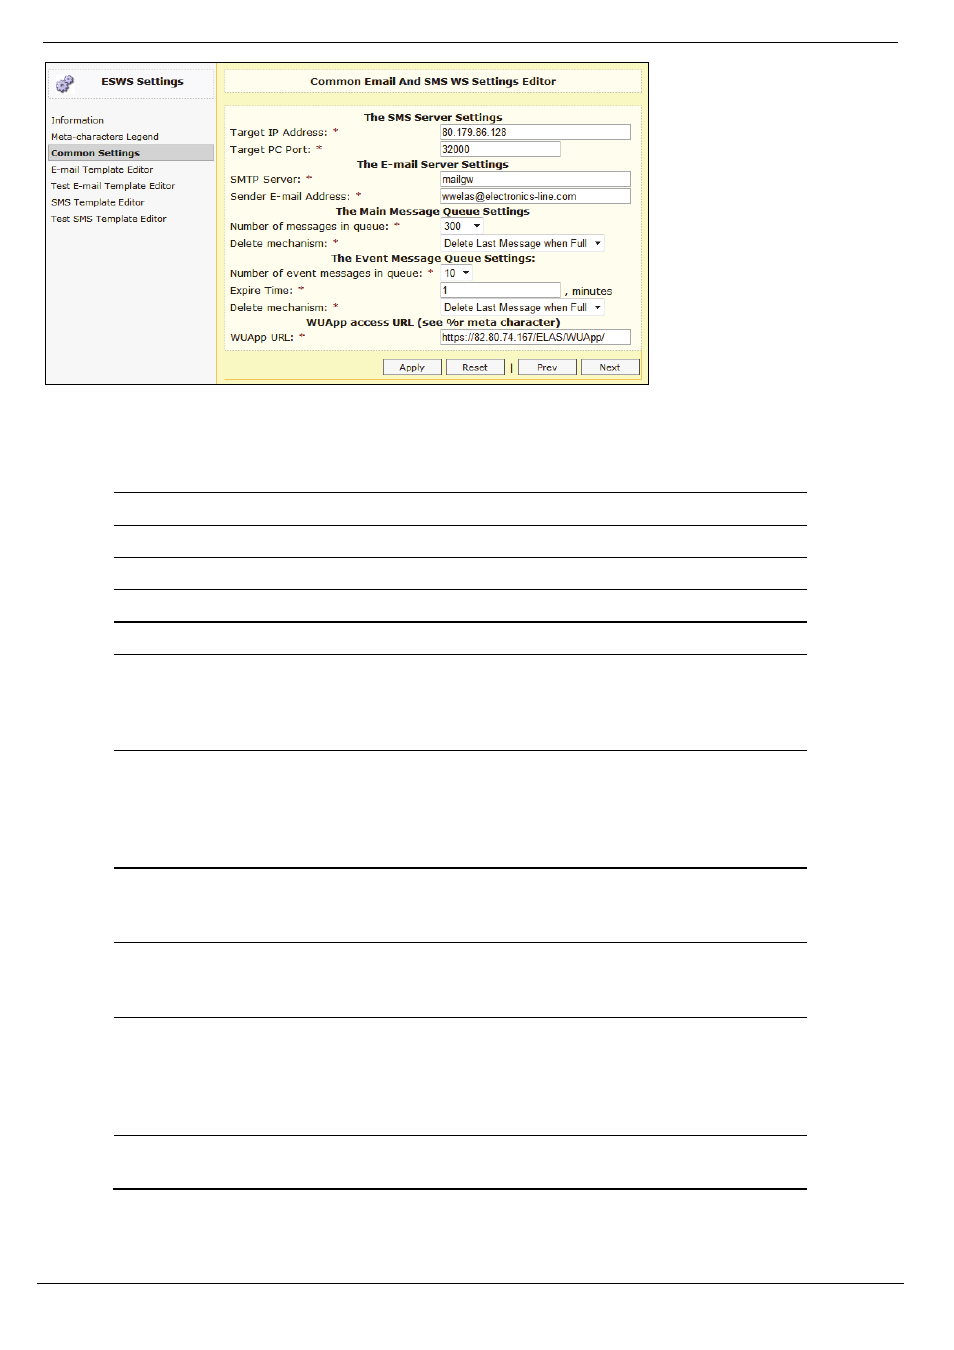
Figure 9-2: Common E-mail and SMS WS Settings Editor
5.
Enter the required settings in the fields provided.
Table 9-1: Common E-mail and SMS WS Settings Editor
Field
Description
Target IP Address
The IP address of the SMS Server.
Target PC Port
Port that the RISCO Cloud uses to reach the SMS server.
SMTP Server
The IP address of the SMTP server.
Sender E-mail Address
The address from which emails are sent to the Alert contacts.
Main Message: Number of
Messages in Queue
The maximum capacity of the queue. This is the maximum
number of email messages to all recipients. The possible values
that may be programmed for this field are: 50, 100, 200, 300,
400, 500, 750 and 1000.
Main Message: Delete
Mechanism
This option defines how RISCO Cloud handles a full queue.
Two options are available. If Delete Last Message When Full is
selected, a new message causes the oldest message to be
deleted (FIFO). If No Action is selected, new messages are
ignored when the queue is full.
Event Message: Number of
Messages in Queue
The maximum number of email messages to a single Alert
contact that may be entered in the queue. The possible values
that may be programmed for this field are: 5, 7, 10, 15 and 20.
Event Message: Expire Time The amount of time (in minutes) that a single message can
remain in the queue before it is deleted. The maximum value
that you can program for this field is 60 minutes.
Event Message: Delete
Mechanism
This option defines how RISCO Cloud handles a full queue for
a single alert contact. Two options are available. If Delete Last
Message When Full is selected, a new message causes the
oldest message to be deleted (FIFO). If No Action is selected,
new messages are ignored when the queue is full.
WUApp access URL:
WUApp URL:
The image event file link that is added to the SMS/e-mail that
is sent to the web user.
6.
Once you have configured the required settings, click Apply.
7.
Click Next to proceed.