Updating the software, 1 updating the pt-link ii controller – Orion System PT-Link II BACnet3 User Manual
Page 16
Zone
Zone
4. UPDATING THE SOFTWARE
PT-Link II BACnet3 Interface
16
4.1.1 Programming the PT-Link II with
BootLoader
The PT-Link II is equipped with the ability to update its software with
the use of a computer. You will need the following before you begin:
•
PT-Link II in need of an update (powered up,
no other connections necessary)
•
Computer running Microsoft Windows
TM
operating
system
•
Prism 2 software from www.orioncontrols.com
•
Latest version of PT-Link II software (e-mailed from our
tech support staff or downloaded from any of our websites)
and software sheet
•
USB Driver Setup.exe fi le from PT-Link II CD or
downloaded from any of our websites.
•
USB
cable
Follow these simple steps to update the PT-Link II:
1.) Turn on your computer and download the latest Prism 2 software
from www.orioncontrols.com.
2.) Either download the PT-Link II update fi le from http://techsupport.
wattmaster.com or save the fi le to your computer from the e-mail you
received from Tech Support. Record the path and name of the fi le for
later use. Also, print the software sheet provided for future reference.
3.) Run the USB Driver Setup.exe fi le (found on the PT-Link II CD or
downloaded from any of our websites) so that Prism can communicate
to the PT Link II. Unzip the fi le to the directory where you saved your
PT-Link II software.
4.) Plug the USB cable into the computer’s and PT-Link II’s USB
ports.
5.) A message will pop-up from the lower menu bar of Windows that
reads, “Found New Hardware.” Click on this message and follow the
instructions that appear to install the USB drivers.
6.) Open Prism 2 and Login with the User Name, admin and the Pass-
word, admin. If successful, “Administrator Access” will appear at the
lower right of the Prism program.
NOTE:
If using a Prism 2 version
prior to 4.0, the Login is fl ash. If successful, “Level 4 Access” will ap-
pear at the lower right of the Prism program.
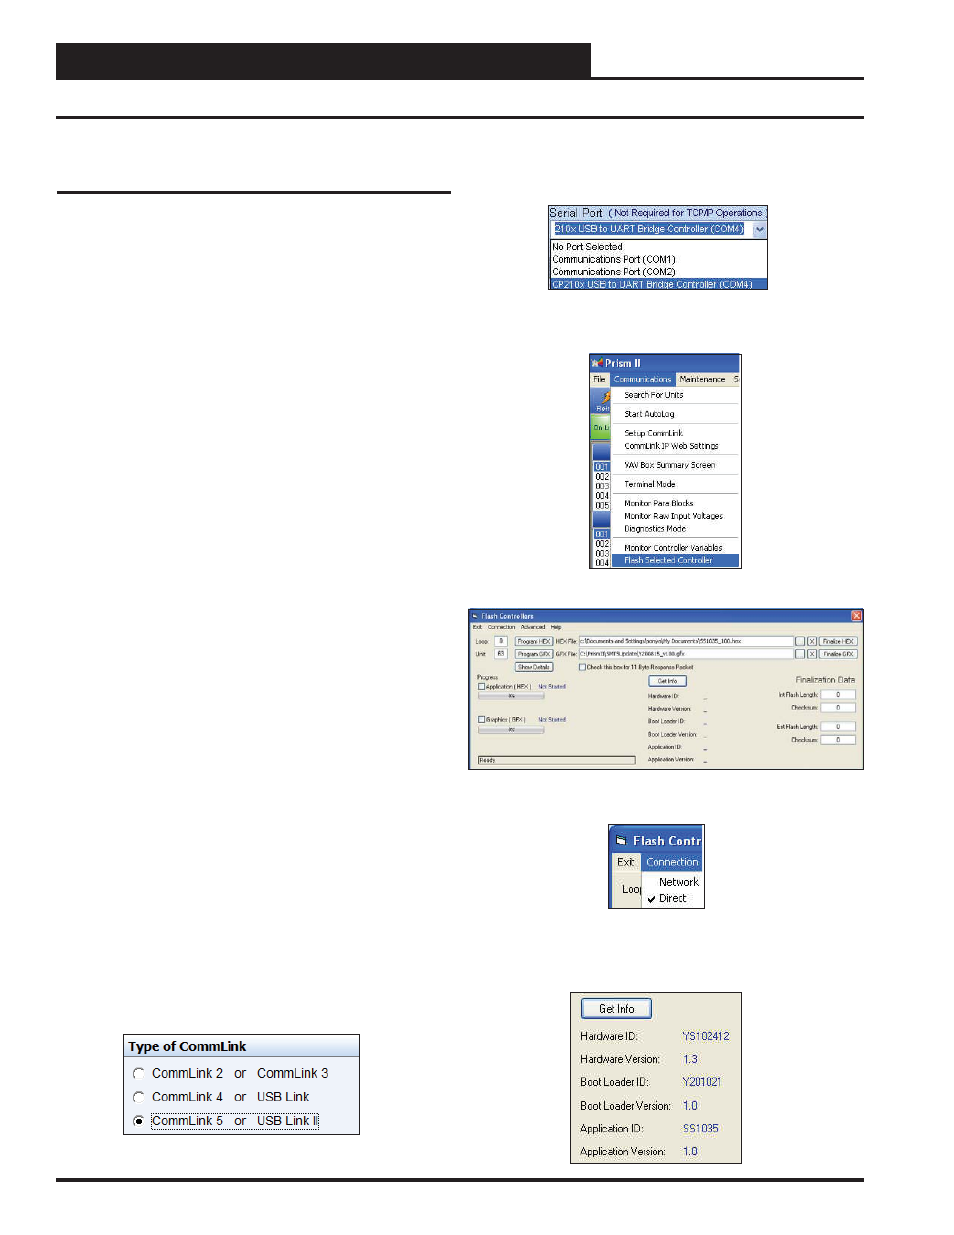
7.) Click on the
<Job-Site>
icon. The Job-Sites Window will ap-
pear. In the Type of CommLink Dialog Box, select “CommLink 5.”
8.) In the Job-Sites Window, from the Serial Port drop down list, select
the correct COM port. If you don’t know the COM port number or if
the number is 10 or higher, follow the directions on pages 18 and 19.
9.) From Prism 2’s Communications tab, select “Flash Selected
Controller.”
10.) The Flash Controller Window will appear.
11.) From the Flash Controller Window’s Connection tab, select
“Direct”. Keep the Flash Controller Window open.
12.) Cycle power to the PT-Link II and within 5 seconds, click the
<Get Info>
button in the Flash Controller Window. The PT-Link II in-
formation will now appear in the window under the
<Get Info>
button.
4.1 Updating the PT-Link II Controller