Frame relay service details screen, Frame relay service details screen -23 – Verilink WANsuite 7205 (34-00317.B) Product Manual User Manual
Page 53
W e b S e r v e r I n t e r f a c e
3-23
Two user-activated buttons, “Clear History” and “Refresh,” are also included
on the 24 Hour and 30 Day History screens.
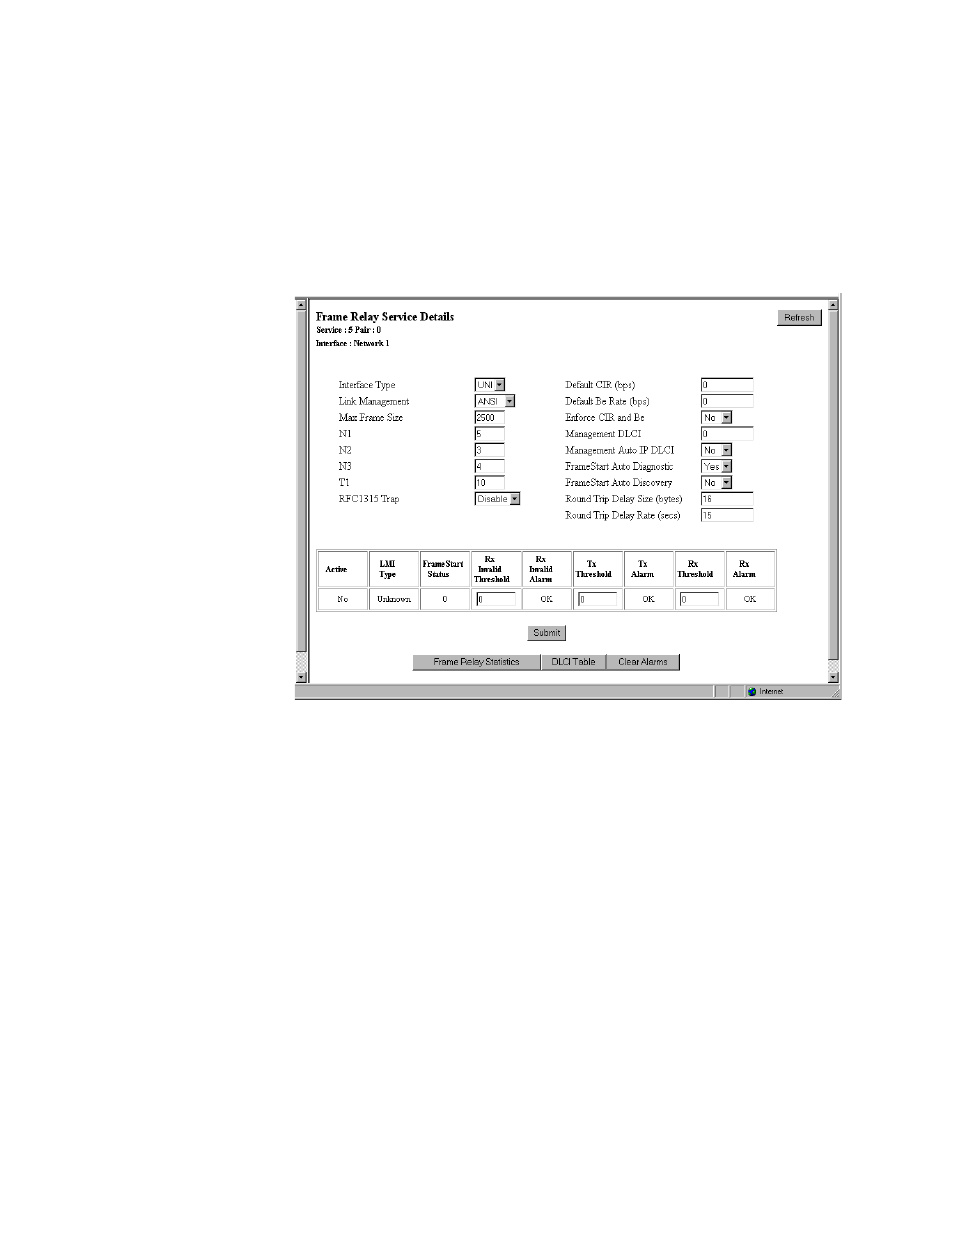
Frame Relay Service Details Screen
Click on “Frame Relay” under the “Type” column on the Services screen to
access the Frame Relay Service Details screen (Figure 3.19). This screen lets
you access the configuration parameters described in the paragraphs below.
Figure 3.19
Frame Relay Service Details Screen
Interface Type
If this service is connected to a Frame Relay network, the Interface Type
should be set to “UNI” because it is the user side of a user-to-Network
interface. If it is connected to a FRAD/router, the Interface Type should be set
to “NI” because it is the network side of a user-to-Network interface. If it is
connected to an equipment set for Network-to-Network interface, the Interface
Type should be set to “NNI.”
Values: UNI, NI, NNI
Default: UNI if interface is Network, NI if interface is Serial
Link Management
Set this parameter to the link management used by the equipment connected
to it. If set to “Auto,” the unit will learn the link management type and
display it on the status portion of this screen.
Once it discovers the link management type, set the unit to the discovered
value so that subsequent unit or network re-initialization will be faster.
Values: Auto, ANSI, CCITT, LMI, None
Default: ANSI
Max Frame Size
If Auto Diagnostic is set to “Yes,” the unit will discard received frames that
are larger than the maximum frame size. If Auto Diagnostic is set to “No,”