Remove sensors, View errors – Wavetronix Command Collector (CMD-DCx) - User Guide User Manual
Page 39
38
CHAPTER 4 • SENSOR TOOLBAR
Remove Sensors
The Remove Sensors button removes all selected sensors from Collector. Follow the steps
below to remove a sensor:
1 Checkmark the sensor(s) to be removed.
2 Click the Remove Sensors button.
3 When a confirmation message appears, click OK. The screen will refresh and the de-
leted sensor(s) will be removed from Collector.
Collector will not attempt to communicate or collect data from a removed sensor; however,
the sensor configuration information and data collected from a sensor prior to its removal
will still be available.
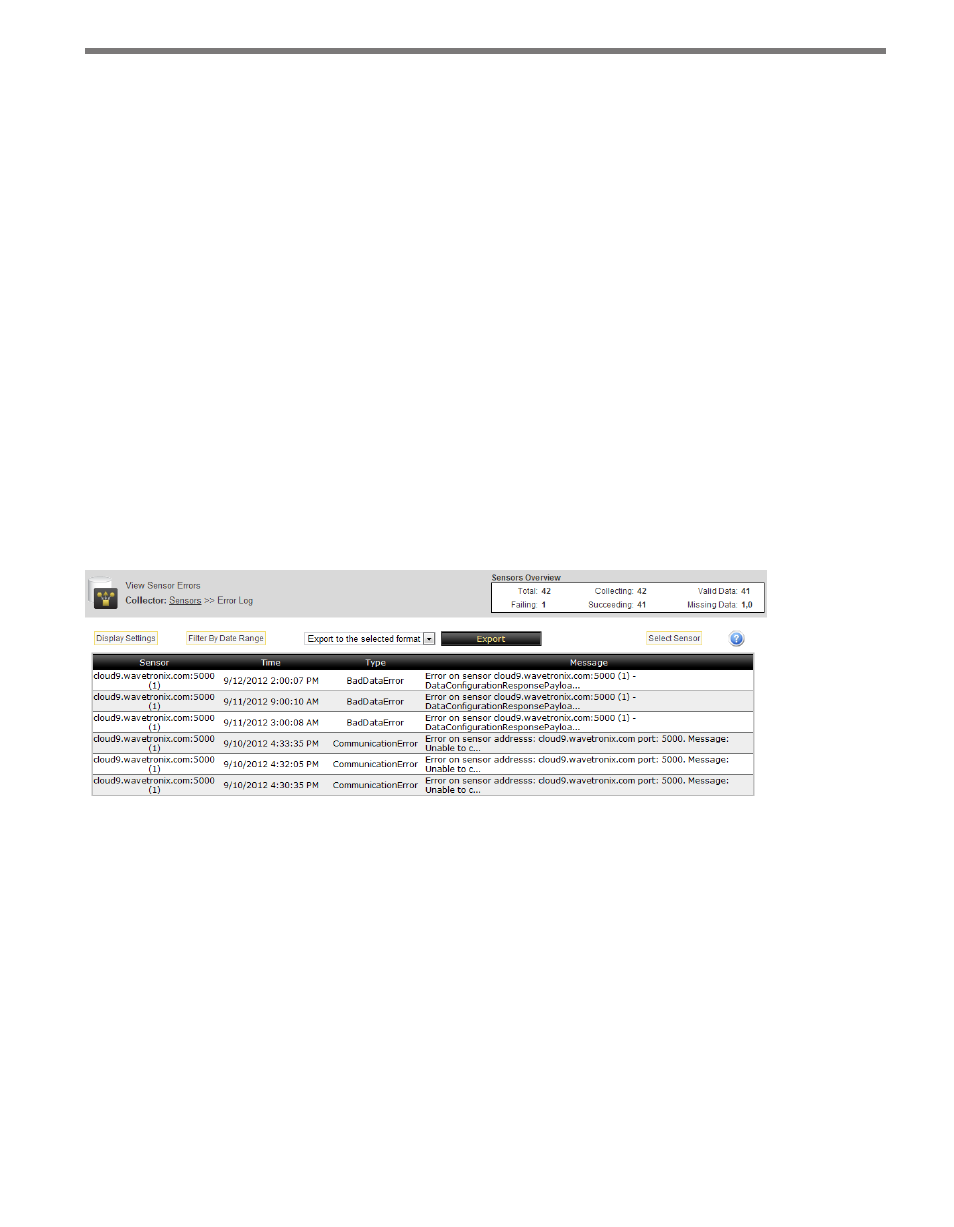
View Errors
The Errors column in the sensor list displays which sensors are currently experiencing er-
rors. To view the specific errors from a sensor, select the sensor in the list and click the View
Errors button. The Sensor Error Log will appear, displaying the errors from the selected
sensor (see Figure 4.7).
Figure 4.7 – Sensor Error Log
Each row in the log represents an error that occurred at a time when Collector attempted
to communicate with the sensor. The sensor error table shows all errors initially sorted by
sensor and timestamp, with the most recent errors first. Each error row contains the follow-
ing four data columns:
˽
Sensor – Defaults to the IP/Port for the sensor as identification, but can be changed to
other sensor attributes such as location or custom ID.
˽
Time – Shows the date and time the errors were recorded by the sensor driver.
˽
Type – Shows the classification for the error and will be marked as Information, Warn-
ing or a specific type of error such as Communication or IO.
˽
Message – Contains the beginning of each error message.
As with other tables in Collector, the sensor error table can be sorted by clicking on any col-