3 ipsec configuration example, Tunnel configuration – Westermo MRD-3x0 User Manual
Page 130
130
6623-3201
6.2.3 IPsec Configuration Example
The following example demonstrates how to add an IPsec
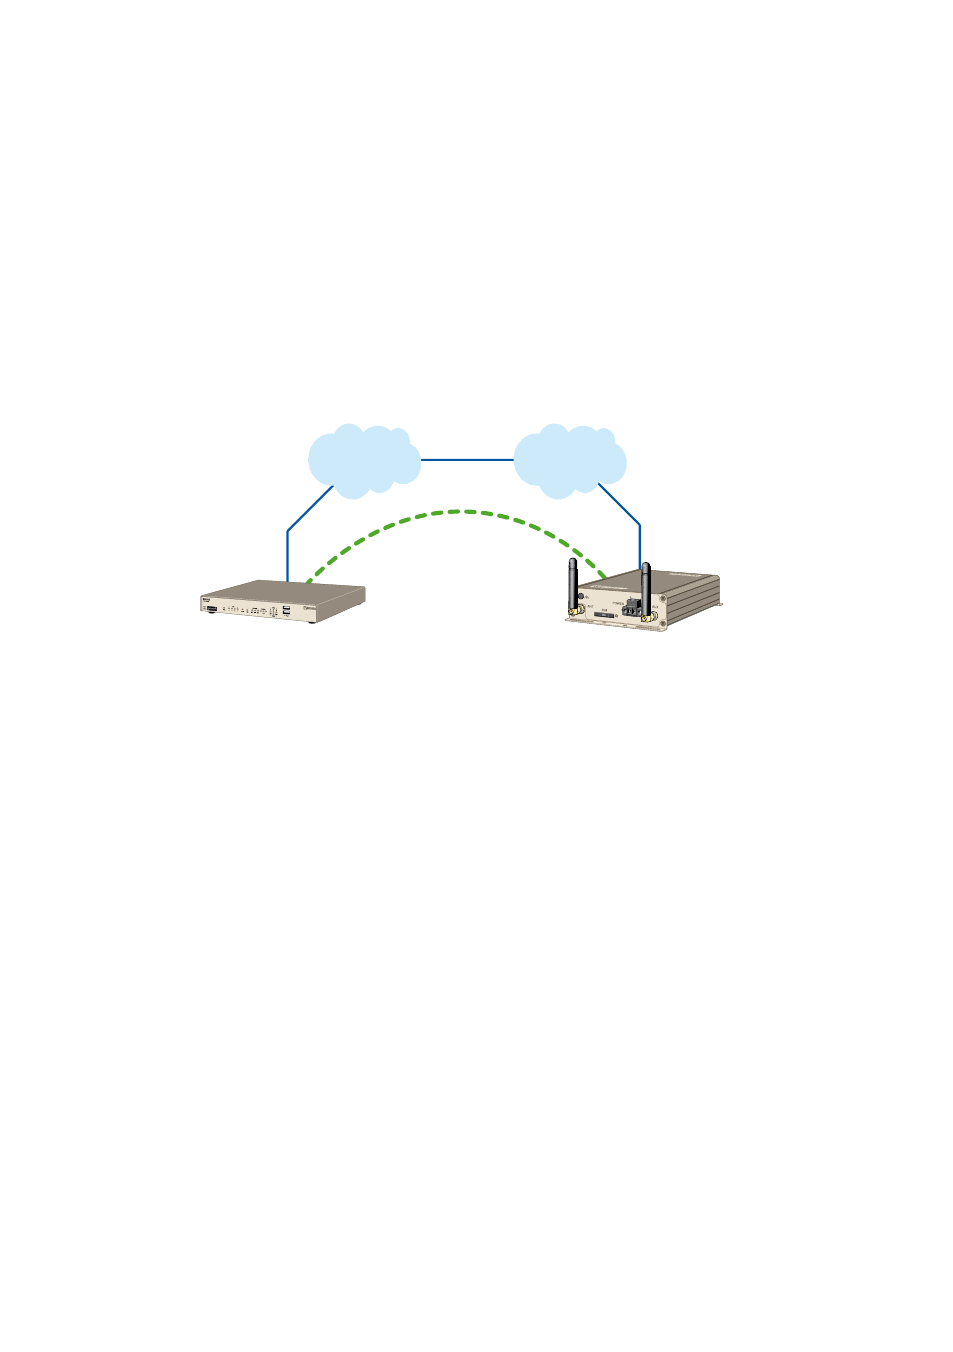
tunnel to the MRD-3xx, Figure 94 illustrates the connection
which will be created in the example. The MRD-3xx unit is
configured for a standard Internet connection, this means that
the IP address assigned to it will be dynamic and private. The
example assumes that the router has been configured, has a
static IP address and is directly accessible from the Internet.
The IPsec tunnel will be terminated as a virtual host on the
MRD-3xx with IP address 11.22.33.44 and will be terminated
on a LAN subnet at the router with address 192.168.2.0/24
Internet
3G Network
IPSec VPN
tunnel
MRD-3XX modem
Dynamic and private
IP address
Viritual Host
11.22.33.44
Router
Static IP address
123.123.123.123
LAN Subnet
192.168.2.0/24
Figure 94: IPsec configuration example network.
Tunnel Configuration
To start select the IPsec main page, by first clicking VPN on
the main menu and then IPsec on the sub-menu, then click
the Add new tunnel button. The first page of three IPsec tunnel
configuration pages will be displayed, as shown in Figure 95.
This page is used to configure the IPsec tunnel, the tunnel will
be named Test, it will be enabled and the local interface set to
the wireless port. The remote host address is 123.123.123.123
and the operating mode is Tunnel mode. As the wireless IP
address is dynamic and private it is not accessible from the
Internet and so the MRD-3xx is required to initiate the tun-
nel. The re-keying options are left at the default values and the
dead peer detection delay and timeout values are set to 0, this
disables dead peer detection.