Daktronics AB-1600-1.5,2.5 User Manual
Page 51
Maintenance & Troubleshooting
4-9
2. After removing the lens/reflector assembly from the display, remove the lampbank from the
assembly. Refer to Lampbanks in Section 4.3 for instructions on removing the lampbank.
3. Replace the necessary lamps. Use the lens/lamp extractor if the lamps are hot. Use only
Daktronics-approved lamps of the same wattage.
4. Remount the lampbank to the back of the lens/reflector assembly as explained in Lampbanks
in Section 4.3.
5. Insert the lens/reflector assembly back into the display cabinet as explained in Lens/Reflector
Assemblies in Section 4.3.
Complete the following steps to access and service lamps by removing a lens.
1. Remove the necessary lenses as explained in
Lens/Reflector Assemblies in Section 4.3.
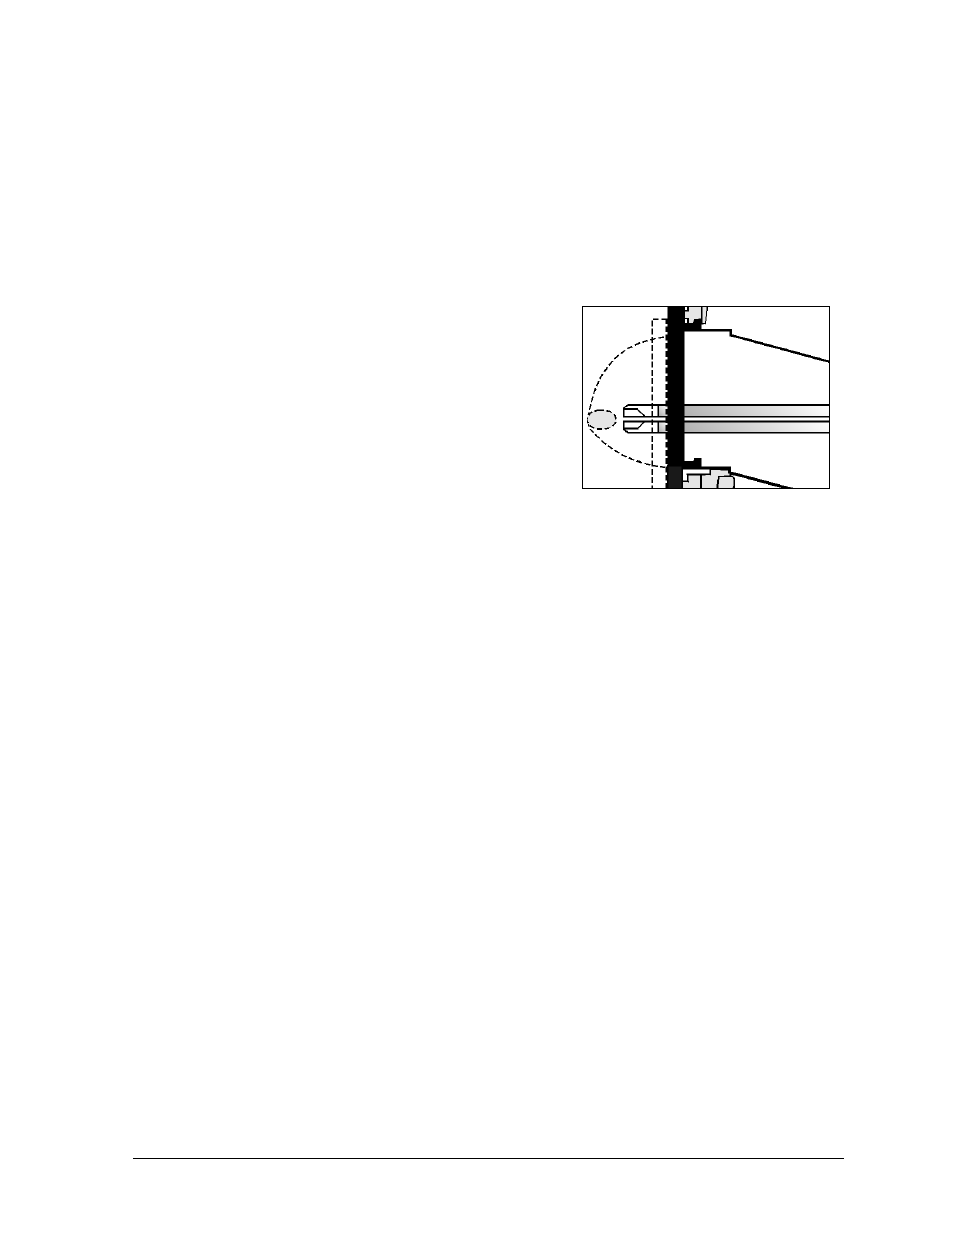
2. As illustrated in Figure 49, remove the bad lamps
with the lens/lamp extractor tool found in the tool kit.
3. Replace the necessary lamps. Use the lens/lamp
extractor if the lamps are hot. Use only Daktronics-
approved lamps of the same wattage.
4. Replace the lenses as explained in Lenses in Section
4.3.
Lens/Reflector Assemblies
The lens/reflector assembly is an eight pixel by eight pixel unit consisting of a frame on which
louvers, lenses and reflectors are mounted. Each lens/reflector assembly can be easily removed
from the display for servicing. If a lens/reflector ever becomes damaged, refer to Section 4.15 for
a replacement part number and to Section 4.16 for exchange/replacement information. An 8x16
module consists of two side-by-side lens/reflector assemblies and the lampbanks (four in all) on
the back.
Figure 49: Lamp Removal