Daktronics AB-1600-1.5,2.5 User Manual
Page 64
4-22
Maintenance & Troubleshooting
Weather Stripping Maintenance
Often, difficulty in sliding a lens/reflector assembly back into the cabinet can be attributed to worn
or deteriorating weather stripping. If this is the case, the adhesive on the underside of the tape has
likely failed, causing the weather stripping to buckle when pushed into the cabinet.
Weather stripping is essential for keeping moisture out of the display and for maintaining proper
display ventilation. Replace bad weather stripping immediately.
Take note of the following before attempting to replace the pile weather stripping on a
lens/reflector assembly:
•
After peeling away the old weather stripping, clean the lens/reflector assembly with an
adhesive remover so the new weather stripping will adhere better.
•
Precut the necessary amount of weather stripping needed to wrap up one side, across the top
and down the other side of the lens/reflector assembly (plus a little extra).
•
Only peel enough protective paper off the weather stripping to do one side at a time. After
removing the protective tape, do not let anything, especially hands, touch the adhesive side of
the weather stripping
•
During the entire application process, keep the weather stripping taut. Even the slightest
buckle or wrinkle will cause problems when trying to put the assembly back into the display
cabinet.
•
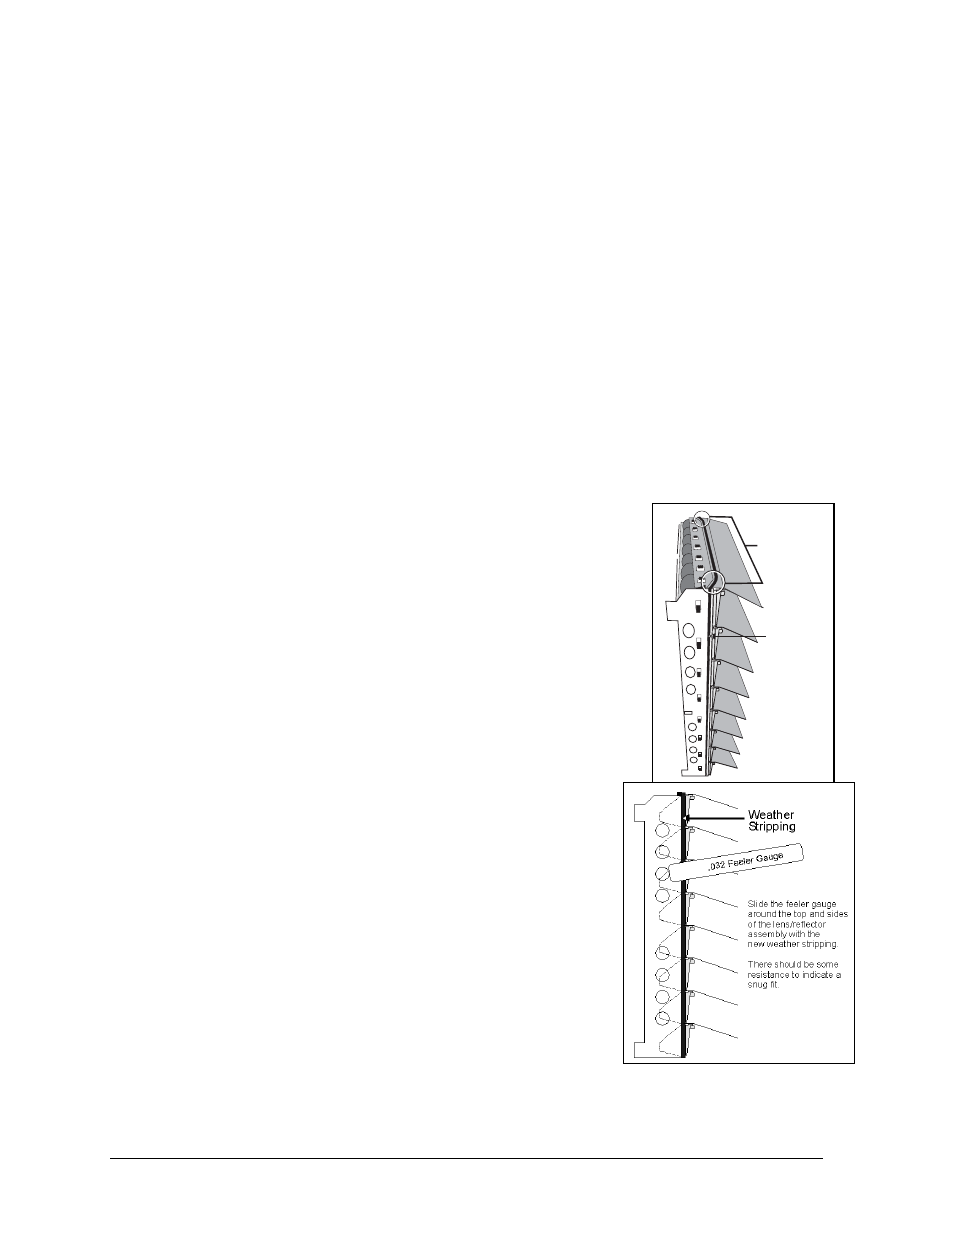
Take note of the critical areas shown in Figure 63. Stretch the
weather stripping tighter in these areas to prevent buckling.
Having read the previously listed notes, complete the following steps to
replace bad weather stripping:
1. Starting at the bottom of one side, apply the weather stripping up
the side of the assembly as close to the front edge of the metal side
plate as possible.
2. Continue the weather stripping onto the top of the assembly. Pull
the weather stripping firmly to produce a tight corner and then,
while still pulling it tightly, apply it around the raised curve on the
top of the louver. Stay on the raised portion of the louver, but stay
as close as possible to the ledge.
3. Apply the weather stripping across the top of the assembly
(across the top of the louver) and again pull it firmly to follow
the raised curve of the louver and to wrap it over the corner of
the assembly.
4. Continue the application down the side of the metal side plate
as done in Step 1.
5. Clip the weather stripping flush at the bottom of both sides of
the assembly.
6. After putting the lens/reflector assembly back into the cabinet,
check the spacing between this assembly and the assemblies
and/or display cabinet around it with the .032-inch feeler gauge
found in the tool kit. The feeler gauge should not move freely.
There should be some resistance along the entire length of all
sides of the assembly. Refer to Figure 64.
Louver Maintenance
The louvers play an important role in making this small matrix display an effective
communication device. The louvers cast a dark shadow on the display face, which contrasts
Critical Areas
Pile Weather
Stripping
Figure 63: Weather
Stripping Application
Figure 64: Checking Weather
Stripping