Setup, Menu basics, Navigation buttons – ROTEL RSP-1098 User Manual
Page 31: System status
31
English
SETUP
The RSP-1098 features two types of informa-
tion displays to help operate the system. The
first consists of simple status displays that appear
on the TV screen and/or front panel TFT screen
whenever primary settings (Volume, Input, etc.)
are changed. These status displays are self-
explanatory.
A more comprehensive ON-SCREEN DISPLAY
(OSD) menu system is available at any time
by pressing the MENU/OSD button on the
remote or the front panel MENU button. These
OSD menus guide you through the configu-
ration and setup of the RSP-1098. In general,
the settings made in the configuration process
are memorized as default settings and need
not be made again for normal operation of
the unit.
The OSD menus can be displayed on the TV
monitor, the front panel TFT screen, or both.
This selection can be changed using the DIS-
PLAY OPTIONS menu later in this section.
NOTE
: We recommend displaying the OSD
menus on the TFT screen for system setup.
The OSD menus will be available for display
on the TFT screen, regardless of source input
and video output connections and whether
or not a source is actually playing.
The OSD menus can be configured to display
several different languages. The default English
version of all the menus is shown at the front
of this manual. If your language is available,
those menus will be shown in the following
instructions. If you would like to change from
the default English language before proceed-
ing, go to the instructions for the OTHER OP-
TIONS menu later in this manual. From this
menu, you can change the language display.
Menu Basics
Navigation Buttons
The following remote control buttons are used
to navigate the OSD menu system:
S
R
C
M
-
+
UP
DWN
ENT
GUIDE
MENU
PREV CH
OSD
SEARCH +
SEARCH –
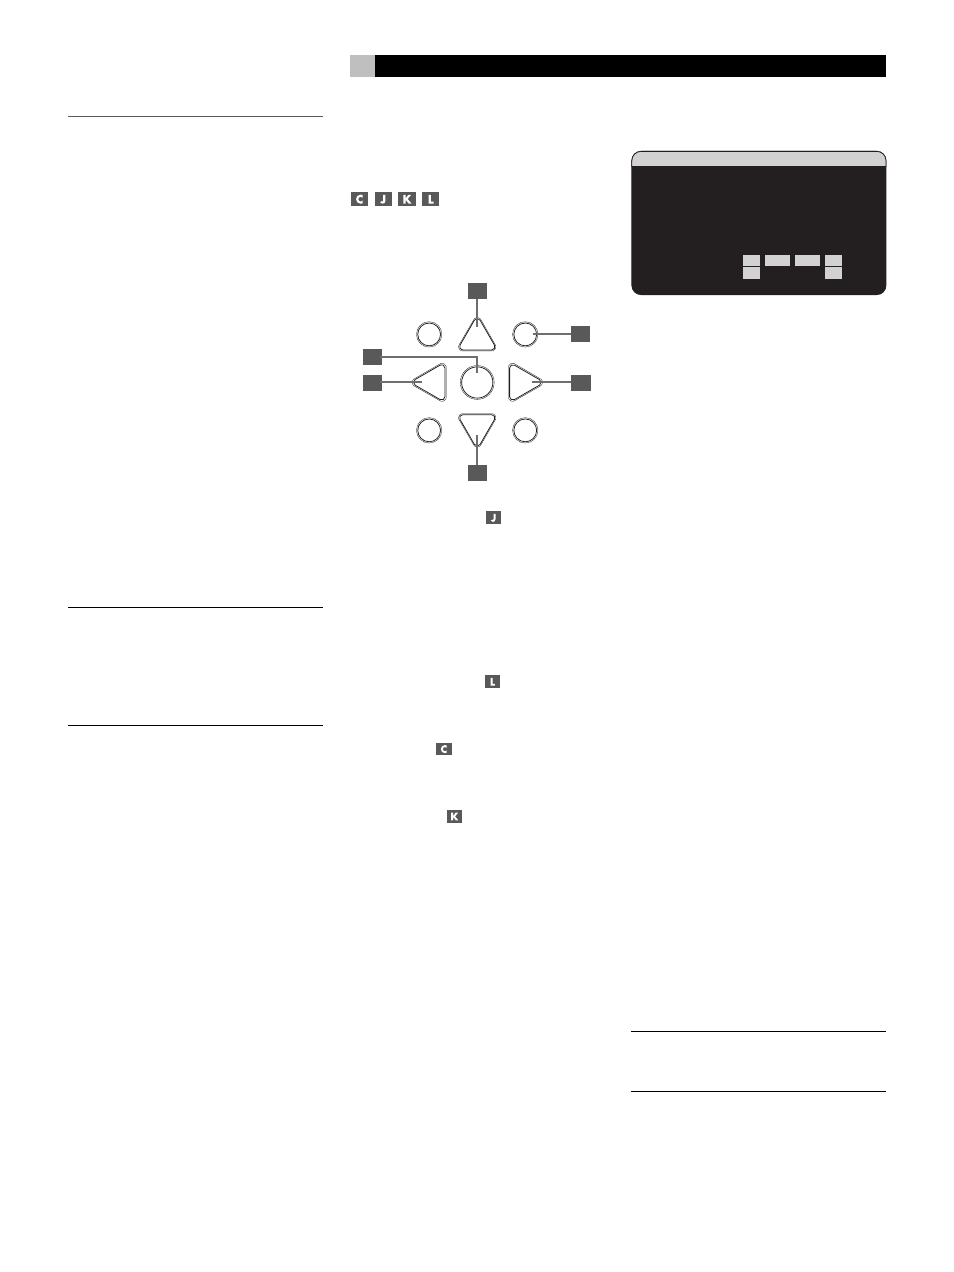
C
L
J
L
K
C
MENU/OSD button
: Press to display
the SYSTEM STATUS screen. From the SYSTEM
STATUS screen, press the ENTER button to dis-
play the MAIN MENU screen which has links
to all other menus. If a menu is already vis-
ible, push this button to cancel the display. The
MENU button on the front panel provides the
same function.
DOWN/UP Buttons
: Press to move up
and down in the lists of menu items that ap-
pear on the OSD screens.
+/– Buttons
: Press to change the cur-
rent settings for a selected menu item on OSD
screens.
ENTER Button
: From the SYSTEM STA-
TUS screen, press ENTER to display the MAIN
MENU screen. From any other OSD screen,
press ENTER to confirm a setting and return
to the MAIN menu.
System Status
SYSTEM STATUS
LISTEN:Tuner
VID INPUT:Video 1
RECORD:Source
MODE:Dolby Digital
INPUT:Coaxial 2
VOLUME:65
ZONE 2:Off
SPEAKERS:
FR CNT SUB FL
SR
CB1 CB2
SL
The SYSTEM STATUS menu provides a snap-
shot of the current system settings and a start-
ing point for reaching all other screens and
menus. This screen appears when you press
the remote MENU/OSD or front panel MENU
button and displays the following information:
LISTEN: the input source selected for listen-
ing.
VID INPUT: the video source selected for
viewing. Can be VIDEO 1–5 or OFF (no video)
as selected on the INPUT SETUP menu. Typi-
cally, the video source matches the audio from
listening source; however a different video input
can be selected.
RECORD: the source selected for recording
from the VIDEO and AUDIO outputs.
MODE: the current surround sound mode.
INPUT: the input selected for the current source:
Optical Digital, Coaxial Digital, Analog, etc.
VOLUME: the current volume setting.
ZONE: the current status of ZONE 2, ON or
OFF.
SPEAKERS: highlights the speakers that are
currently configured for the system (front right,
center, subwoofer, front left, surround left, center
back 1, center back 2, and surround right)
No changes can be made using this screen;
it only provides information. To go to the rest
of the menus, press the ENTER button to go
to the MAIN menu. Press the MENU/OSD
button on the remote to cancel the display and
return to normal operation.
NOTE
: The SYSTEM STATUS screen appears
for five seconds when the unit is turned on
and automatically turns off.