Configuring dhcp relay – ATL Telecom AM30 User Manual
Page 59
ATL Telecom User Guide
AM30
5
9
Configuring DHCP Relay
Some ISPs perform the DHCP server function for their customers’ home/small office
networks. In this case, you can configure the device as a DHCP relay agent. When a
computer on your network requests Internet access, the ROUTER contacts your ISP to
obtain an IP address (and other information), and then forwards that information to the
computer. Follow these instructions to configure DHCP relay:
First, you must configure your PCs to accept DHCP information assigned by a DHCP server:
1.
Open the Windows Control Panel and display the computer's
Networking properties. Configure the TCP/IP properties to
"Obtain an IP address automatically" (the actual text may
vary depending on your operating system). For detailed
instructions, see the Quick Start chapter, “Part 2 —
Configuring Your Computers.”
Next, you specify the IP address of the DHCP server and select the interfaces on your
network that will be using the relay service.
2.
Log into the Configuration Manager, click the LAN tab, and
then click
DHCP Relay
in the task bar.
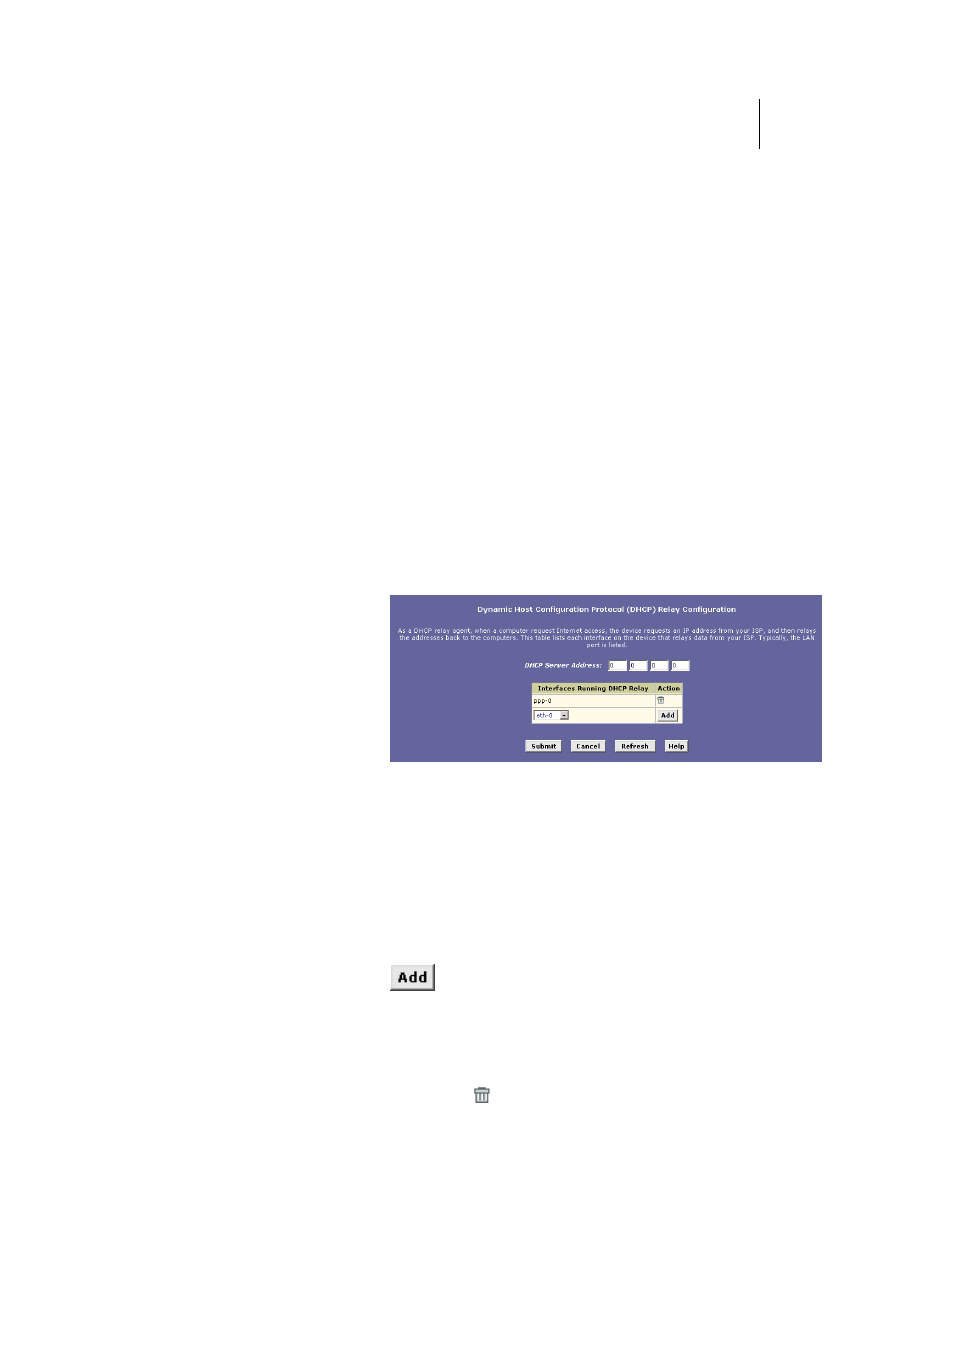
The DHCP Relay Configuration page displays:
Figure 26. DHCP Relay Configuration Page
3.
In the DHCP Server Address fields, type the IP address of
your ISP’s DHCP server.
If you do not have this number, it is not essential to enter
it here. Requests for IP information from your LAN will be
passed to the default gateway, which should route the
request appropriately.
4.
Select your WAN interface from the drop-down list and click
.
Your WAN interface may be named ppp-0, eoa-0, or
ipoa-0. Contact your ISP if you are unsure which type of
WAN interface you use.
(Note that you can also delete an interface from the table
by clicking in the right column.)