Switching the video automatically (auto switching), Operation modes for auto switching, Turning the auto switching function on/off – Roland V-8HD HDMI Video Switcher and UVC-01 USB Capture Device Kit User Manual
Page 14: Specifying the operation mode, Video operations
14
Video Operations
Switching the Video Automatically (Auto Switching)
The video of INPUT 1–8 or of preset memories can be switched automatically (the auto switching function). You can make operation easier by
letting the video switch automatically.
Operation modes for auto switching
Auto switching provides three operation modes that you
can select as appropriate for your situation: “input scan”,
“preset memory scan”, and “BPM sync
”.
Switching at a specified interval (Input scan)
This automatically switches the INPUT 1–8 video when a specified
length of time elapses.
You can change the duration that each video is shown, and also
switch randomly between videos.
This is convenient when you want to switch between video signals
of multiple cameras, for example when live-streaming a singer-
instrumentalist.
* Channels that have no video input are skipped.
Switching preset memories (Preset memory scan)
This automatically switches between preset memories 1–8.
The video and audio are switched according to the settings that are
saved in each preset memory.
* Preset memories in which no settings have been saved are skipped.
Switching in synchronization with the BPM (BPM sync)
This automatically switches the video at specified BPM intervals.
This lets you create video transitions that are synchronized with
the music, for example when live-streaming a DJ performance or a
musical performance.
Turning the auto switching function on/off
1 .
Press the [AUTO SWITCHING] button to turn the
auto switching function on (lit).
Indicator
Explanation
Green
Input scan
Blue
Preset memory scan
Red
BPM sync
2 .
To turn the auto switching function off, press the
[AUTO SWITCHING] button once again.
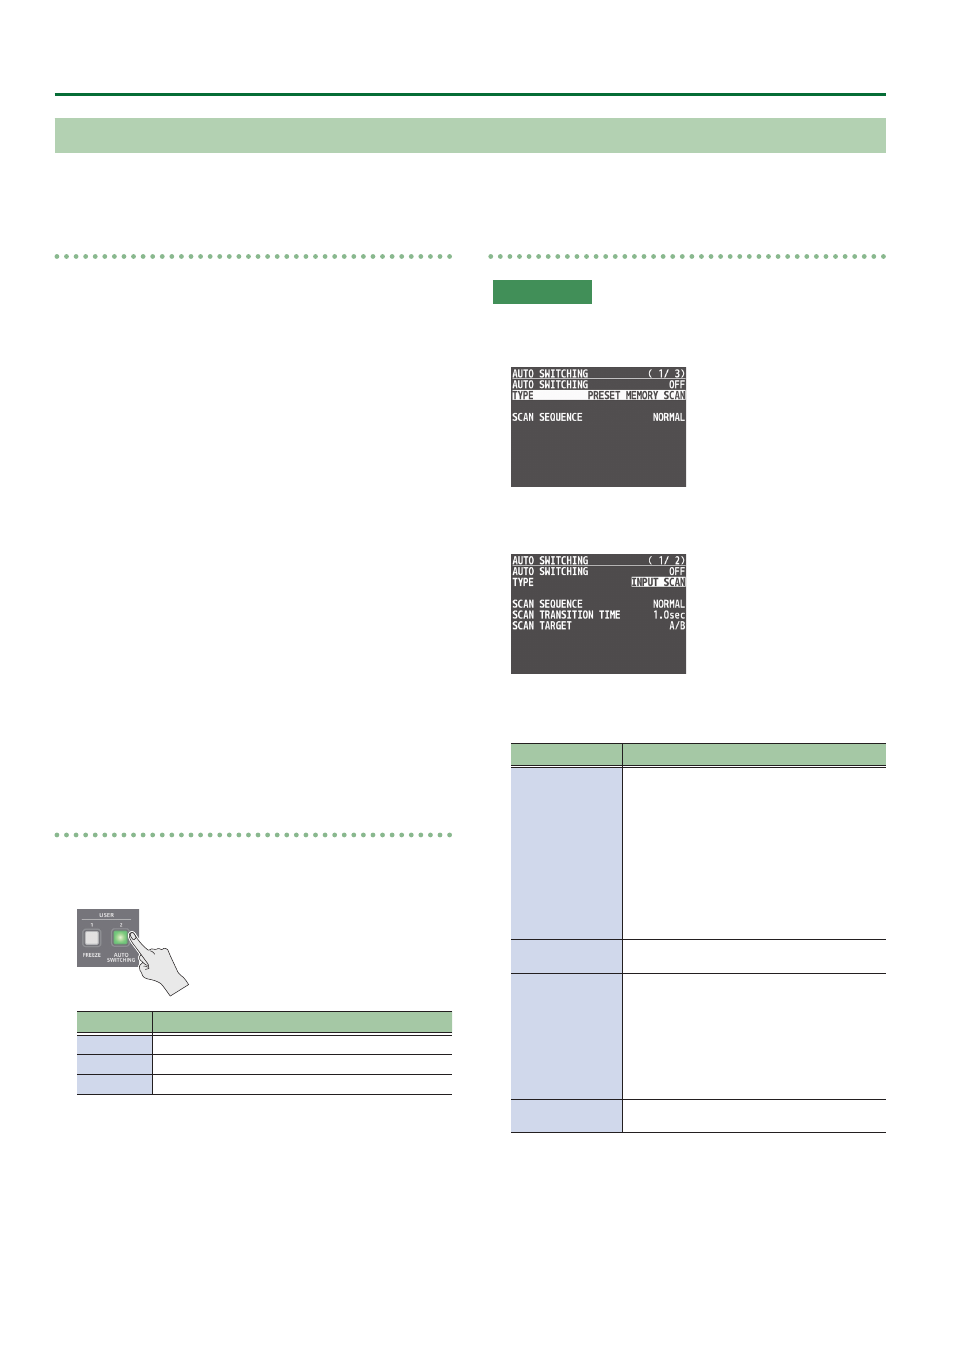
Specifying the operation mode
Input scan
1 .
Press the [MENU] button
0
”AUTO SWITCHING”
0
select “TYPE”, and press the [VALUE] knob.
2 .
Use the [VALUE] knob to select “INPUT SCAN”, and
press the [VALUE] knob.
3 .
Use the [VALUE] knob to select a menu item, and
press the [VALUE] knob.
Menu item
Explanation
SCAN SEQUENCE
Specifies the order in which video signals are
shown.
NORMAL:
Switch in the order of INPUT 1
0
8.
REVERSE:
Switch in the order of INPUT 8
0
1.
RANDOM:
Switch randomly.
SCAN TRANSITION
TIME
Specifies the video transition time.
SCAN TARGET
Specifies the video bus in which video transition.
A/B:
Switches between A/PGM bus and B/PST bus.
PinP 1, PinP 2:
Switches the video you want to make the inset
screen of the PinP 1 or PinP 2.
INPUT 1–8 TIME
Specifies the time that the INPUT 1–8 video is
shown.
4 .
Use the [VALUE] knob to change the value, and
press the [VALUE] knob.
5 .
Press the [MENU] button to quit the menu.