Executing a macro, Other features – Roland V-8HD HDMI Video Switcher and UVC-01 USB Capture Device Kit User Manual
Page 48
48
Other Features
Executing a Macro
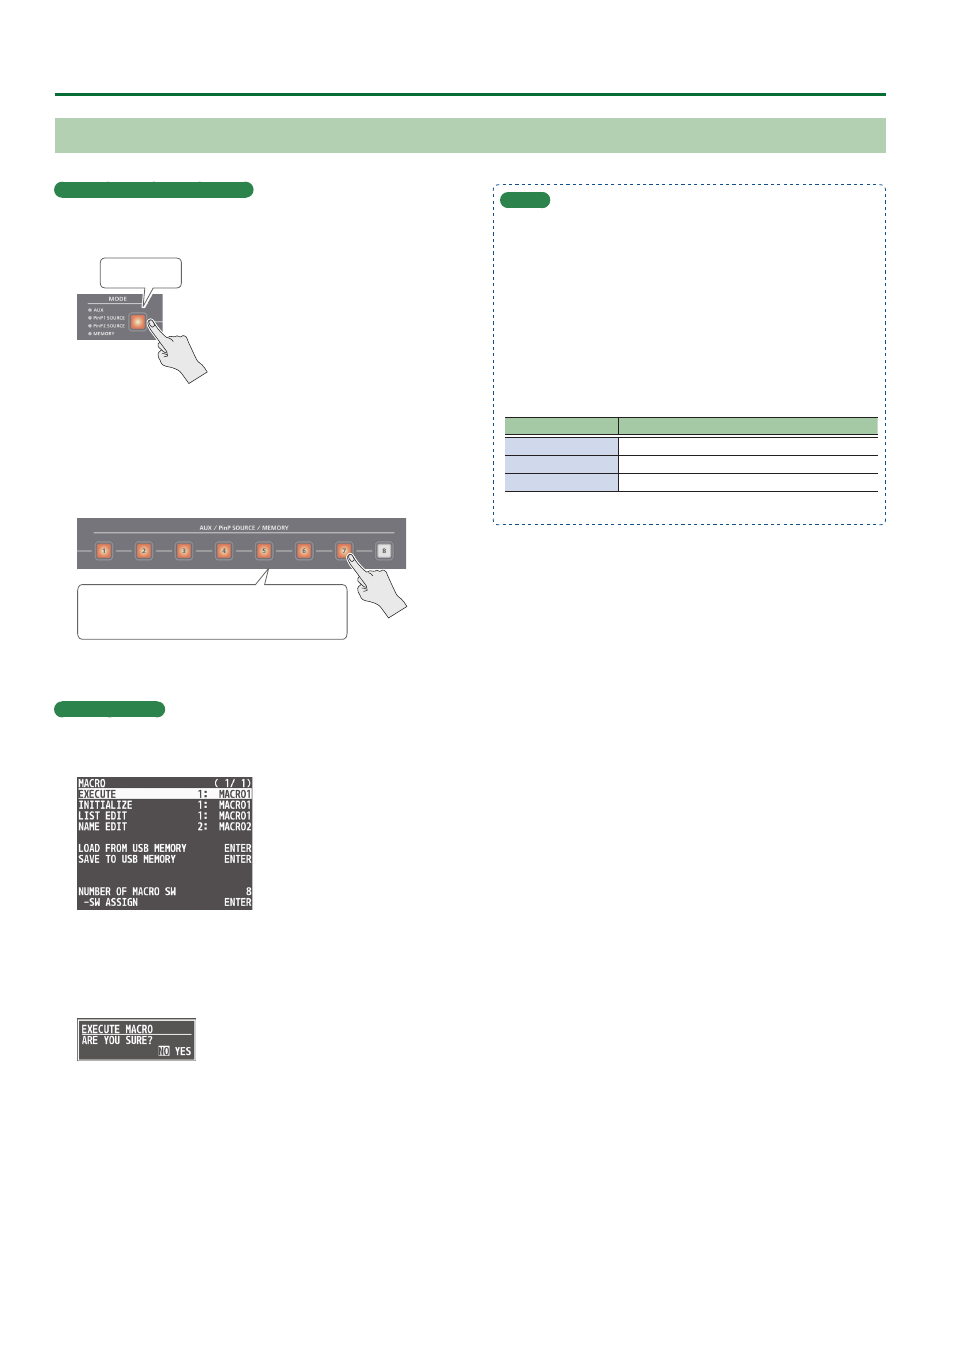
Using the buttons (Macro 1–10)
1 .
Long-press the [MODE] button to make it light up
orange.
Long-press
The AUX/PinP SOURCE/MEMORY [1]–[8] buttons function as
macro selection buttons.
2 .
Press the AUX / PinP SOURCE / MEMORY button
corresponding to the number of the macro you
wish to execute.
Orange: Macros with a recorded function
Unlit:
Macros without a recorded function
This executes the macro.
Using the menus
1 .
Press the [MENU] button
0
“MACRO”
0
select
“EXECUTE”, and press the [VALUE] knob.
2 .
Use the [VALUE] knob to select the macro (1–100)
that you want to execute, and press the [VALUE]
knob.
A confirmation message appears.
* If you decide to cancel, press the [EXIT] button.
3 .
Use the [VALUE] knob to select “YES”, and press the
[VALUE] knob.
The macro is executed.
4 .
Press the [MENU] button to close the menu.
MEMO
Using the cross-point buttons to select macros
When MODE is macro (the [MODE] button is lit orange), the cross-
point buttons function as macro selection buttons.
Use the [MENU] button
0
“MACRO”
0
and set “NUMBER OF
MACRO SW” to “24”.
Changing the macro assigned to a button
You can change the macros assigned to the buttons.
From the [MENU] button
0
“MACRO”
0
“SW ASSIGN”, specify a
macro (1–100) to assign to the respective button, using the menu
items shown below.
Menu item
Explanation
MACRO 1–8
AUX / PinP SOURCE / MEMORY [1]–[8] buttons
PGM/A 1–8 (
*1)
Cross-point A [1]–[8] buttons
PST/B 1–8 (
*1)
Cross-point B [1]–[8] buttons
(*1) This can be set if “NUMBER OF MACRO SW” is “24”.