Teac GigaPulse User Manual
Page 89
89
GigaPulse
™
User Guide
Gig
aP
uls
e-P
ro
Sig
na
l F
lo
w
GigaPulse-Pro Signal Flow
89
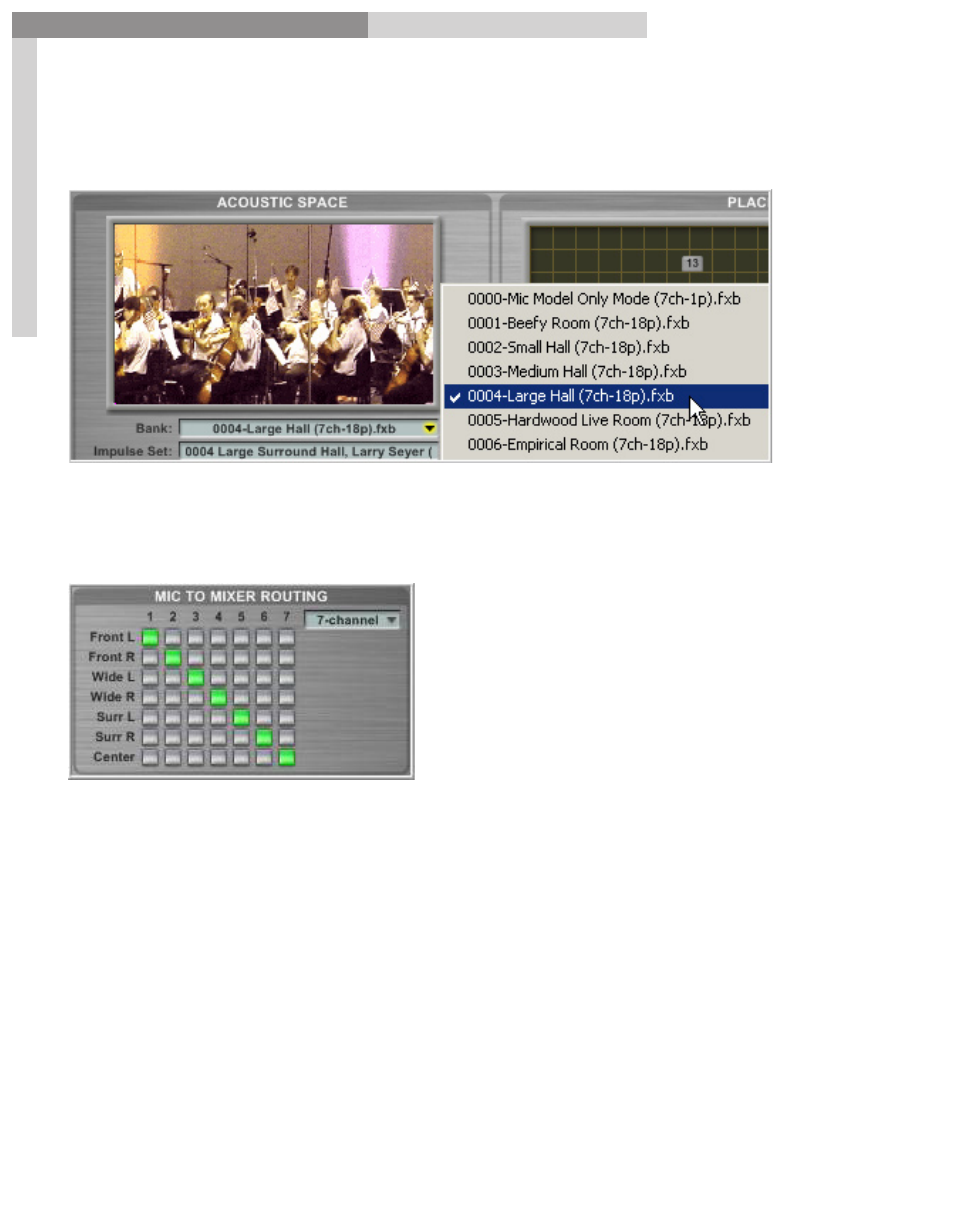
In the
Acoustic Space Pane
, click the drop down arrow under Bank to select a room for
its characteristics. Large halls are better for music, and small rooms are better for voice.
Play the instrument and see how the GigaPulse sounds on it.
Take a look at the
Mic to Mixer Routing
section.
The default arrangement is
as shown, with the Front Left
Microphone sending it’s signal to
Output 1, the Front Left to Output 2,
and so on, but all seven microphones
can be assigned to any output
desired.
Notice how numbers from left to right go from 1-7. These numbers literally mean mixer
channels 1-7. The mic positions on the left will be routed directly to the mixer channel
they are assigned. Just click on the buttons to assign the mic positions. Any mic
position can be routed to any mixer channel here. You can also route multiple mics to
the same channel.