Modem connection, Advanced modem settings – Wavetronix SmartSensor 105 (SS-105) - User Guide User Manual
Page 39
38
CHAPTER 4 • COMMUNICATION
Modem Connection
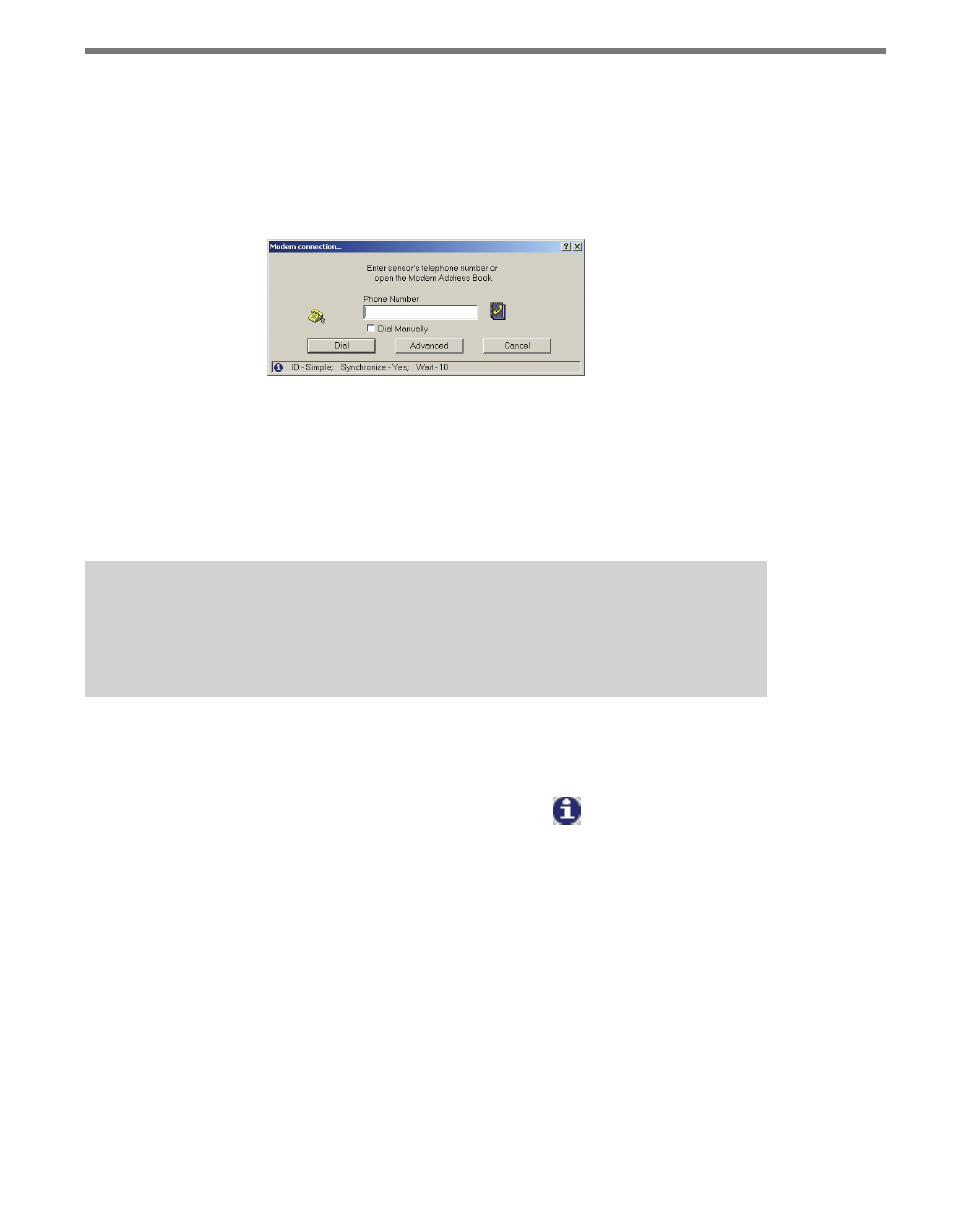
Clicking the Modem (Phone #) radio button on the New Connection page and then click-
ing OK will allow you to connect to the SmartSensor using a modem. The Modem Con-
nection page has a text box in which you can enter the phone number for the sensor’s
modem (see Figure 4.4).
Figure 4.4 – Modem Connection
The phone book icon to the right of the text field allows you to browse for numbers pre-
viously saved in the SmartSensor Manager address book (for more information, see the
Address Book section later in this chapter). If you’d prefer to dial manually, click the Dial
Manually check box beneath the text field, then click on Dial. At this point you will need
to pick up the telephone receiver and manually dial the phone number.
Note
When this window is first opened, the modem connection phone number you used
most recently will automatically appear in the text field.
Once the number is entered, click Dial to make a connection. Click Cancel to stop the
action and return to the New Connection page.
The message bar at the bottom of the page, identified by the icon, shows the modem
settings being used. If the default settings are used, the message bar will display the fol-
lowing:
ID - Simple; Synchronize - Yes; Wait - 0
Advanced Modem Settings
The following settings are part of the modem connection’s advanced functions and can be
found by clicking the Advanced button (see Figure 4.5):