Setting a temporary ip address in the gateway, Ns 2.2, O setting a temporary ip address in the gateway – ProSoft Technology PLX81-EIP-61850 User Manual
Page 16
Configuring the PLX8x-EIP-61850 Gateway
PLX8x-EIP-61850 ♦ Communication Gateway
User Manual
Server to
IEC 61850 Client
Page 16 of 167
ProSoft Technology, Inc.
July 2, 2015
2.2
Setting a Temporary IP Address in the Gateway
Important:
ProSoft Discovery Service locates the gateway through UDP broadcast messages.
These messages may be blocked by routers or layer 3 switches. In that case, ProSoft Discovery
Service is unable to locate the gateways.
To use ProSoft Discovery Service, arrange the Ethernet connection so that there is no router/layer
3 switch between the computer and the gateway OR reconfigure the router/layer 3 switch to allow
the routing of the UDP broadcast messages.
1 If you have not installed the ProSoft Discovery Service, refer to Installing the
ProSoft Discovery Service on page 14.
2 Click the Windows S
TART
button, and then choose P
ROGRAMS
>
P
RO
S
OFT
T
ECHNOLOGY
>
P
RO
S
OFT
D
ISCOVERY
S
ERVICE
.
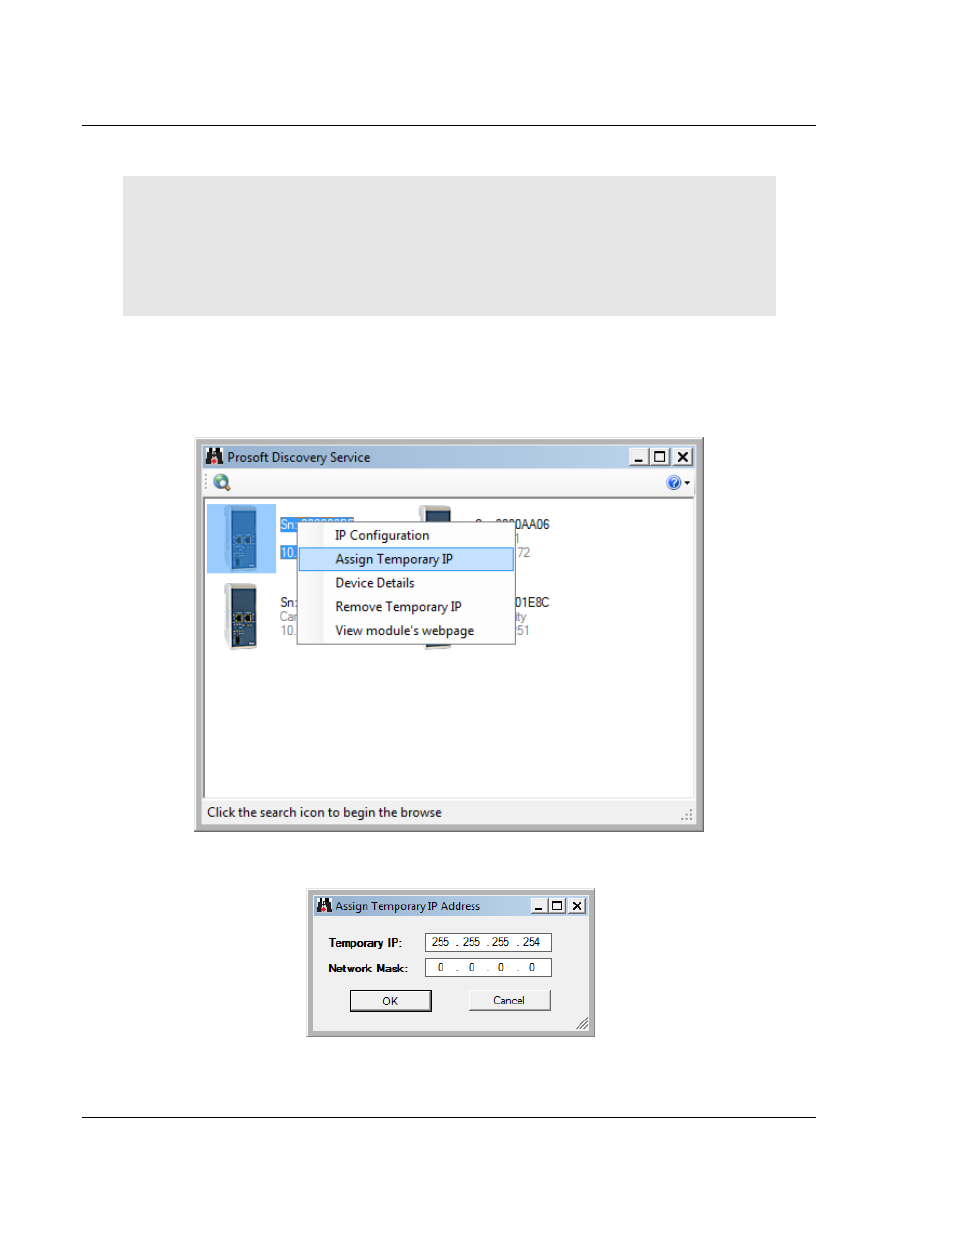
3 Select the module, then right-click and choose A
SSIGN
T
EMPORARY
IP.
4
The module’s default IP address is 192.168.0.250.
5 Choose an unused IP within your subnet, and then click OK.