Casio YC-430 User Manual
Page 53
53
Scanning Images (Scanner Mode)
2.
Click the [Scanner] tab.
3.
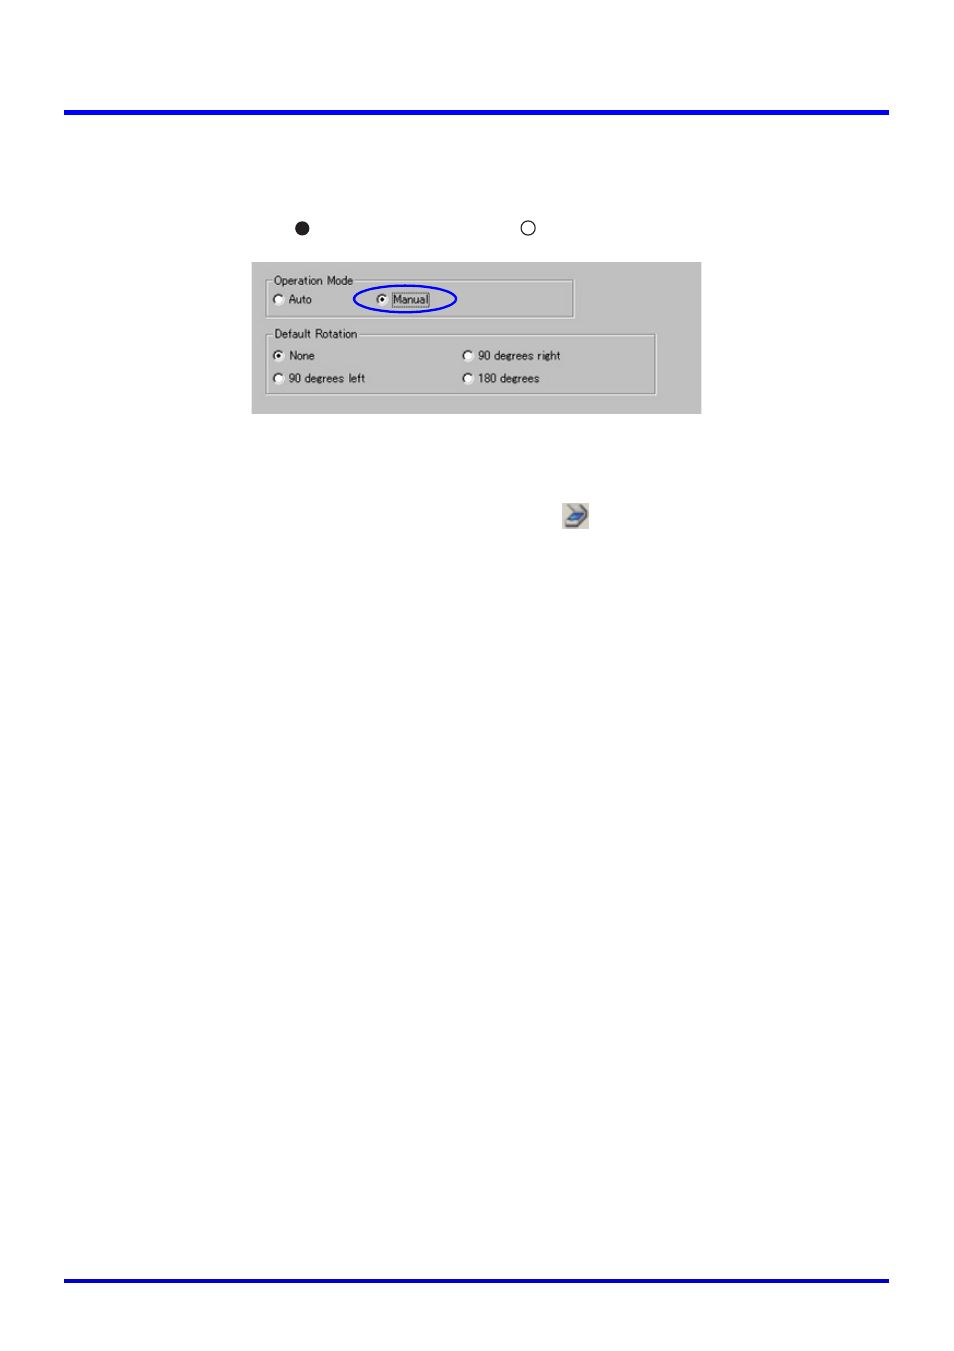
Under “Operation Mode”, click “Manual”.
z This should turn on (
) “Manual” and turn off (
) “Auto”.
4.
Click the [OK] button to apply the setting and close the dialog box.
5.
Select [Scanner] on the [File] menu or click
on the toolbar.
z If the dialog box for adjusting camera position appears, point the PJ Camera downwards
at the document stage, and make sure there is no document on it. For more
information about camera position adjustment, see “Adjusting the Camera Position” (page
37).
z Entering the Scanner Mode displays a scanner window. The image area of the scanner
window shows a rough (monitor) image of the document on the document stage of the
PJ Camera Stand.
z The preview list and playlist areas will also appear to the right of the scanner window,
but these lists are not used for scanning operations. All scanning operations are
performed using the scanner window.
z Nothing will be displayed on the PJ Camera monitor screen.
6.
Place the document you want to scan onto the document stage of the
PJ Camera Stand.
7.
Use the scanner window to configure PJ Camera settings.
z You can use the scanner window to configure PJ Camera zoom and focus settings. For
details see step 3 under “Adjusting PJ Camera Settings” (page 42).
z The white enhancement setting enhances the white of the background, to make text
and other figures stand out more clearly. Click the [White Enhancement] down arrow
button on the scanner window and then select the white enhancement you want to use.
Automatically:
The decision whether or not to perform white enhancement is made
automatically in accordance with the image being recorded.
Enhance White: Turns on white enhancement.
Normal Color:
Turns off white enhancement.