Paxton Superchargers Ford Mustang GT User Manual
Page 76
P/N: 4809654 v5.0
©2010 Paxton Automotive
All Rights Reserved, Intl. Copr. Secured
56
*** NOTE ***
Install the MAF sensor element so the inlet of the sen-
sor faces the air filter. (See Fig. 10-h.)
L. Install the MAF sensor and air filter to the 180°
duct. (See Fig. 12-h.)
P. MAF (Mass Air Meter) Harness Extension
(Non-cooled kits only):
1. Locate the supplied wire and butt connec-
tors in assembly 4FU139-096.
*** NOTE ***
It is strongly recommended that the wires be soldered.
Temporary solderless connectors have been provided
in case you are unable to solder.
2. Remove the split loom from the factory
wires on the MAF (Mass Air Meter) sen-
sor.
3. Cut the wires to the connector approxi-
mately 2" from the plug.
4. Using the supplied connectors and wire
extend the connector to the MAF.
5. Install the supplied 3/8" split loom to the
extended sensor plug. Secure the split
loom with wire-ties or tape.
6. Route the lengthened wires and connector
to the MAF, keeping the wires away from
hot or moving parts.
M. Bend the factory hood cable bracket up 90° away
from the air filter. (see fig 12-i)
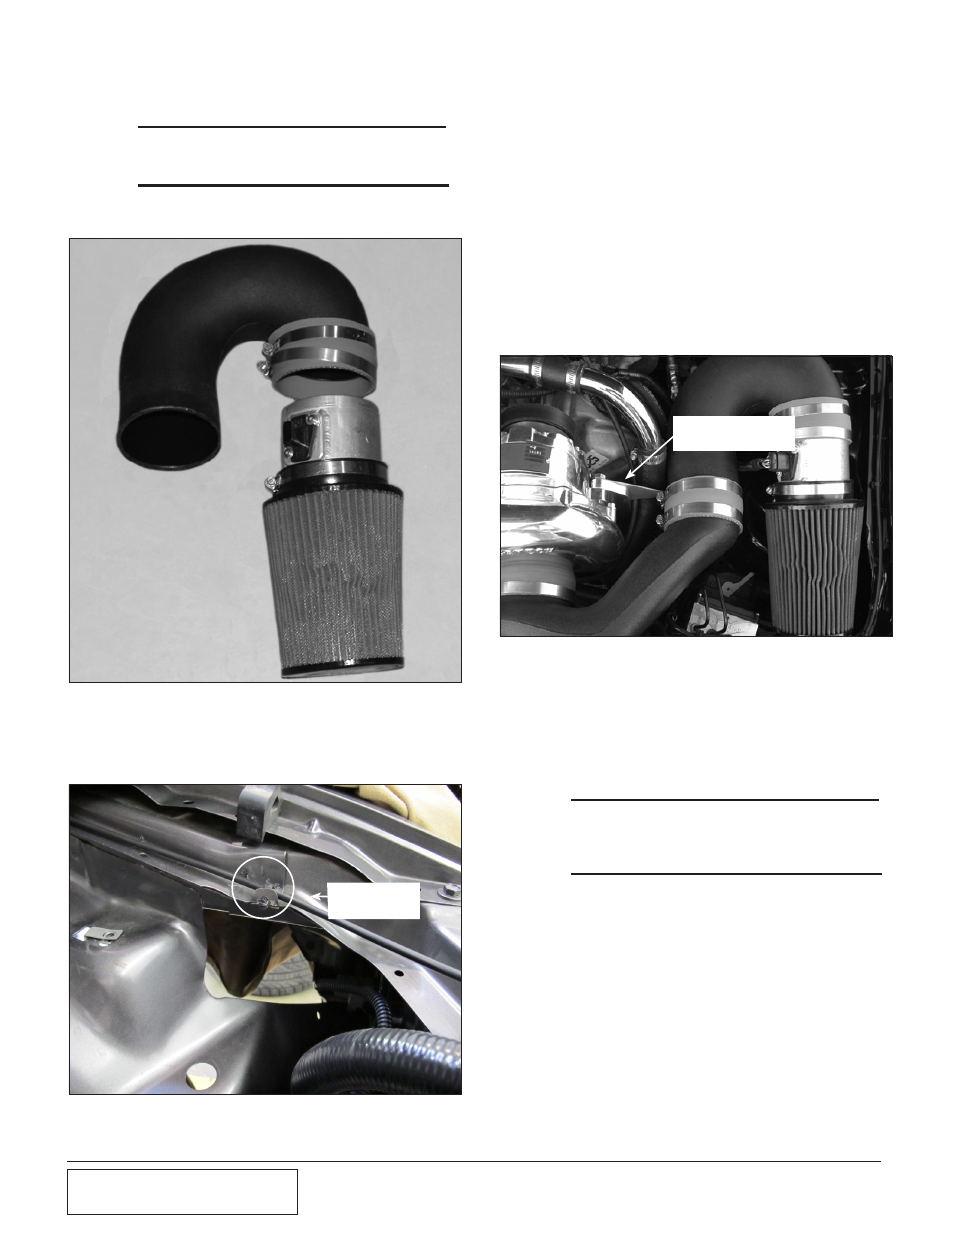
Fig. 12-j
Fig. 12-h
AIR INLET
SUPPORT BRACKET
12. AiR iNLET ASSEMBLy,
cont’d
N. Install the 180° duct and the MAF sensor with
filter to the inlet duct leading to the
Supercharger. (See Fig. 12-j.) Clock the MAF
exactly as shown in the Figure. MAF, keeping
the wires away from hot or moving parts.
O. Secure the rear clamp at the inlet duct union
to the previously installed support bracket.
(See Fig. 12-j.)
BEND 90
°
HERE
Fig. 12-i