Wavetronix SmartSensor HD (101-0415) - User Guide User Manual
Page 57
56
CHAPTER 6 • LANES
Sidebar
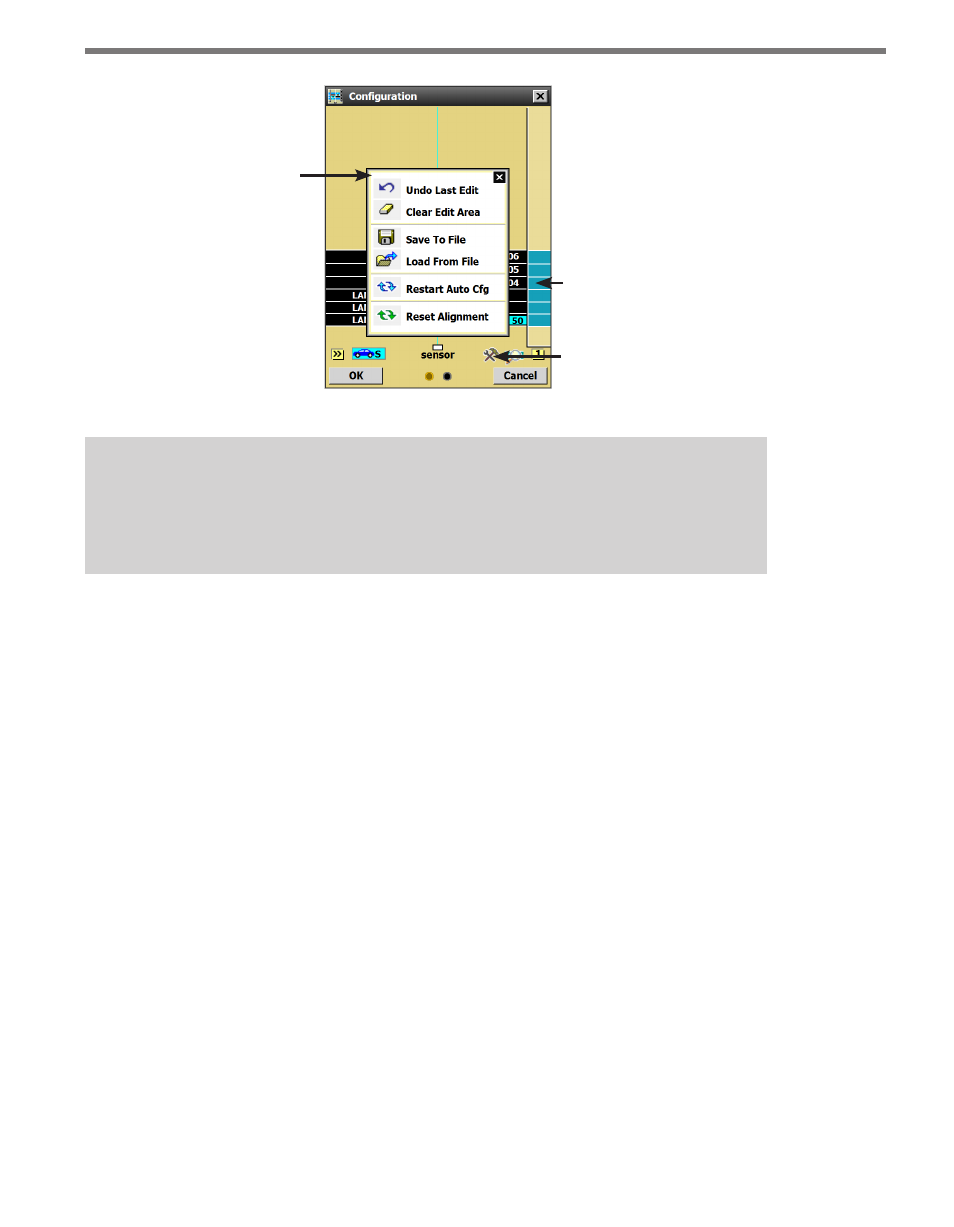
Tools Icon
Tools Menu
Figure 6.3 – Buttons Used in Automatic Lane Configuration
Note
You may need to click on the magnifying glass icon and select
Show Auto Lanes for
the automatically discovered lanes to appear.
Depending on where the sensor is mounted and on the amount of traffic, the configuration
process could take a few minutes. Once the SmartSensor HD has detected vehicles and
created the appropriate lanes, click OK and a window will appear asking you to save the
changes to the configuration. Click Yes and the configuration will be saved.
Follow the steps below if only a portion of the automatically defined lanes are desired:
1 Click anywhere in the Configuration screen.
2 Check the Hide Auto-Lanes box and the automatically configured lanes will disappear.
3 Click on the desired automatic lane in the sidebar (when the sidebar is set to 1) and the
Automatic Lane window will appear (see Figure 6.4). This window allows you to select
the lanes you want to appear in the roadway. To have all lanes appear in the roadway,
click the Copy Sidebar button; to have individual lanes appear in the roadway, click the
Copy Lane button. You can also copy the entire sidebar and then delete the unwanted
lanes by clicking on them and selecting Delete.