Ab b, Making a margin space on the copies [margin mode, 1) standard margin – TA Triumph-Adler DC 2045 User Manual
Page 48: 2) separate front and back margin settings
Section 5 OTHER CONVENIENT FUNCTIONS
5-6
3. Making a margin space on the copies [Margin mode]
(1) Standard margin
Inch specifications
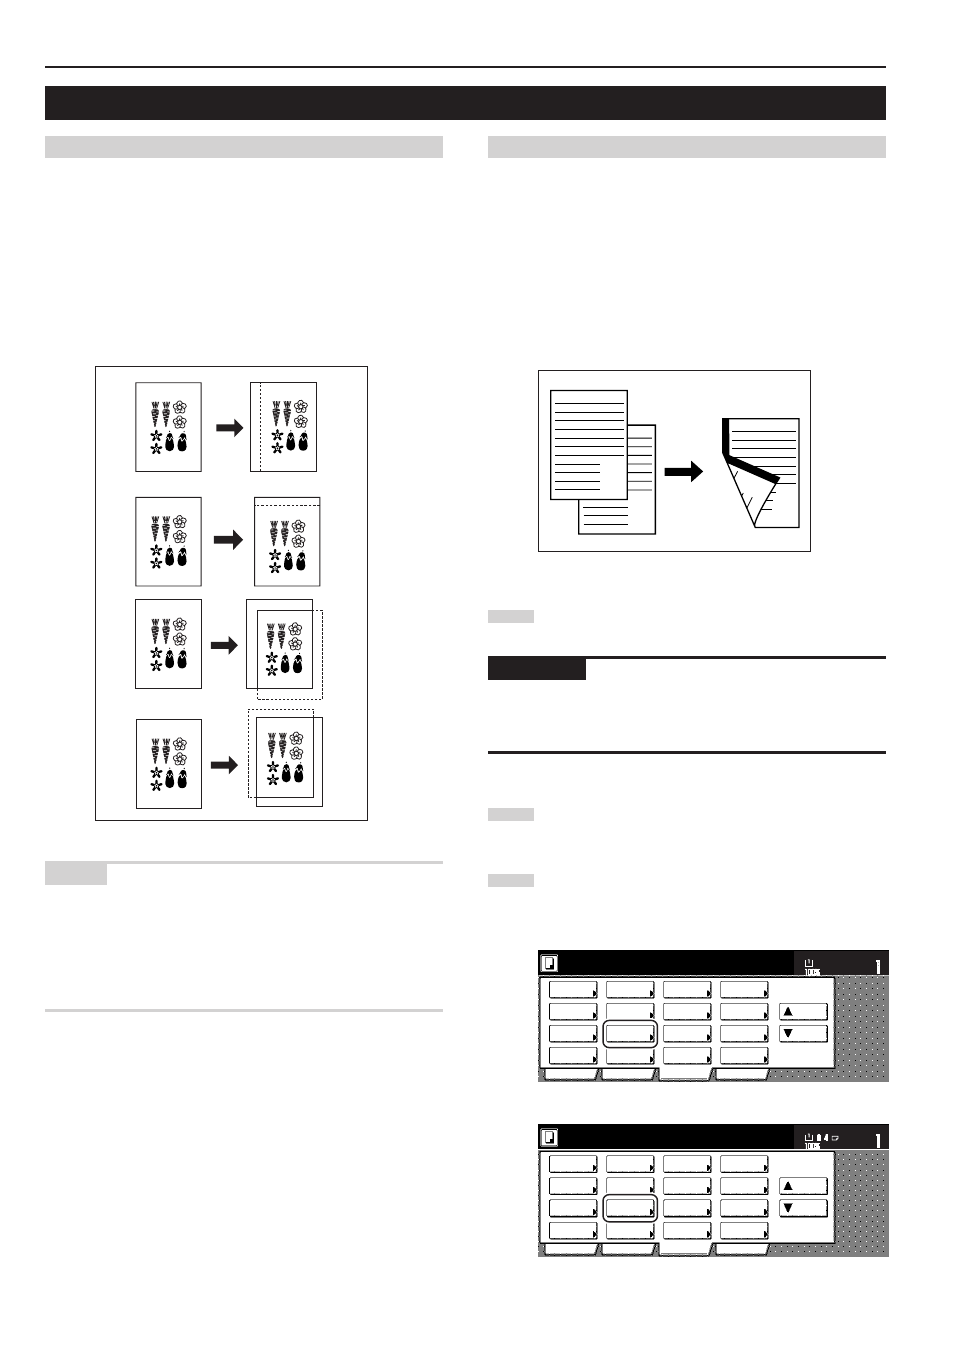
The image of the original can be shifted to the left or right and up or
down to make a margin (blank) space on the copy. The width of each
margin can be set to any 1/8" increment between 1/8" and 3/4".
A setting of “0” will leave no margin space.
Metric specifications
The image of the original can be shifted to the left or right and up or
down to make a margin (blank) space on the copy. The width of each
margin can be set to any 1 mm increment between 1 mm and 18 mm.
A setting of “0” will leave no margin space.
NOTES
• It is also possible for you to select the default setting for the location
and width of the margins. (See “Margin width” on page 7-52.)
• If you select to have a left margin created during 2-sided copying
and the location for the back side margin is set to “Auto”, a right
margin that is the same width as the margin on the front side will be
automatically created on the back side of the copies.
(2) Separate front and back margin settings
Inch specifications
When you are making 2-sided copies, the margin positions and
widths can be selected separately for the front and back sides. The
width of each margin can be set to any 1/8" increment between 1/8"
and 3/4". A setting of “0” will leave no margin space.
Metric specifications
When you are making 2-sided copies, the margin positions and
widths can be selected separately for the front and back sides. The
width of each margin can be set to any 1 mm increment between 1
mm and 18 mm. A setting of “0” will leave no margin space.
1
Set the originals to be copied.
IMPORTANT!
Set originals so that the top edge is facing either the back or the left of
the copier. Setting them in the wrong direction may cause the margin
to be created in the incorrect position.
2
Touch the “Function” tab. The content of the “Function” tab
will be displayed.
3
Touch the “Margin/Centering” [“Margin/Image shift”] key.
The “Margin/Centering” [“Margin/Image shift”] screen will be
displayed.
Inch specifications
2 sided/
Separation
Select
paper
Combine
Reduce
/Enlarge
Margin
Centering
Form
Overlay
Page #
Function
Basic
User choice
Program
Cover
Booklet
/Stitching
Sort/
Finished
Border
Erase
Exposure
Orig.image
quality
Ready to copy.
Select
original size
Auto
Selection
Batch
scanning
Up
Down
Set
Paper size
11x8
1
/
2
"
Metric specifications
Select
paper
2-sided/
Split
Merge copy
Reduce/
Enlarge
Margin/
Image shift
Page
numbering
Function
Basic
User choice
Program
Cover
Mode
Booklet/
Stitching
Erase
Mode
Exposure
Mode
Image
quality
Sort/
Finished
Ready to copy.
Select
size orig.
Auto
selection
Large # of
originals
Form
overlay
Up
Down
Set
Paper size
A
A
B
B