Sip configuration, Hint – PLANET VIP-191 User Manual
Page 23
Also, since the APs in the list are arranged in descending order of preference, moving an AP up on the
list will give a higher preference to that AP. To do so, carry out the following steps:
1. From the Advanced Wireless Settings screen, highlight the desired AP, press the Left (“Edit”)
Key and select “Up”.
2. This will move the AP up one slot in the list. Conversely, selecting “Down” will move the AP
down one slot.
3. Repeat steps 1 and 2 until the AP is placed at a desired slot in the list.
4. Pressing the Left (“Edit”) Key and selecting OK will confirm the changes and go back to the
Wireless Information screen. However, pressing the Right (“Cancel”) Key will also take you
back to the same screen without saving the changes.
L
Note
If you move an AP from the top of the list, selecting “Save”
will have the phone tried to connect to the AP that is
currently on the top of the list.
SIP Configuration
To connect to a SIP server, you can carry out the following steps:
1. Make sure the Wi-FI Phone is connected to an AP.
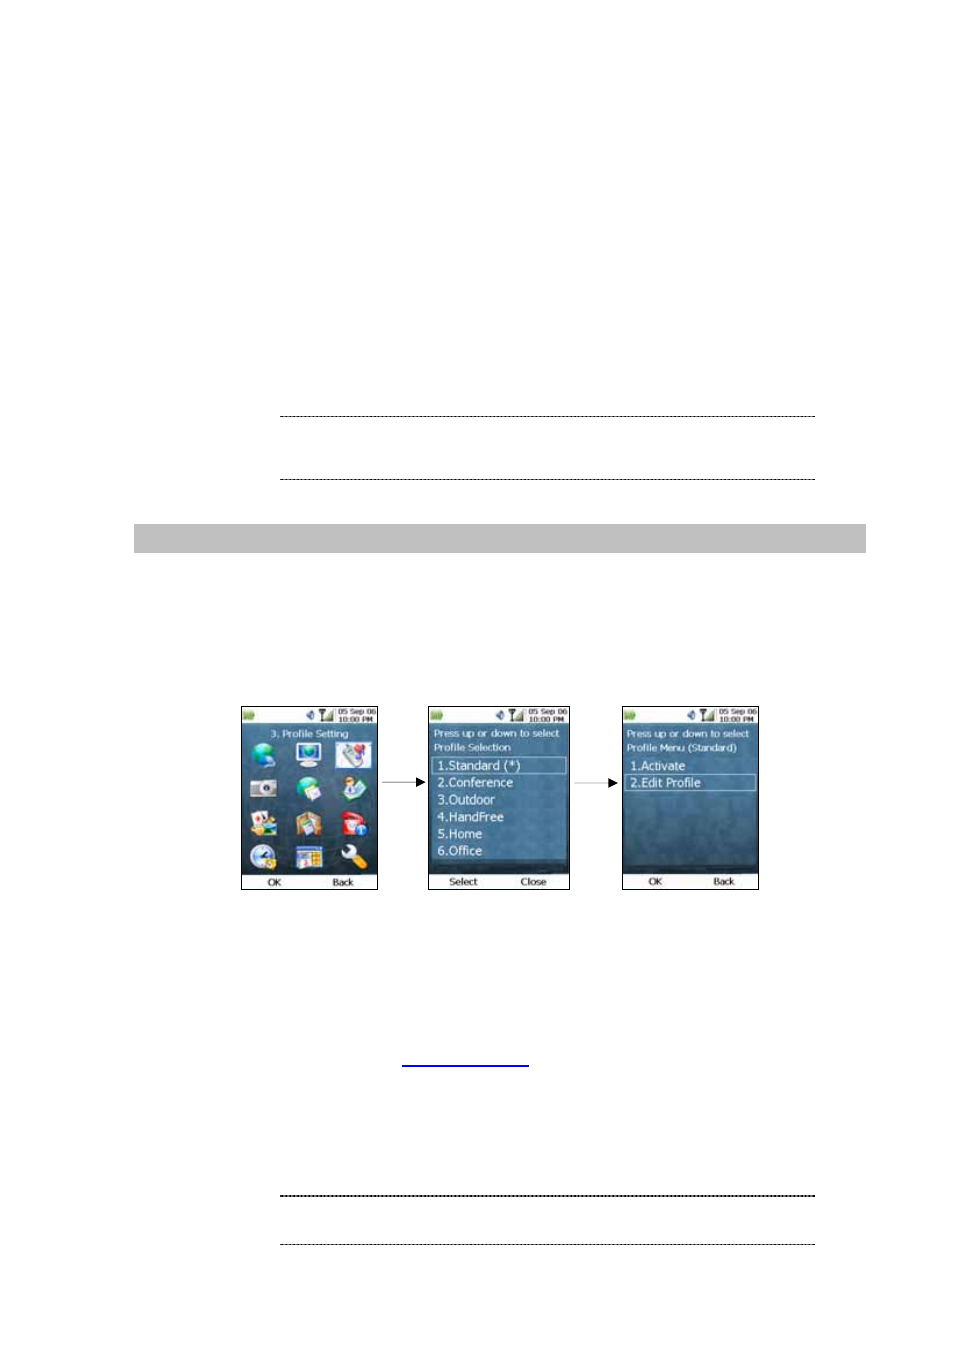
2. From the Main Screen, press the Left (“Menu”) Key and select “3. Profile Setting”. Select
“Standard”, press OK and select “Edit Profile” from the submenu, just as shown below:
Figure 16. Profile setting
23
3. Fill in the corresponding information. Usually the fields that need to be filled are: “My Phone
Number”, “SIP Server” (i.e. domain name or IP address of SIP server), “Account Name”, and
“Account Password”, and you can leave the other fields with the default values. An example:
My Phone Number:
SIP Server: 192.168.1.1
Account Name: 882
Account Password: 123
The SIP standard requires you to include the “@” sign and
the SIP server domain in the My Phone Number field.
L
Hint