Install the component barrier – Hypertherm Powermax30 XP Service Manual User Manual
Page 91
Powermax30 XP Service Manual 808150 Revision 1
91
6 – Power Supply Component Replacement
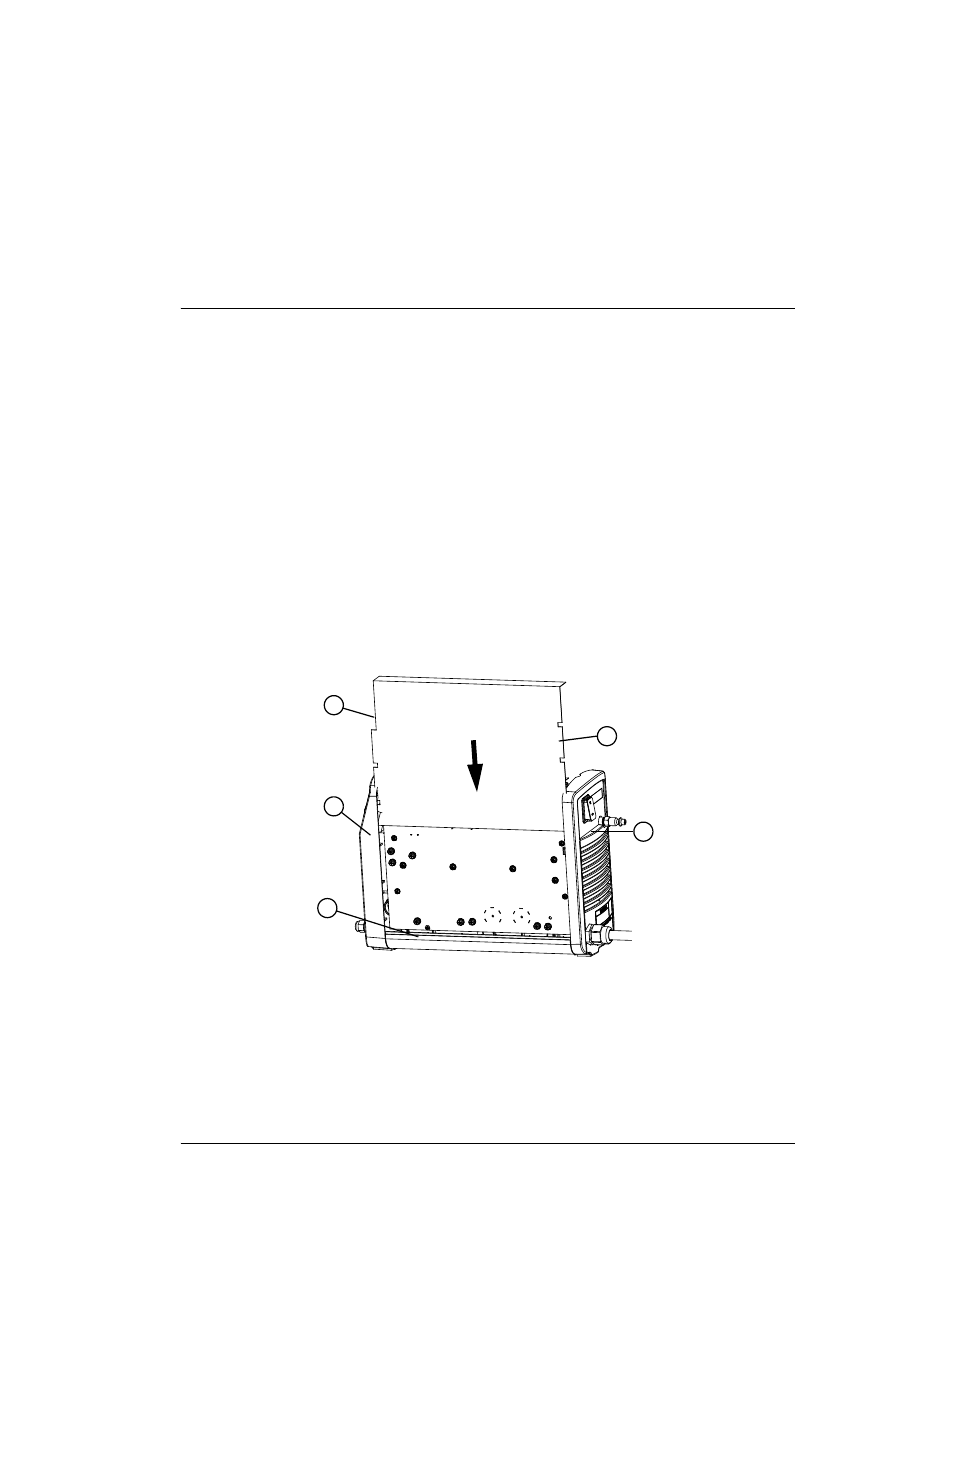
Install the component barrier
1. Hold the component barrier so that the edge with the long cutout and the two notches is closest to the front panel,
and the edge with the three notches is closest to the rear panel.
2. A perforated line runs across the top of the barrier, about 25 mm (1 inch) below the top edge. Fold the barrier along
this perforation so that the top edge bends away from you.
3. Position the barrier so that the folded section will cover the top of the power board. The edge with the long cutout
and the two notches should align with the front panel; the edge with the three notches should align with the rear
panel.
4. Put the front-panel edge of the barrier in place first, then the rear-panel edge. The notches on each side of the barrier
should align with the ribs on the inside of the front and rear panels. As you slide the barrier into place, make sure the
bottom edge is between the wires at the bottom of the power board and the side of the plastic base.
The barrier will not fit in the same track with the power supply cover.
5. Reconnect the gas supply and power cord, and set the power switch to ON (I).
Figure 27
1
2
3
5
4
1
Component barrier edge with long cutout and
two notches
2
Front panel
3
Track
4
Rear panel
5
Component barrier edge with three notches