Canon PowerShot G7 X Mark II User Manual
Page 102
102
3
Adjust the image.
Use the slider to adjust the resolution based on depth information
and the level of resolution.
4
Click the [OK] button.
Adjustment results are applied to the image.
For information on saving adjustment results to images, see
“Saving Editing Results”
If the subject’s outline or any bokeh look unnatural, or there is an
increase in noise or noticeable changes in hue or brightness,
lower the level of adjustment.
This function cannot be used at the same time as “Reposition the
viewpoint or foreground bokeh for a more pleasing result” or
“Reduces the appearance of ghosting in images”.
Reposition the viewpoint or foreground bokeh for a more pleasing result,
using the dual pixel information recorded in Dual Pixel RAW images.
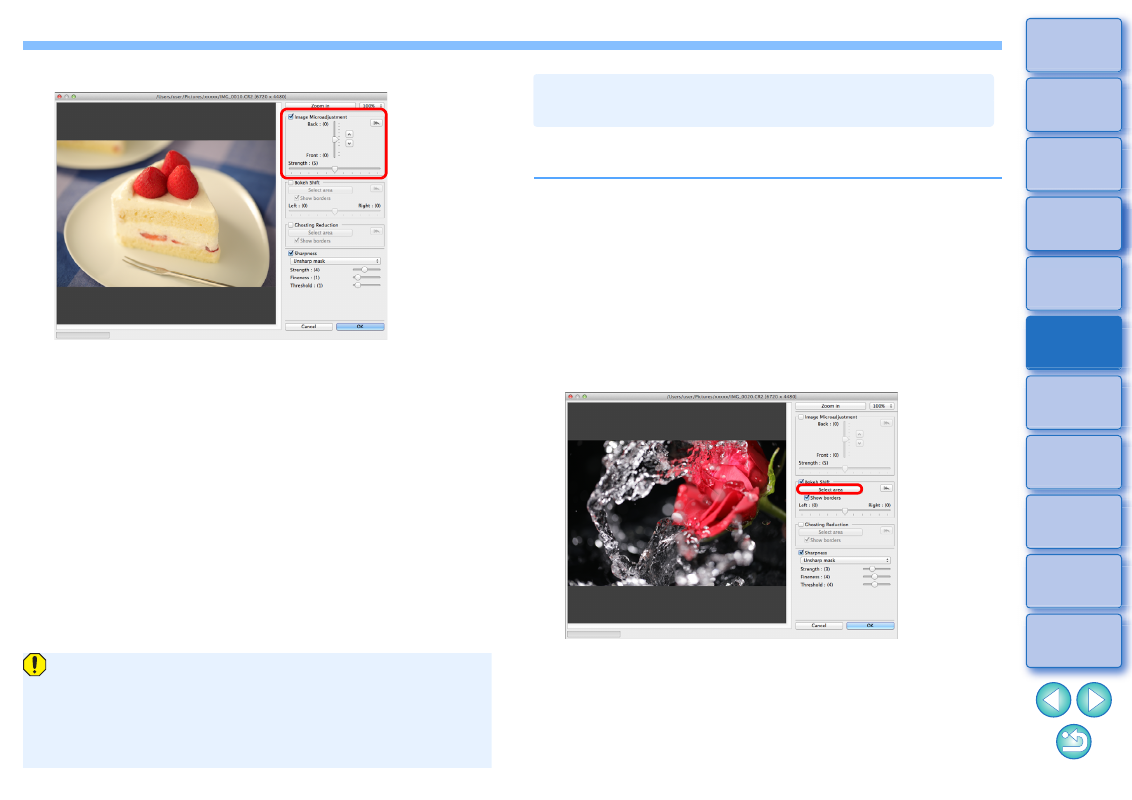
1
In the main window or edit image window, select the
Dual Pixel RAW image you want to adjust, and then
select [Start Dual Pixel RAW Optimizer] from the
[Tools] menu.
The Dual Pixel RAW Optimizer window appears.
2
Checkmark the [Bokeh Shift] checkbox.
3
Specify the area to adjust.
Click the [Select area] button and drag on the image to specify
the area to be adjusted, and right-click with the mouse to fix the
area.
You can also remove the check mark from the [Show borders]
checkbox to hide the border.
Reposition the Viewpoint or Foreground
Bokeh for a More Pleasing Result