Manually erasing dust (repair function), P.78) – Canon PowerShot G7 X Mark II User Manual
Page 78
78
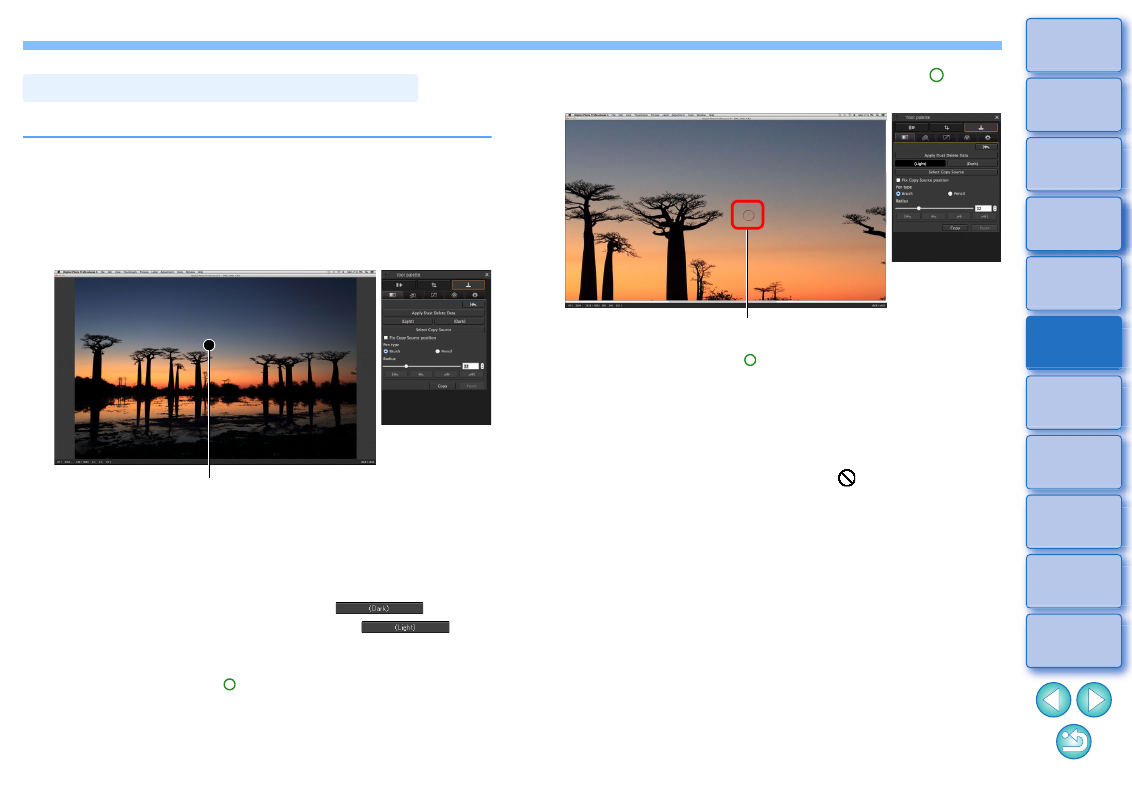
You can erase dust spots in an image by selecting them one by one.
1
In the main window, select the image from which you
want to erase dust spots.
2
Display the Dust Delete/Copy Stamp tool palette.
3
Click the point from where dust is to be erased.
The display changes to 100% view.
The display position can be changed by dragging.
4
Click the button that matches the dust spot to be
erased.
If the dust spot is dark in color, click the [
] button,
and if the dust spot is light in color, click the [
]
button.
When you move the cursor over the image, the dust erasure
range is indicated with [ ].
Manually Erasing Dust (Repair Function)
Click
5
Place the dust spot to be erased within the [ ] and
click.
The dust spot within the [ ] is erased.
Click on another part of the image to continue erasing dust spots
within the displayed image.
To erase dust in another part of the image, click the button clicked
in step 4 again to cancel dust erasure processing and perform the
operation again from step 3.
When the dust spot cannot be erased, [
] is displayed.
6
Return to the main window.
Click