Batch transfer images to image editing software, A time, see, P.117 – Canon PowerShot G7 X Mark II User Manual
Page 117
117
Batch Transfer Images to Image Editing Software
You can transfer multiple images to image editing software. Unlike
“Transferring a RAW Image to Photoshop”
, you transfer images
that have first been converted and saved as a separate image, so the
transferred image will not be deleted after quitting the destination
software. The software used here as an example is Adobe Photoshop.
1
In the main window, select multiple images to be
transferred.
2
Select the [File] menu [Batch process].
The [Batch settings] window appears.
3
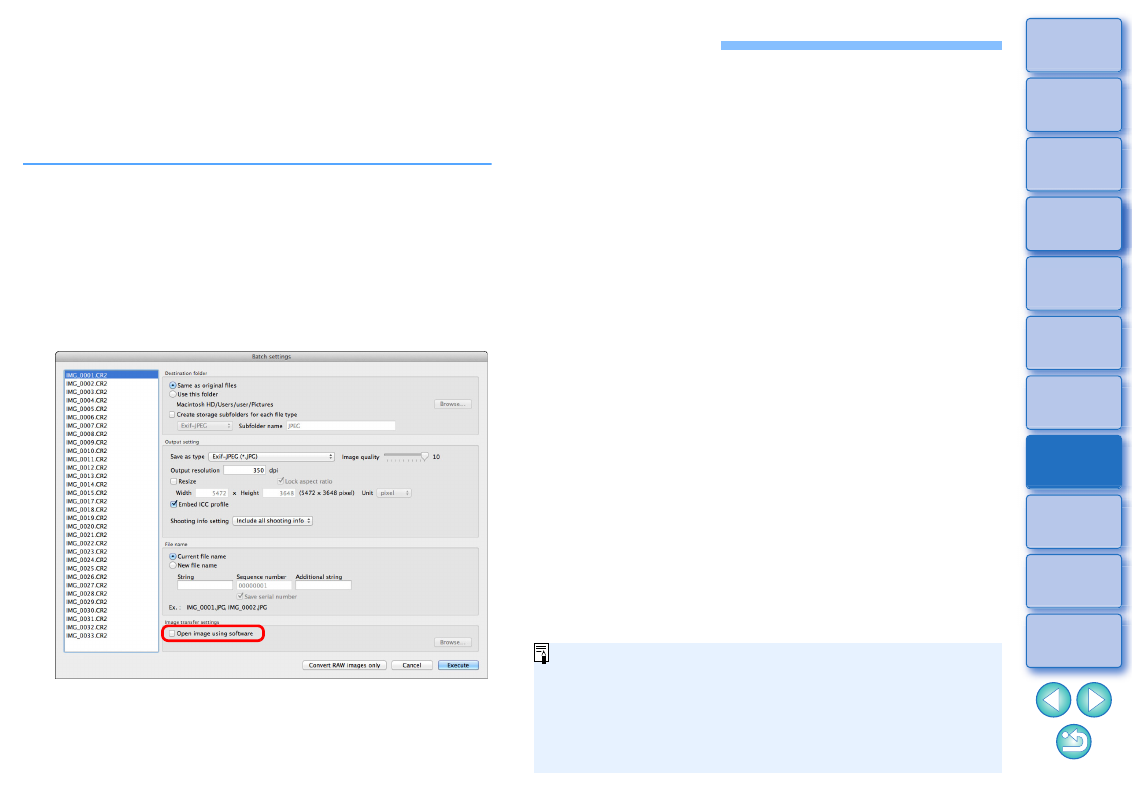
Perform settings required for transferring (e.g. file
format).
4
Checkmark [Open image using software].
The [Open] dialog box appears.
5
Select Photoshop.
In the [Open] dialog box, select a Photoshop file or an alias and
click the [Open] button.
The [Open] dialog box closes and [Image transfer settings] in the
[Batch settings] window is set to Photoshop.
6
Click the [Execute] button.
The processing dialog box appears and batch transfer begins.
When the first image has been transferred, Photoshop starts up
and transferred images are displayed in transferred order.
To reset the transfer destination to another software, click the
[Browse] button in [Image transfer settings], and in the [Open]
dialog that appears, select the software and click the [Open]
button.
You can also use this function in the edit image window. However,
all images in the window (not only the selected ones) are
transferred.