Adjusting position, Auto setup, Press <position> to display the [position] menu – Panasonic TH-55VF2HW 54.6" Full HD Video Wall Display User Manual
Page 41: Select the item to adjust with, Adjust with, Press <position> to exit from adjust mode
41
English
Adjusting Position
1
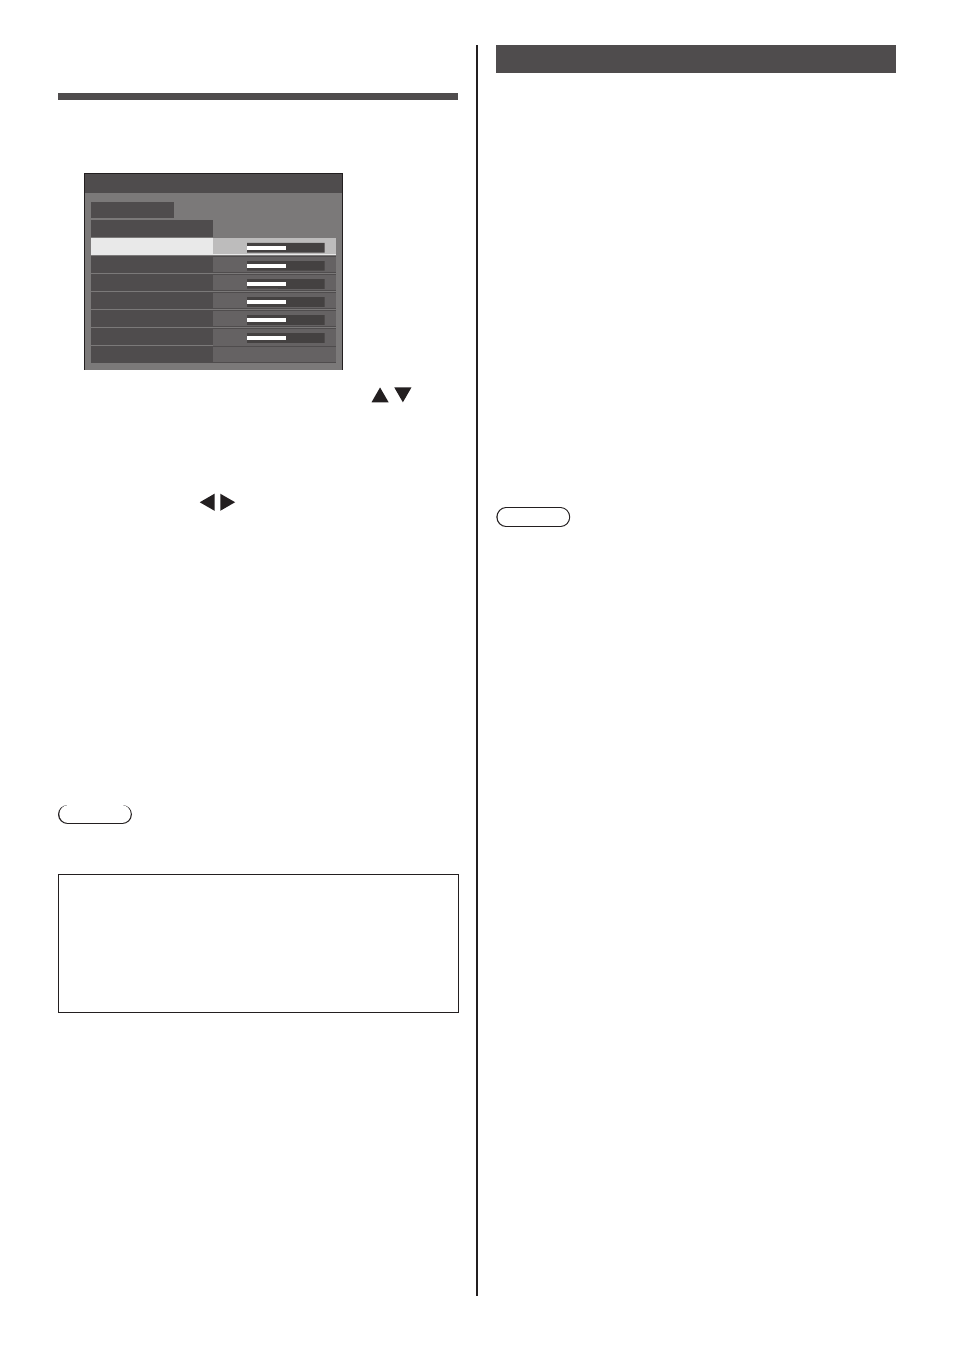
Press <POSITION> to display the
[Position] menu.
0
0
0
0
15
0
Position
Default
Default
Auto setup
H-position
H-size
V-position
V-size
Clock phase
Dot clock
1:1 pixel mode
Off
2
Select the item to adjust with .
●
Unadjustable items are greyed out.
Adjustable items differ depending on the signal,
input and the display mode.
3
Adjust with .
4
Press <POSITION> to exit from adjust
mode.
■
To return to the previous screen
Press <RETURN>.
■
To reset to defaults
When [Default] is selected, pressing <ENTER> resets
the adjustment values of all the displayed menus to
default.
When adjusting each item, pressing <DEFAULT>
resets the adjustment value of the item to default.
Note
●
Settings for [Position] are memorised separately for
each input signal.
Setting [Position] when the display is installed
vertically
When adjusting, please note that even when the
display is installed vertically, setting directions of
position / size are the same as that of horizontal
installation.
Auto setup
When inputting a PC signal, [H-position] / [V-position],
[H-size] / [V-size], [Clock phase] and [Dot clock] are
automatically corrected.
This setting is enabled under the following
condition:
●
When inputting from PC IN
While displaying the picture of the corresponding
signal, select [Auto setup] and press <ENTER>.
Using Remote Control
Press <AUTO SETUP>.
When Auto Setup does not work, [Invalid] is
displayed.
Auto mode
When the [PC auto setting] is set to [On] in the [Options]
menu (see page 79), automatic position adjustment
starts under the following conditions:
●
When the display power is turned ON.
●
When the input signal is switched.
Note
●
When the dot clock frequency of a PC signal is 162
MHz or higher, [Clock phase] and [Dot clock] cannot
be automatically corrected.
●
Auto Setup may not work when a cropped or dark
image is input. In such case, switch to a bright image
with borders and other objects are clearly shown,
and then try auto setup again.
●
Depending on the signal, out of alignment may
occur after Auto Setup. Carry out fine tuning for the
position/size as required.
●
If Auto Setup cannot set properly for XGA signal
(1024 x 768, 1280 x 768, 1366 x 768), pre-selecting
the individual signal in [XGA mode] (see page 51)
may results in correct Auto Setup.
●
Accurate auto setup is not possible when a signal
such as additional information is superimposed out
of valid image period or when intervals between
synchronizing signal and image signal are short.
Also, accurate auto setup is not possible when image
signals with tri level synchronizing signal added, or
when some SYNC ON G signals are input.
●
If Auto Setup does not work well, select [Default],
press <ENTER>, and then adjust the position/size
manually.