Mathey Dearman CNC Saddle Machine User Manual
Page 63

CNC Saddle Machine Parts & Operating Manual 03-0117-MSA 03-0117-1SA 03-0117-2SA
Ver 1.0
63
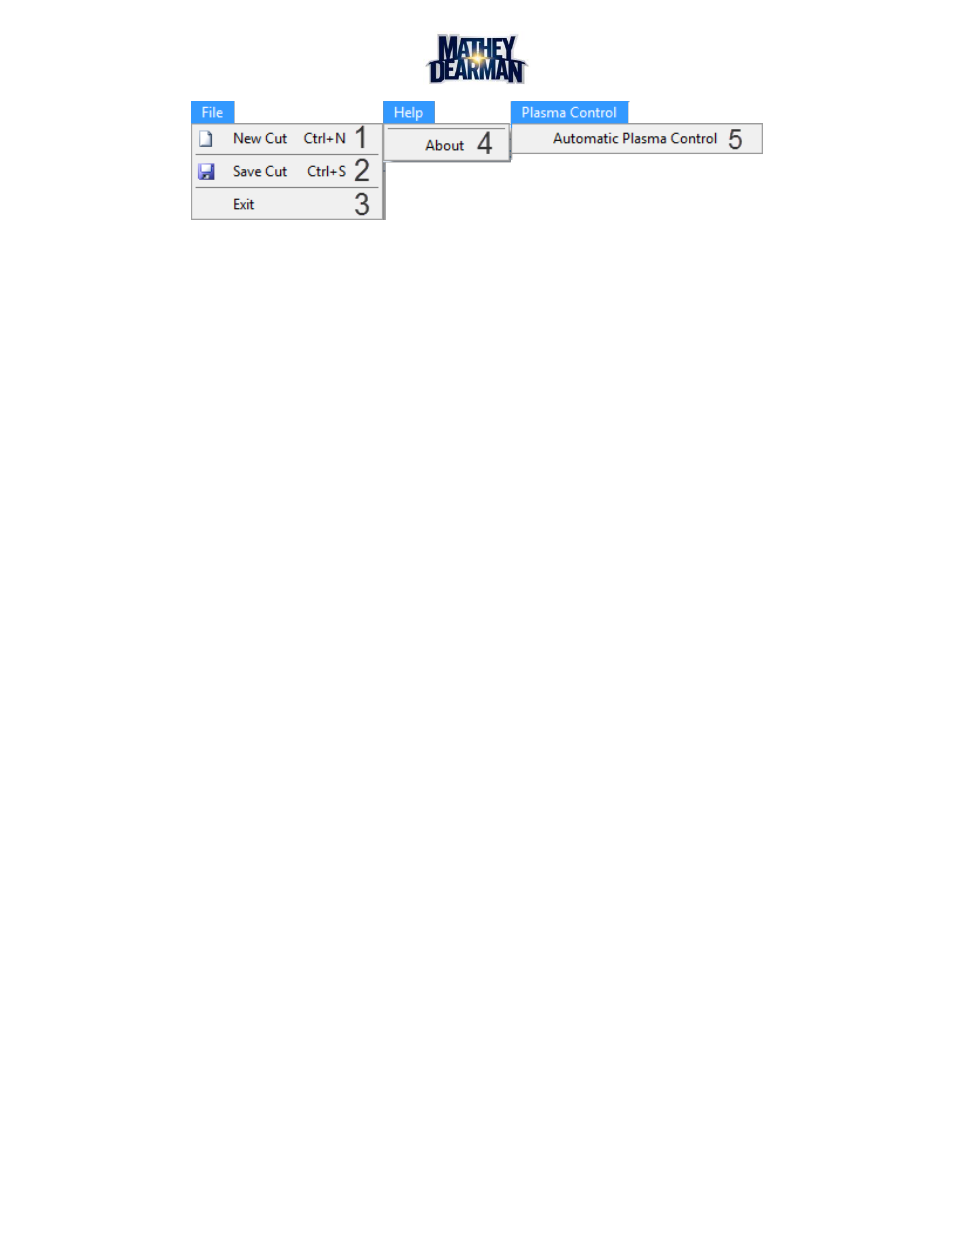
Figure 6-18 Cut View Screen Form Toolbar
1) New Cut – Returns to the ‘Cut Configuration’ screen.
2) Save Cut – Opens the Save Cut dialog box. This allows any cut to be saved for later use.
3) Exit – This will exit the MatheyCNC software.
4) About – Opens help dialog box.
5) Automatic Plasma Control – When this setting is activated an internal relay will signal a
plasma arc torch to fire and stop automatically when a cut is executed. An accessory cable is
required to use this feature and must be connected to the Plasma Control Port on the
Machine Control Module (MCM).
3. Return To Configuration Button – This will take the software back to the ‘Cut Summary’ screen
4. Minimize Button – Clicking this will minimize the window.
5. Maximize Button – Clicking this will maximize the window.
6. Exit Button – Clicking this will close this screen and return to the ‘Cut Configuration’ screen.
7. 3-D Viewport – This is the three dimensional viewport used to display the cut. The pipes and cut are
displayed here and can be manipulated by clicking the buttons above.
8. Zoom Window – This allows the creation of a box in the viewport that will become the new zoom
level.
9. Zoom – When selected this tool can be used to zoom in and out of the viewport.
10. Pan – This feature can be used to laterally move the viewport camera.
11. Rotate – This feature can be used to rotate the viewport camera in any direction.
12. Zoom Fit – When this button is selected the viewport will zoom out to expose the entire pipe and cut
path.
13. Cut Summary View – This box shows a summary of all the settings for the current cut.
14. Reverse Cut Button – When a configured cut has been paused, this button causes the torch to
reverse on its cut path a distance of ½” (13 mm). The torch will travel back to this point and stop.
The software will then wait for the next instruction. If the play button is clicked or the green button
on the MCM is pressed, the cut will resume from this point.
15. Play/Pause Button – Pressing this button will signal the software to start the cut. Based on the state
of the software this button will cause different actions:
a. Cut stopped and machine not at the cut starting point (Play Icon):
The machine will go to the cut starting point and prompt the user to turn on the
torch and start the cut.
b. Cut stopped and machine at the starting point (Play Icon):
The software will prompt the user to turn on the torch and start the cut.
c. Machine and software currently cutting (Pause Icon):
This will cause the machine and software to enter the paused state.
d. Machine and software paused (Play Icon):
The machine will go to the point at which the cut will start again and prompt the
user to turn on the torch and start the cut.