Customizing this unit, Attaching/removing the faceplate of this unit, Removing the faceplate – Roland SP-404MKII Creative Sampler and Effector User Manual
Page 101: Attaching the faceplate
Advertising
Customizing This Unit
101
Customizing This Unit
You can customize the design of this unit to match your tastes.
Attaching/Removing the Faceplate of This Unit
You can remove the faceplate of this unit to customize the top panel.
●
Make sure you don’t cut your fingers on the edges when removing or attaching the faceplate.
●
The faceplate may bend if it is exposed to strong impact when removed. If this happens, you may not be able to reattach
it.
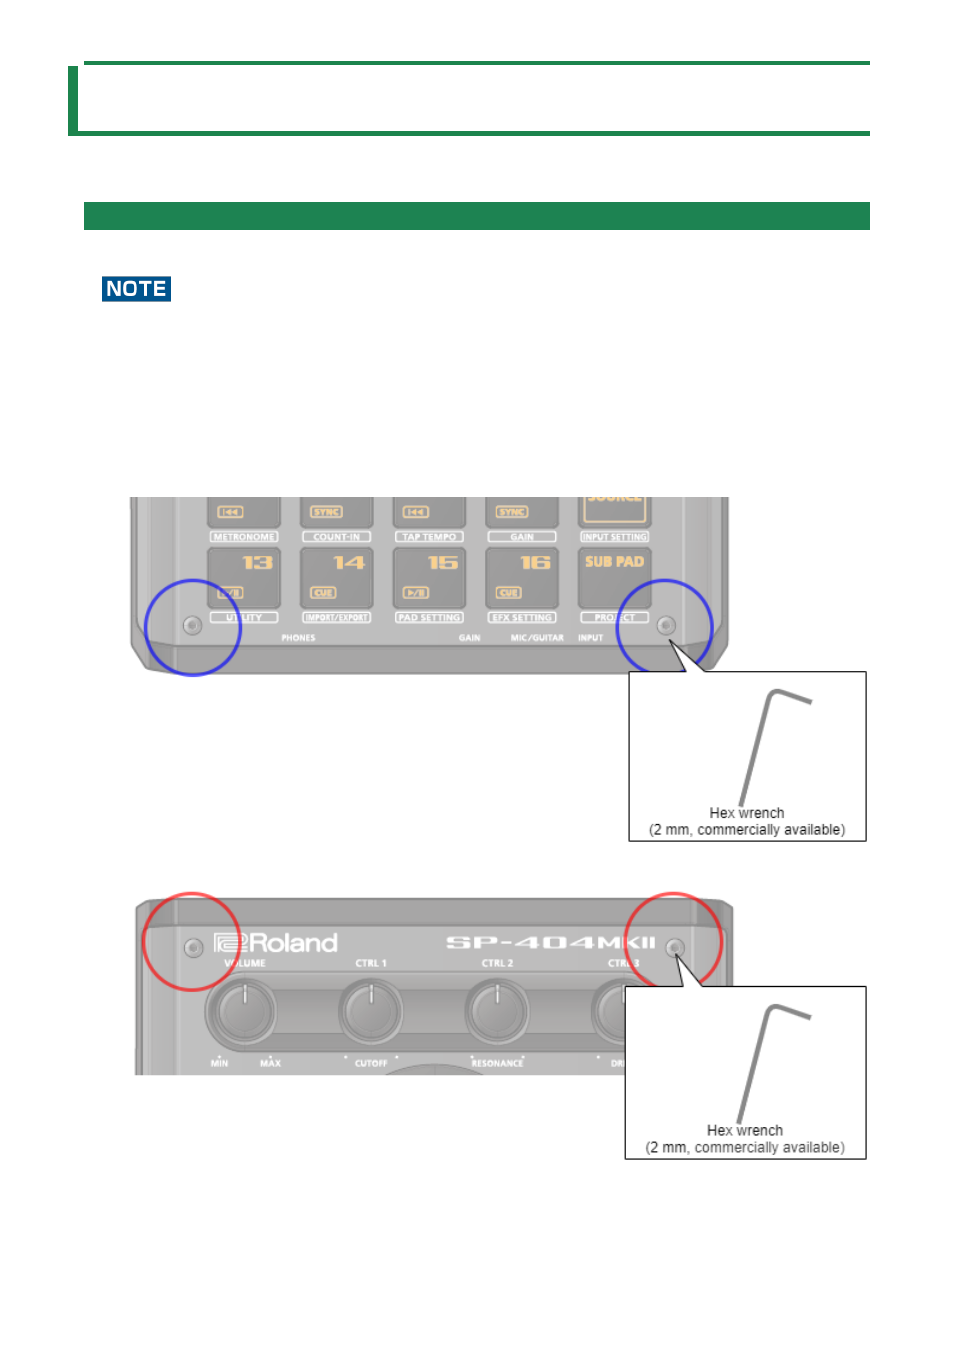
Removing the faceplate
1.
Use a commercially available hex wrench (2 mm) to remove the two screws (at the front of the unit)
circled in blue.
2.
Remove the screws (at the far side of the unit) circled in red.
Attaching the faceplate
Advertising