Importing a project (import project), Importing a project (import, Project) – Roland SP-404MKII Creative Sampler and Effector User Manual
Page 118
Configuring the Various Settings (UTILITY)
118
Importing a Project (IMPORT PROJECT)
You can import a project into this unit that was created on a different SP-404MK2 and exported to an SD card.
1.
Follow the steps in “
Exporting a Project (EXPORT PROJECT)
(P.119)” to export the project(s) to an SD card.
2.
Insert the SD card on which the projects are saved into the SD card slot of this unit.
3.
Hold down the [SHIFT] button and press the pad [13].
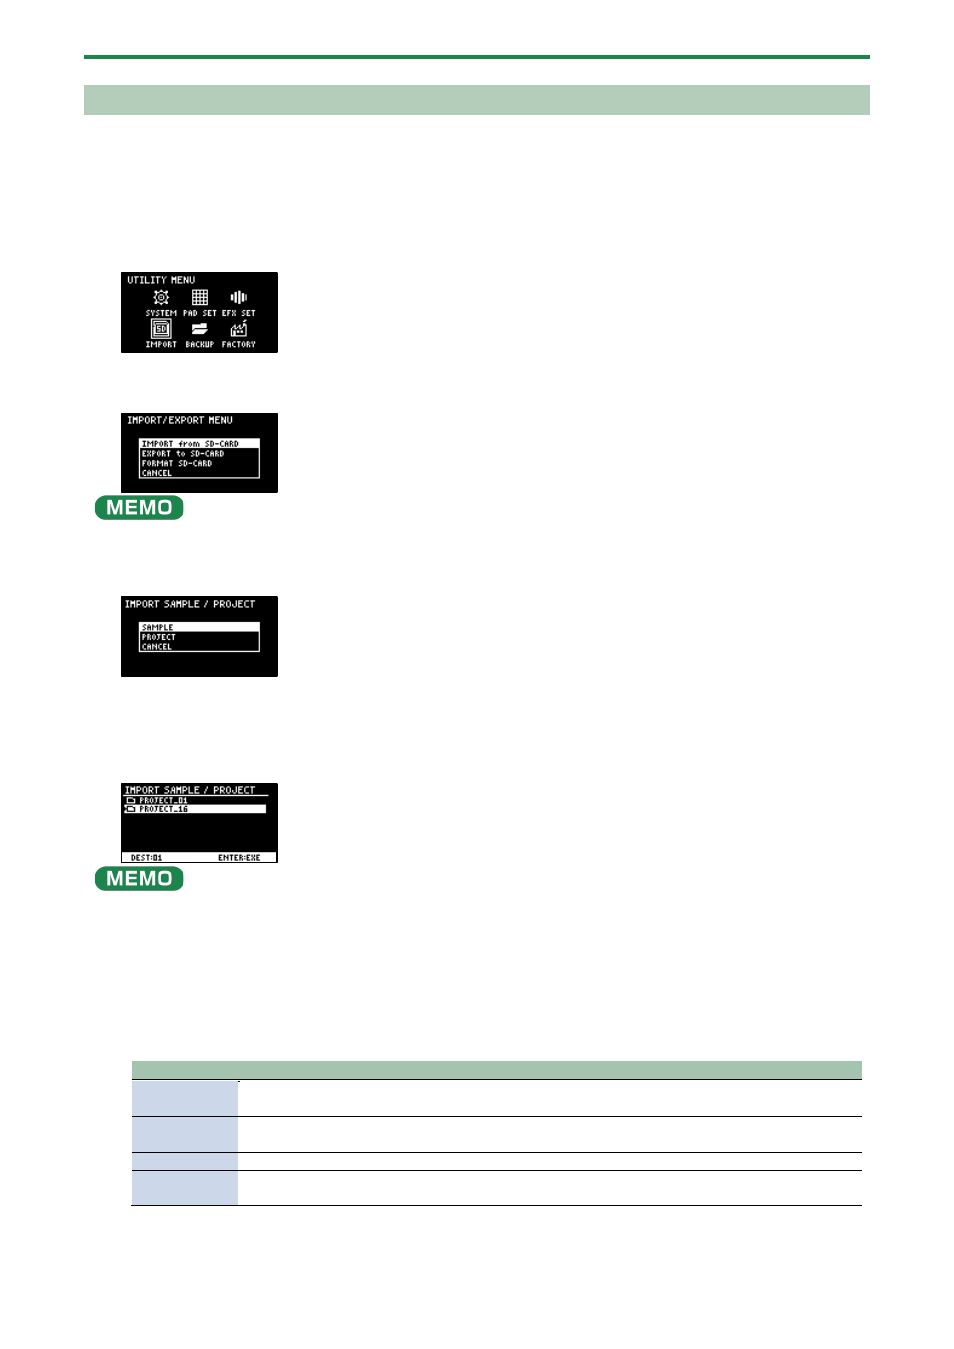
The UTILITY MENU screen appears.
4.
Turn the [VALUE] knob to select “IMPORT”.
The IMPORT/EXPORT MENU screen appears.
From the top screen, you can also make this screen appear by pressing pad [14] while holding down the [SHIFT] button.
5.
Use the [VALUE] knob to select “IMPORT from SD-CARD”, and press the [VALUE] knob.
The IMPORT SAMPLE / PROJECT screen appears.
6.
Use the [VALUE] knob to select “PROJECT”, and press the [VALUE] knob.
7.
Press the [ROLL] button.
The contents of the “EXPORT” folder are shown. The contents of the project folder (PROJECT_**) that was exported to the SD
card are shown.
●
The contents of the “IMPORT” folder are shown first on the screen where you select the project to import. Each time you
press the [ROLL] button, the view switches between the “IMPORT” and “EXPORT” folders.
●
From your computer, you can select the project to export from the “IMPORT” folder list screen.
1.
Open the SD card on your computer.
2.
Move the exported project folder (PROJECT_**) from the “EXPORT” folder to the “IMPORT” folder
Importing/Exporting (Using the SD Card)
(P.114)).
8.
Press pads [1]–[16] to select the project number to import.
Normally, you should select a pad that’s blinking yellow (an empty pad).
Pad status
Explanation
Unlit (dark
orange)
Project number that already contains a project
Blinking
yellow
Project number for which a project hasn’t been created (empty project)
Blinking red
Project number to which the imported project is saved
Lit red
Project number to which the imported project is saved (if a project already exists at that project
number, it is overwritten with the newly imported project)
9.
Turn the [VALUE] knob to select the project to import, and press the [VALUE] knob.
The project is now imported.